Key takeaways
- Bocking 14 sets no viable seed, so comfrey seed is never Bocking 14
- Root cuttings taken in autumn or early spring are the easiest way to make lots of plants
- Cut the top of each root section flat and the bottom slanted, so you plant it the right way up
- Plant cuttings about 5cm deep and 60-90cm apart
- Division gives a few big plants fast from an established clump
- Leave first-year plants uncut, and plant where comfrey can stay for good
Bocking 14 is the comfrey to grow if you want leaves for liquid feed and mulch without seedlings popping up everywhere. It sets no viable seed, so you can’t grow it from a packet. Instead, every new plant starts as a piece of root or a chunk of an existing clump. The good news is that it’s one of the easiest plants there is to propagate.
This guide covers taking root cuttings, dividing clumps and getting new plants off to a good start. For choosing a spot, cutting the leaves and all the ways to use them, see the main guide to growing and using comfrey.
Why Bocking 14 is different from other comfreys
Bocking 14 is a named variety of Russian comfrey (Symphytum x uplandicum). It was picked out in the 1950s by Lawrence D. Hills, founder of the organic charity now called Garden Organic, after trialling different comfreys at Bocking in Essex. It was chosen for its leafy growth.
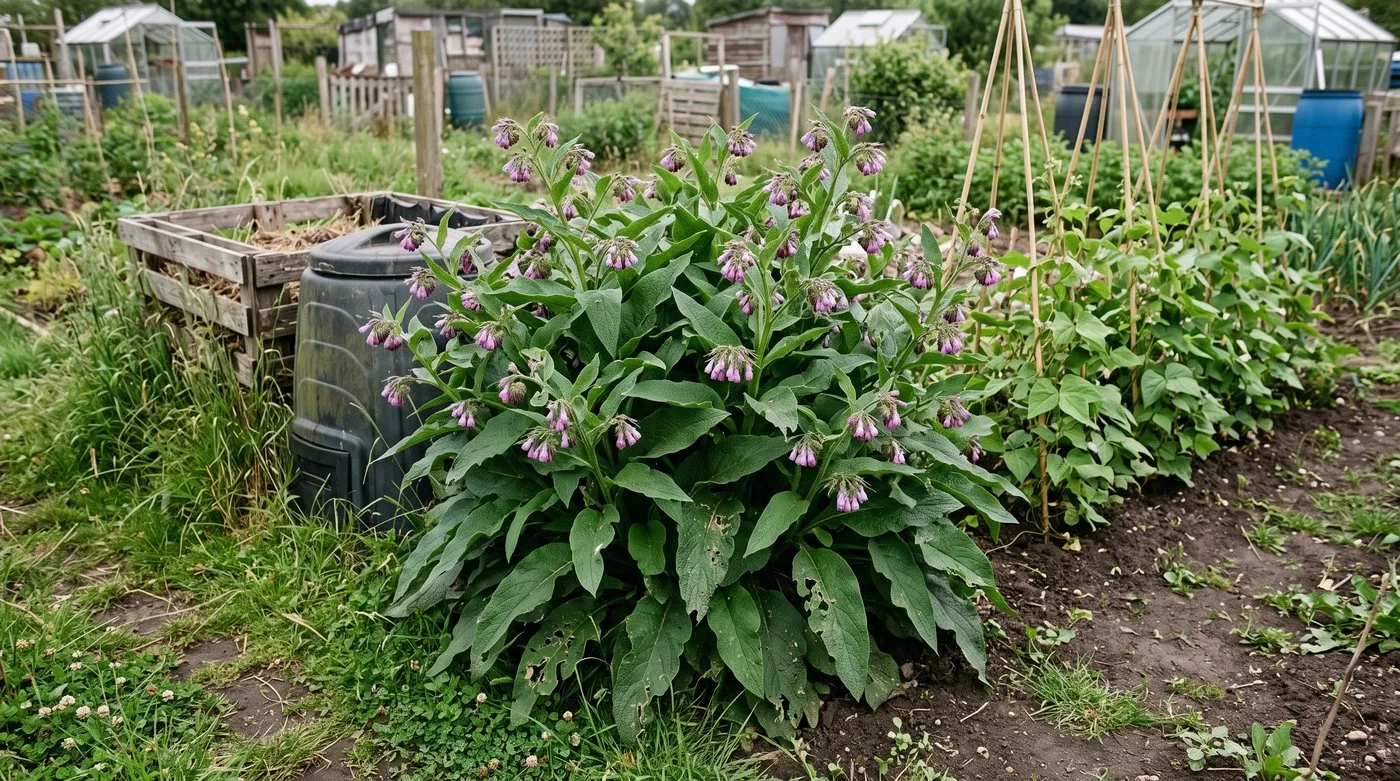
A Bocking 14 clump in flower. It sets no viable seed, so it stays put at the end of the veg bed.
The key difference for gardeners is seed. Common comfrey (Symphytum officinale) self-seeds freely and can spread through paths, hedges and neighbouring beds. Bocking 14 doesn’t set viable seed, so it stays where you plant it. That makes it the best choice near veg beds.
It does have one stubborn habit. Its roots go deep, and any small piece left in the soil can grow into a new plant. That’s what makes it so easy to propagate, and so hard to get rid of. Plant it where it can stay for good.
Warning: Comfrey isn’t for eating, by people or animals. Its bristly leaves can also irritate skin, so wear gloves and long sleeves when handling it.
How to get genuine Bocking 14
Don’t buy comfrey seed if you want Bocking 14. Any seed sold as “comfrey” will be a seeding type, usually common comfrey. Plants sold only as “Russian comfrey” without the Bocking 14 name may be seeding types too.
Good places to find the real thing:
- Nurseries and mail-order suppliers that sell named Bocking 14 root cuttings or young plants.
- Allotment sites. Many have a long-established Bocking 14 patch, and plot holders are often happy to share cuttings.
- Garden clubs and plant swaps, where you can ask the grower where their plant came from.
Once you have one plant, you can make as many more as you like.
Root cuttings or division: which method to use
There are two main ways to propagate Bocking 14, and both are easy.
| Method | When | What you get | Best for |
|---|---|---|---|
| Root cuttings | Autumn or early spring | Lots of small new plants | Making a whole row from one plant |
| Division | Late winter or early spring | A few large plants | Quick results or refreshing an old clump |
How to take Bocking 14 root cuttings
Root cuttings are the easiest way to turn one plant into many.
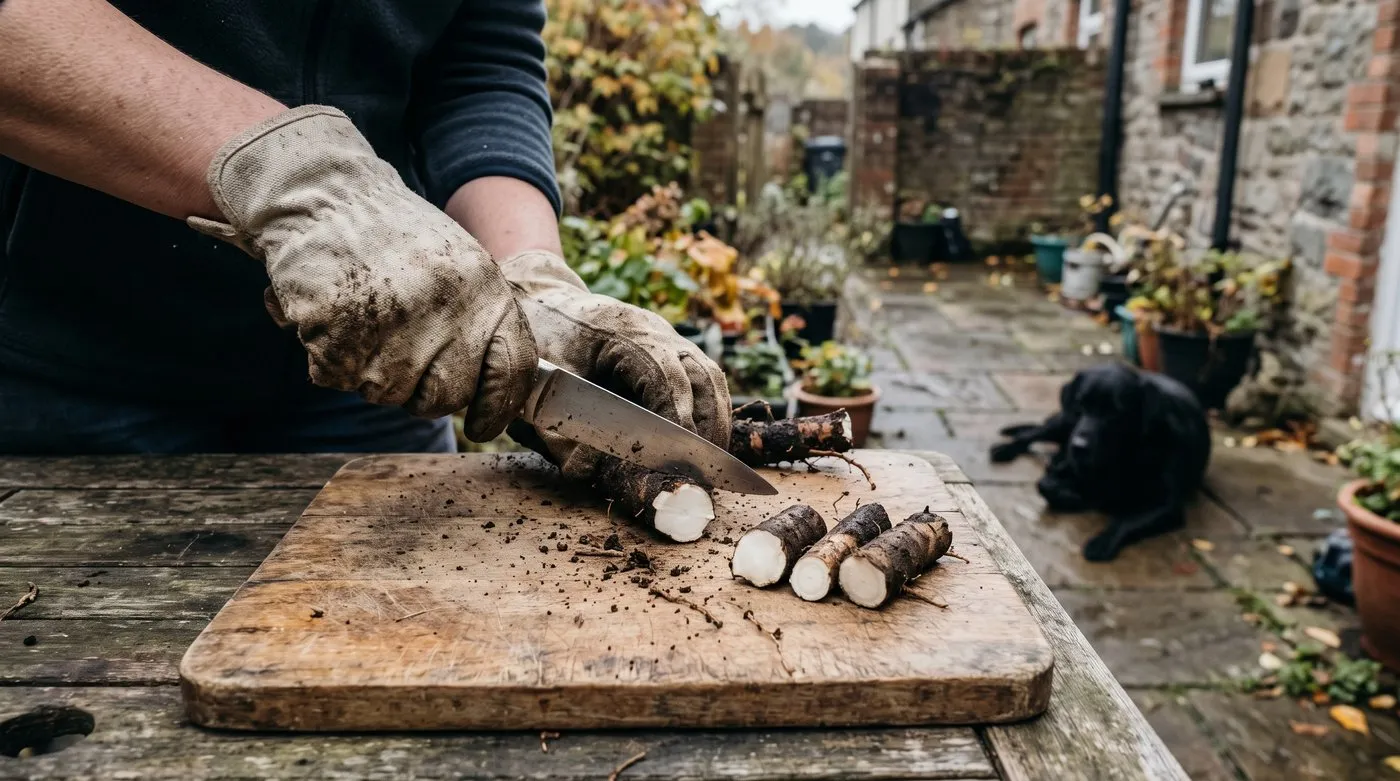
Cut finger-thick roots into 5-10cm pieces. A flat cut at the top and a slanted cut at the bottom shows which way is up.
When to take them
The best time is autumn, once the leaves have died back. The cuttings sit quietly through winter and shoot in spring. Early spring, before the parent starts growing, also works well. Avoid summer, when the plant is in full leaf.
Lifting the roots
You don’t need to dig up the whole plant. Push a spade down beside the clump, lever up a section of roots from one side and leave the crown where it is. If you’re moving the plant anyway, lift it, take what you need and replant it. Any root pieces left behind will regrow, so either way you won’t lose it.
Rinse the roots in a bucket so you can see what you’re doing. Comfrey roots are dark brown to black on the outside and white inside.

You only need a few roots from the edge of an established plant. Any pieces left in the ground will regrow, so the parent won’t miss them.
Cutting the sections
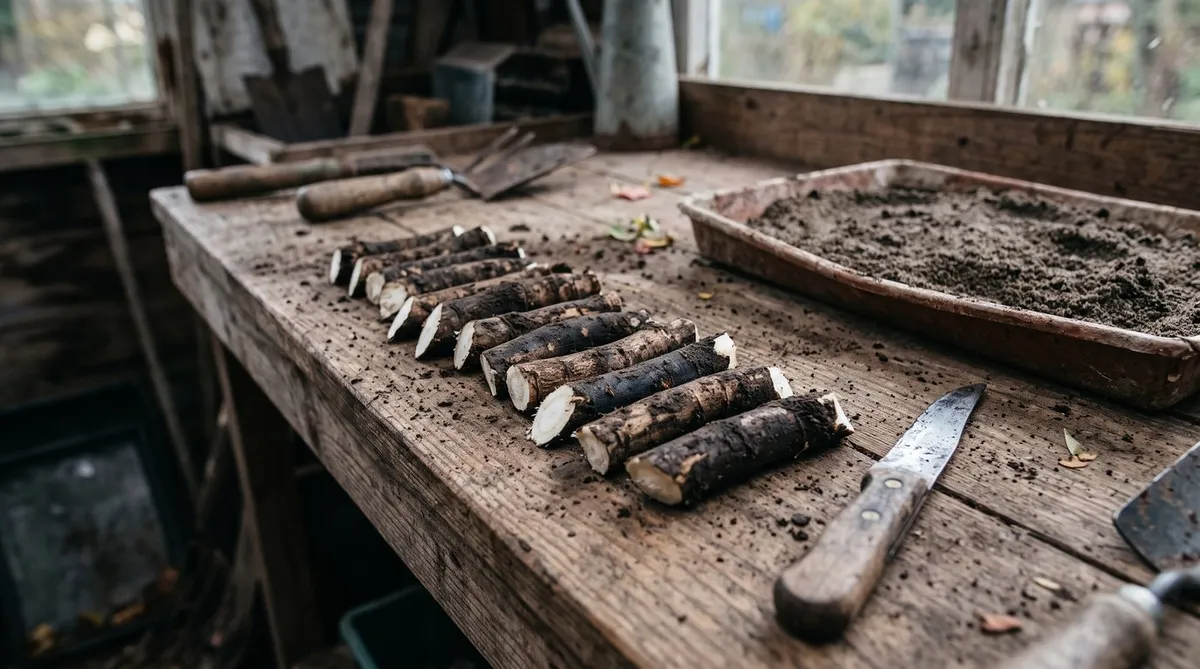
Choose roots about the thickness of your finger or thumb. Cut them into sections 5-10cm long with a clean, sharp knife or secateurs.
- Top end (nearest the crown): make a flat cut.
- Bottom end (furthest from the crown): make a slanted cut.
This old trick tells you which way is up when you plant, even if you’ve mixed the pieces up. Cuttings planted the right way up shoot faster and more reliably.
If you can’t plant straight away, store the cuttings for a few weeks in a tray of barely damp sand somewhere cool and frost-free.
Planting the cuttings
Comfrey is happy in most soils, in sun or part shade, but avoid waterlogged ground. On heavy clay, the guide to no-dig on heavy clay shows how to build up the soil first.
- Make a hole with a dibber or trowel.
- Plant each cutting flat end up, with the top about 5cm below the surface. On light, sandy soil, go a little deeper.
- Space them 60-90cm apart, as each one becomes a big clump.
- Firm the soil, water in and mulch lightly with compost.
- Label each one so you don’t hoe through it before it shoots.

Plant each cutting flat end up, about 5cm deep, and label it. A label saves you hoeing through it before the shoots appear.
What happens next
Autumn cuttings stay dormant through winter and push up shoots in spring. Spring cuttings usually shoot within a few weeks. Keep them watered in dry spells during their first summer.
Don’t cut the leaves in the first year. The young plant needs them to build its roots. From the second year you can cut it several times each summer for liquid feed and mulch.

New shoots have the rough, hairy leaves of comfrey. Leave them uncut for the first year so the roots can build up.
How to divide a Bocking 14 clump
Division splits an established clump into a few large pieces that grow away quickly. It’s ideal if you only need two or three plants, or if an old clump needs refreshing.
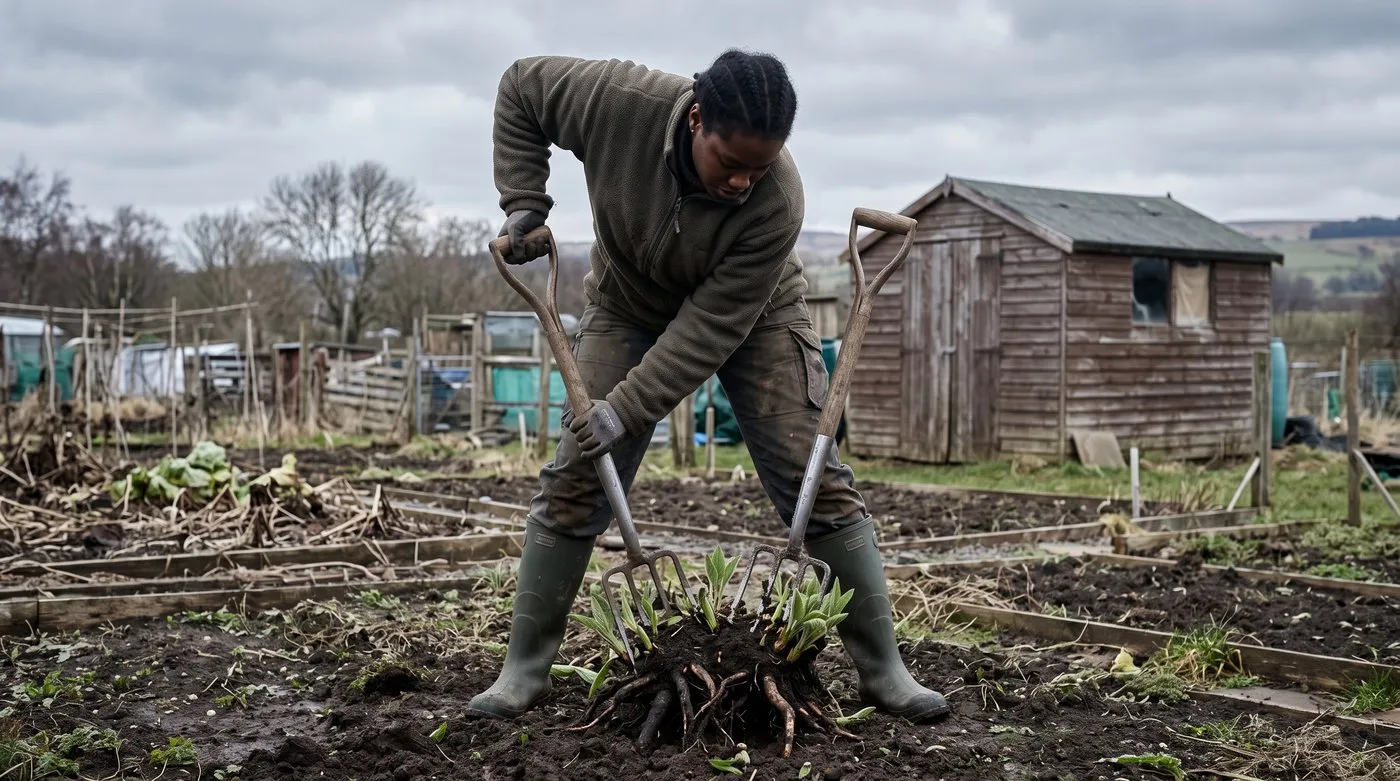
Two forks pushed in back to back make light work of splitting a big clump. Each piece needs a shoot and some root.
- Divide in late winter or early spring, just before new growth starts. Pick a dull, cool day so the roots don’t dry out.
- Lift the clump with a spade or fork.
- Push two forks back to back through the middle and lever them apart, or slice through with a sharp spade.
- Make sure each piece has a growing point (a bud or shoot) and a good chunk of root.
- Replant straight away, 60-90cm apart, and water in.
Divisions are bigger than root cuttings, so they establish quickly. Still go gently with cutting in their first season. The guide to plant propagation by cuttings, division and layering covers division for other perennials too.
Bocking 14 propagation calendar
| Month | What to do |
|---|---|
| January to February | Plan new rows. Divide old clumps in mild spells at the end of winter |
| March to April | Take root cuttings or divide before growth starts. Plant out stored cuttings |
| May to June | Water new plants in dry spells. Don’t cut first-year plants |
| July to August | Keep young plants watered. Cut established plants for feed and mulch |
| September | Final cut of established plants |
| October to November | Main time for root cuttings once leaves die back. Plant and mulch |
| December | Dormant. Store spare cuttings in damp sand if needed |
Keeping your Bocking 14 patch true
Bocking 14 doesn’t set viable seed, but other comfreys nearby can seed into your patch. Over time a seedling could end up mixed in with your plants.
- Keep common comfrey and unnamed Russian comfrey off the same plot if you can.
- Pull any comfrey seedling that appears near your Bocking 14 row.
- Only take cuttings from plants you know are Bocking 14.
- Use a long-lasting label so the next person knows what the row is.
Common Bocking 14 propagation mistakes
- Buying comfrey seed. You’ll get a seeding comfrey that can spread across the garden. Buy named Bocking 14 root cuttings or plants.
- Planting cuttings upside down. Use the flat-top, slanted-bottom trick when you cut.
- Planting too shallow. Cuttings near the surface dry out. About 5cm deep is right.
- Planting too close. Each plant grows into a big clump. Space them 60-90cm apart.
- Cutting leaves in year one. Let the plant build its roots first.
- Planting in the wrong place. Comfrey is hard to remove. Choose a spot where it can stay for good, such as the edge of an allotment or a corner near the compost heap.
What to do with your new comfrey plants
From the second year, cut the leaves several times each summer. The most popular use is liquid feed for tomatoes and other fruiting crops. The step-by-step comfrey liquid feed recipe covers brewing and dilution.
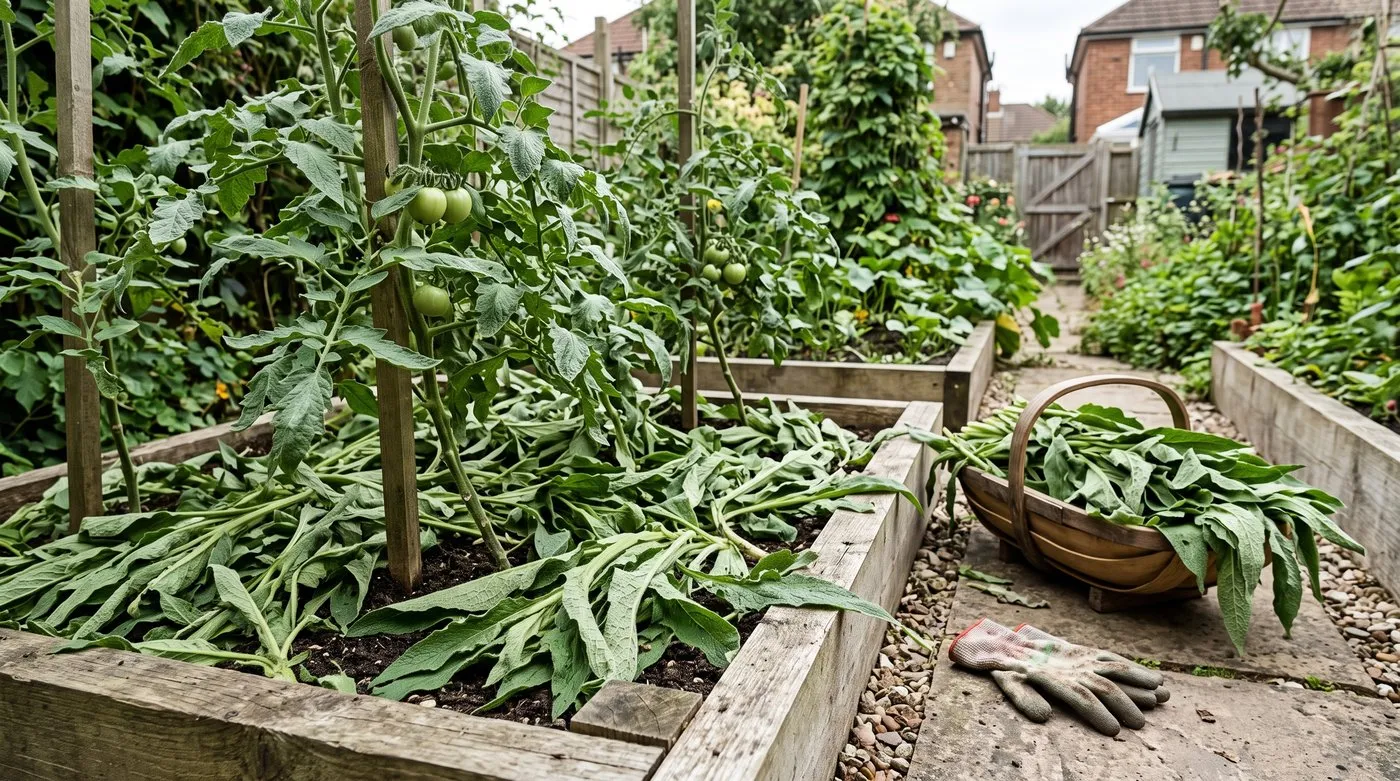
From the second year, cut leaves can go straight round hungry crops like tomatoes as a mulch that rots down quickly.
Comfrey leaves also make a good mulch around fruit bushes and hungry crops, and they speed up a slow compost heap. A few leaves added in layers is plenty.
Frequently asked questions
Can I grow Bocking 14 from seed?
No, Bocking 14 sets no viable seed, so there is no Bocking 14 seed. Seed sold simply as comfrey is usually common comfrey, which self-seeds and can become a weed. For true Bocking 14, buy named root cuttings or plants, or take cuttings from a plant you know is Bocking 14.
When is the best time to take Bocking 14 root cuttings in the UK?
Autumn, once the leaves have died back, is the best time. Early spring, before new growth gets going, is a good second choice. Avoid summer, when the plant is in full leaf and cuttings are slower to settle.
How deep and how far apart should I plant root cuttings?
Plant root cuttings about 5cm deep, with the top end uppermost. Space them 60-90cm apart, as each one grows into a large clump. Water them in, keep the soil moist until shoots appear, and mark where they are.
Will Bocking 14 spread and take over my garden?
No, Bocking 14 won’t spread by seed, but it is very hard to remove. Any small piece of root left in the ground can grow into a new plant. Choose its spot carefully, as it’s effectively permanent.
Can I take cuttings from a neighbour’s Bocking 14 plant?
Yes, with your neighbour’s permission, and it’s a time-honoured way to share it. Take a few pieces of root from the edge of the clump. Every piece grows into a plant identical to the parent, so check it really is Bocking 14 first.
Once your plants are cropping, turn the leaves into free plant food with our guide to making comfrey and nettle feed, and find more growing guides on the growing hub.
Our team produces practical UK gardening guidance from source research, contributor records and established horticultural practice. Editorial standards are overseen by Matt W.


