
Key takeaways
- A well-compacted 100mm hardcore base is what makes a patio last
- Slope it away from the house by about 17mm per metre so rain runs off
- Keep the patio at least 150mm below your damp-proof course
- Bed slabs on a full layer of mortar, not on sand alone
- Back gardens rarely need planning permission, but large solid front-garden paving can
- Wait 48 hours after jointing before walking on it
To lay a patio, you dig out the area, build a firm compacted base, give it a slope so rain runs away from the house, and bed every slab on mortar. Taking care with the groundwork matters far more than laying quickly.
This guide takes you through marking out, digging, the base, mortar, laying, cutting and filling the joints. If you’re paving a front garden in England, the Planning Portal patio guidance explains when you might need permission. For softer surfaces, have a look at our garden path ideas.
Planning your patio: size, position and shape
Before you buy a single slab, spend a little time planning. It makes every later step easier.
Position comes first. Most patios sit right outside the back door. South and west-facing spots get the most afternoon and evening sun. A north-facing patio can work if it’s big enough to catch the sun as it moves round. Think about where you might want garden lighting later, too.
 A compacted hardcore base, ready for the mortar. This is the bit that decides how long your patio lasts.
Size depends on how you’ll use it. A table and four chairs needs at least 3m by 3m. Add a barbecue and you’ll want more like 4m by 5m.
Shape affects cost and effort. Rectangles are easiest and waste the least. Curves and odd shapes mean more cutting, more time and extra slabs.
Choosing your patio materials
Your choice affects the cost, the look and how much looking after it needs.
Patio materials compared
| Material | Cost | Upkeep | Grip when wet | Best for |
|---|---|---|---|---|
| Concrete slabs | Low | Low | Good if textured | Budget patios |
| Sandstone | Medium | A yearly clean | Good | Traditional and cottage gardens |
| Limestone | Medium | Can stain | Fair | Smart, formal gardens |
| Porcelain | Medium to high | Very low | Can be slippery, choose a grippy finish | Modern, low-fuss gardens |
| Block paving | Low to medium | Low | Good | Curves, paths and driveways |
Sandstone is the UK favourite. Indian sandstone comes in warm buffs, golds, greys and browns. Its rough surface gives good grip in the wet. Give it a clean once a year to keep algae at bay.
Porcelain is hugely popular. It hardly soaks up water, resists stains and barely needs cleaning. It can be slippery when wet, so pick an outdoor-rated, textured finish. It needs a special priming slurry brushed on the back of each slab so it sticks to the mortar, and a wet saw to cut it.
Concrete slabs are the budget choice. Modern ones look surprisingly like real stone, though they don’t age as nicely.
Block paving uses small interlocking blocks, so it’s great for curves. You can lift and replace single blocks if one gets damaged. It suits garden paths as well as patios.
Gardener’s tip: Order about 10% more slabs than you need. Cutting waste and breakages eat into your supply, and a few spares in the garage make repairs easy years later.
Tools and materials checklist
Get everything together before you start. Running out halfway is no fun.
Tools
 Tapping a slab down on a full mortar bed. Check it’s level before you move on.
| Tool | What it’s for | Own or hire |
|---|---|---|
| Tape measure | Measuring and marking out | Own |
| String line and pegs | Setting heights and the slope | Own |
| Long spirit level | Checking levels | Own |
| Spade and shovel | Digging | Own |
| Wheelbarrow | Moving hardcore and mortar | Own |
| Plate compactor (whacker plate) | Compacting the base | Hire |
| Rubber mallet | Tapping slabs into place | Own |
| Angle grinder with diamond blade | Cutting slabs | Own or hire |
| Wet saw | Cutting porcelain | Hire |
| Pointing trowel | Filling joints | Own |
| Bucket and mixing board | Mixing mortar | Own |
| Knee pads | Saving your knees | Own |
Materials
- Paving slabs, plus about 10% extra
- MOT Type 1 hardcore for the base
- Sharp sand and cement for the mortar
- Jointing mortar or compound
- Weed membrane (optional)
Your builders’ merchant can work out quantities from your patio size.
Step-by-step: how to lay a patio
Work through these steps in order. Each one builds on the last.
Step 1: Mark out the patio area
Knock a wooden peg in at each corner and run string lines between them. Check the corners are square with the 3-4-5 trick: measure 3m along one string and 4m along the other, and the diagonal between those points should be exactly 5m.
Check the height against the house’s damp-proof course (DPC). The finished patio must sit at least 150mm below it. Any higher and rain can splash up and cause damp inside.
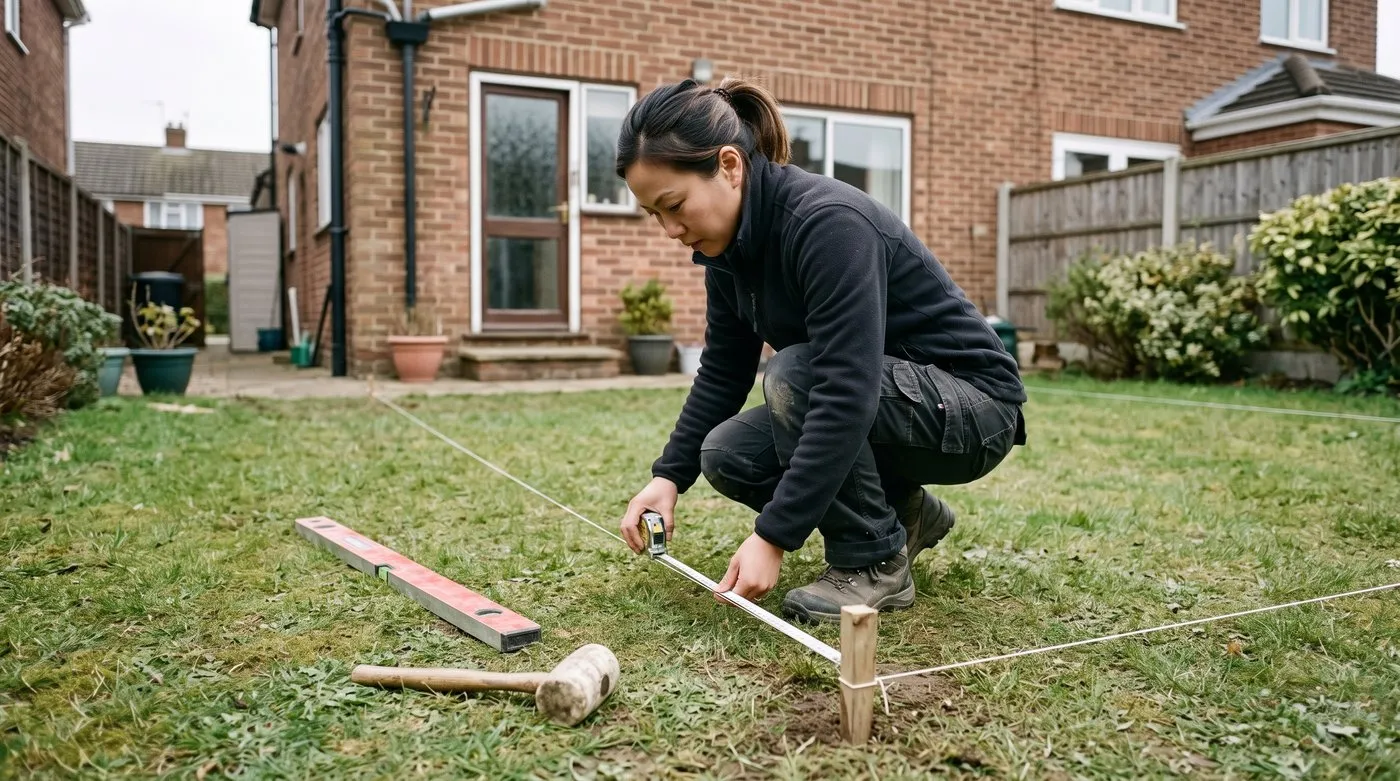
Check the corners are square with the 3-4-5 trick. While you’re there, check the patio will sit at least 150mm below the damp-proof course.
Step 2: Excavate the area
Dig out the area to the right depth. For most patios that’s about 150-160mm: 100mm of base, around 30mm of mortar, plus the thickness of your slab.
Allow for the slope too. The patio needs to fall away from the house by about 17mm for every metre. So on a 3m-deep patio, the far edge sits about 50mm lower than the house edge.
Take out all topsoil, roots and anything soft. Topsoil squashes down over time and makes slabs sink. Dig down to firm ground. On soft clay, go a bit deeper and add more hardcore.
Step 3: Compact the sub-base
Spread MOT Type 1 hardcore over the area to about 100mm deep. It’s a mix of crushed stone and dust that locks together when compacted.
Compact it in two layers. Spread half, run the plate compactor over it, then add the rest and compact again. When you’re done, it should feel rock solid with no movement underfoot.
Now set your string lines at the finished slab height, including the slope. They’re your guide for the rest of the job.
Step 4: Prepare the mortar bed
Mix sharp sand and cement into a firm, workable mortar, using the ratio on the cement bag or your slab supplier’s advice. Squeeze a handful: it should hold its shape without crumbling or dripping.
Spread a full bed of mortar about 30-40mm thick, only as much as you can lay on in half an hour. A full bed supports the whole slab, so there are no hollow spots where it can crack. Laying slabs on a few blobs of mortar leaves hollows underneath, so stick with the full bed.
Step 5: Lay the slabs
Start in the corner nearest the house and work outwards, so you’re never kneeling on fresh slabs.
Set the first slab on the mortar and tap it down with a rubber mallet until it meets your string line. Check with the spirit level that it follows the slope one way and is level the other.
Keep the gaps even. Natural stone usually has 10-15mm joints. Porcelain and sawn stone look smart with narrower 3-5mm joints.
Work in rows, checking each slab against its neighbours and the strings. Every few slabs, lay the level across several to check the slope. Little errors add up fast.
Gardener’s tip: If a slab sits too low, lift it, add more mortar and try again. If it’s too high, tap it down or scrape some mortar off. Never stand on a slab to push it down, as that leaves gaps underneath.
Step 6: Cut edge and corner slabs
Mark your cut with a pencil and straight edge. Cut with an angle grinder fitted with a diamond blade. For porcelain, a wet saw gives the cleanest cut, as it can shatter otherwise.
Always wear safety glasses, ear defenders and a dust mask when cutting. Stone dust is harmful to breathe, so cut outdoors.
Step 7: Joint the patio
Wait at least 24 hours after laying, so the slabs don’t shift while you work.
Natural stone (sandstone, limestone): Use a semi-dry mortar, just damp enough to hold its shape. Press it firmly into the joints with a pointing trowel, finishing just below the slab surface. Brush off any spills and wipe smears with a damp sponge before they set.
Porcelain and sawn stone: Use a ready-made resin jointing compound. Follow the instructions on the tub exactly.
Block paving: Brush kiln-dried sand into the joints and run the plate compactor over it. Top up and repeat until the joints are full.
Step 8: Seal and protect (optional)
Sealing is optional, but it helps natural stone resist stains. An impregnating sealer soaks in without changing the look.
Seal on a dry day once the patio has fully cured, about 4 weeks after laying. Avoid rain, frost and hot sun. Porcelain doesn’t need sealing.
Stay off the patio for 48 hours after jointing, and wait a week before putting heavy furniture on it.
Drainage: getting the fall right
After a weak base, poor drainage is the next most common reason patios go wrong. Puddles stain slabs, grow algae and can freeze and lift paving in winter.
The 1 in 60 rule
 Pressing semi-dry mortar into the joints. A firm, just-damp mix holds its shape and sets stronger than a wet one.
Slope your patio away from the house by about 1 in 60. That’s roughly 17mm for every metre. So a 3m-deep patio drops about 50mm from the house to the far edge.
Set the slope with your string lines before you lay anything. Measure down from the string at several points to check it’s even.
Where does the water go?
Rain running off the patio needs somewhere to go:
- Onto a lawn or border: The easiest option. The soil soaks it up.
- Into a channel drain: If the patio ends at a wall, fence or path, fit a channel drain along that edge and connect it to the surface water drain.
- Into a soakaway: For big patios or heavy clay, a soakaway pit lets water soak slowly into the ground. Keep it well away from the house.
Never send water towards the house, next door or onto the road.
Budget guide: what does a patio cost?
The slabs are usually the biggest cost, so your choice of material makes the most difference. Concrete is cheapest, sandstone and limestone sit in the middle, and porcelain is often the priciest.
On top of slabs, budget for:
- Hardcore, sand and cement
- Hiring a plate compactor and a saw
- A skip to get rid of the soil you dig out
- Labour, if you’re paying someone
Doing it yourself saves the labour cost, which can be a big part of the total. If you use a pro, get three quotes and check their reviews.
Legal requirements: permitted development
Most back-garden patios in England don’t need planning permission. The government’s permitted development guidance has the details.
Front gardens are the main thing to watch. You don’t need permission if:
 A finished sandstone patio. The gentle slope sends the rain off onto the lawn.
- The paving lets water through, such as gravel, permeable block paving or resin-bound surfaces
- Or rain from it runs onto a lawn, border or soakaway on your property
You may need permission if:
- You cover more than 5 square metres of front garden with solid paving that drains towards the road
- You live in a listed building, or in a conservation area or other protected area
- The patio raises the ground level a lot
Whatever the rules say, always keep the patio at least 150mm below your damp-proof course.
Gardener’s tip: Not sure? Ring your council’s planning team before you start. Many offer free informal advice.
5 common mistakes when laying a patio
All of these are easy to avoid with a little preparation.
1. Skipping the base. Slabs laid straight onto soil or sand sink and rock, often within the first year. There’s no shortcut here.
2. Forgetting the slope. A flat patio holds puddles every time it rains, and they can freeze and lift slabs in winter. Setting the slope with string lines only takes a few minutes.
3. Building too close to the damp-proof course. A patio at or above the DPC sends rain into the house walls, causing damp. Check the height before you dig.
4. Getting the mortar wrong. Too much cement makes a brittle bed that cracks. Too little and it crumbles. Follow the mix on the bag or your supplier’s advice.
5. Rushing the joints. Jointing before the bed has firmed up can shift slabs and crack the joints. Wait 24 hours before jointing and 48 hours before walking on it.
Patio aftercare and maintenance
A well-laid patio needs very little looking after. A yearly clean and check stops small problems turning into big ones.
Clean once a year. Scrub or pressure wash in spring to remove algae and moss that make it slippery. For natural stone, use a cleaner made for stone. Our guide on how to clean a patio covers every surface.
Check the joints. Look them over each autumn and refill any that have crumbled. Weeds popping up mean there’s a gap, so pull them and refill the joint.
Replace a cracked slab. Chip out the old mortar, lift the slab, lay a fresh bed and pop in one of your spares.
Keep weeds down. A weed membrane under the base helps, and resin joints resist weeds better than cement mortar.
If your patio meets a lawn, our guide to laying turf shows you how to get a neat edge between paving and grass.
Patio design inspiration
Good groundwork gives you a solid patio. A few design touches make it a place you’ll love sitting out.
Mix materials. Try sandstone with a brick border, or a frame of darker slabs around a lighter middle. A low brick wall along one side makes a cosy seating area. Our guide on how to build a garden wall shows how, and our landscaping with concrete ideas guide has ideas for steps, planters and edging.
Leave planting pockets. Leave out the odd slab and fill the gap with soil. Low herbs like thyme and chamomile soften the edges and smell lovely when you brush past. Our patio garden ideas guide has more.
Play with levels. A step down to a seating area and up to a dining spot creates separate zones, which works well in small gardens. Steps also help on a slope.
Plan the lighting early. Lights set into the paving, low bollards or festoon lights let you enjoy the patio into the evening. Run any cables before you lay the slabs, as adding them later means lifting paving.
Now you’ve mastered laying a patio, read our guide on garden path ideas for the next step in linking it to the rest of the garden.
If you’re still weighing up surfaces, see our guides to alternatives to paving slabs and outdoor garden tiles and porcelain paving.
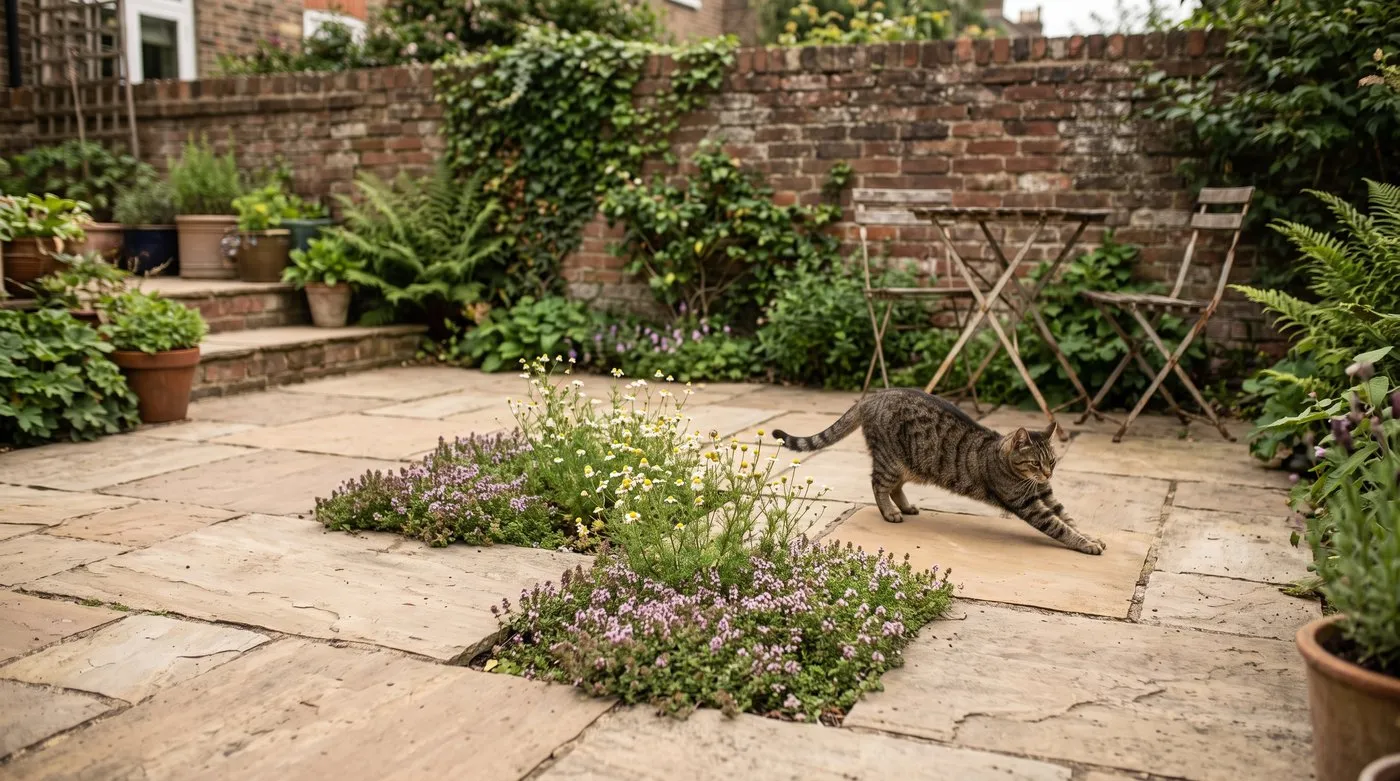
Leaving out the odd slab for low herbs softens the edges. Thyme and chamomile smell lovely when you brush past.
Frequently asked questions
Do I need planning permission to lay a patio in the UK?
Usually not, especially in a back garden. In a front garden in England, covering more than 5 square metres with solid paving that drains towards the road needs permission. Using permeable paving, or letting rain run onto a lawn or border, avoids that. Check the Planning Portal or your council if you’re unsure, especially in a conservation area.
How deep should a patio sub-base be?
About 100mm of compacted MOT Type 1 hardcore. On soft clay or badly drained ground, go deeper, to around 150mm. Compact it in two layers with a plate compactor. A firm base stops the patio sinking or rocking.
What is the correct fall for patio drainage?
About 1 in 60, which is roughly 17mm per metre. Slope it away from the house towards a lawn, border or drain. Set the slope on your string lines before you lay any slabs.
How long does it take to lay a patio?
A medium-sized patio usually takes a few days of DIY. Day one is digging and the base. Then comes laying the slabs, cutting the edges and filling the joints. Stay off it for 48 hours after jointing.
Can I lay patio slabs on sand instead of mortar?
No, slabs on sand alone tend to rock and sink. Sand beds only suit block paving, which locks together inside firm edges. For slabs, use a full mortar bed on a well-compacted base.
Our team produces practical UK gardening guidance from source research, contributor records and established horticultural practice. Editorial standards are overseen by Matt W.


