Key takeaways
- Low garden walls usually need no planning permission, but check if you're next to a road or in a listed property
- Dig the footing down to firm subsoil, about 300mm wide for a half-brick wall
- Use about 1 part cement to 4-5 parts building sand, with 10mm joints
- Each course of standard UK bricks rises 75mm, so mark a gauge rod
- Add piers at the ends and every 3m or so on a half-brick wall
- Finish with a coping and never lay bricks below 3°C
A low freestanding brick wall is one of the most satisfying DIY jobs in the garden. Get the footing right, keep every course level and finish with a coping, and it will last for decades. Take your time: bricklaying rewards patience far more than speed.
This guide covers a freestanding wall up to about waist height, from planning checks to the last coping stone. If your wall needs to hold back soil on a slope, that’s a retaining wall, which is a different job. See our guide to garden steps and retaining walls instead.
Do you need planning permission for a garden wall?
Usually not for a low garden wall. Under permitted development rules, walls up to 1m high next to a road (including its pavement) and up to 2m elsewhere don’t normally need planning permission. Measure from ground level.
There are exceptions:
- Listed buildings need consent for new walls
- Conservation areas may have extra rules, especially for front boundaries
- Some new estates have permitted development rights removed, so check your deeds
The Planning Portal explains the rules, and your council can confirm. If the wall sits on or right next to a boundary, talk to your neighbour first. Our guide to garden neighbour disputes covers the basics.
How to dig and pour the footing
The footing is the concrete strip the wall sits on. It’s the part people skimp on, and the main reason DIY walls crack.
- Mark out the trench. Make it about 300mm wide for a half-brick wall (one brick thick, 102.5mm) and about 450mm wide for a one-brick wall (215mm thick)
- Dig to firm subsoil. Keep going until you’re below loose topsoil and into firm, undisturbed ground. For a low wall that’s often 400-500mm deep
- Set level pegs along the trench so you can pour to an even height
- Pour the concrete at least 150mm deep, tamp it down and level it to the pegs
- Keep the top below ground by about 150mm, so the first couple of courses sit underground
Let the concrete harden for at least a couple of days before you start laying. Cover it with damp hessian or polythene in hot or frosty weather. Below ground, use bricks rated for that job, such as engineering bricks, as ordinary facing bricks can crumble in wet, frozen soil.

Level pegs in the trench help you pour the concrete to an even depth. A flat footing makes every course after it easier.
Setting out with profile boards and a string line
Profile boards keep your wall straight. Knock two pegs into the ground about 600mm beyond each end of the trench and fix a level crossbar between them. Stretch a string line between the boards to mark the face of the wall.
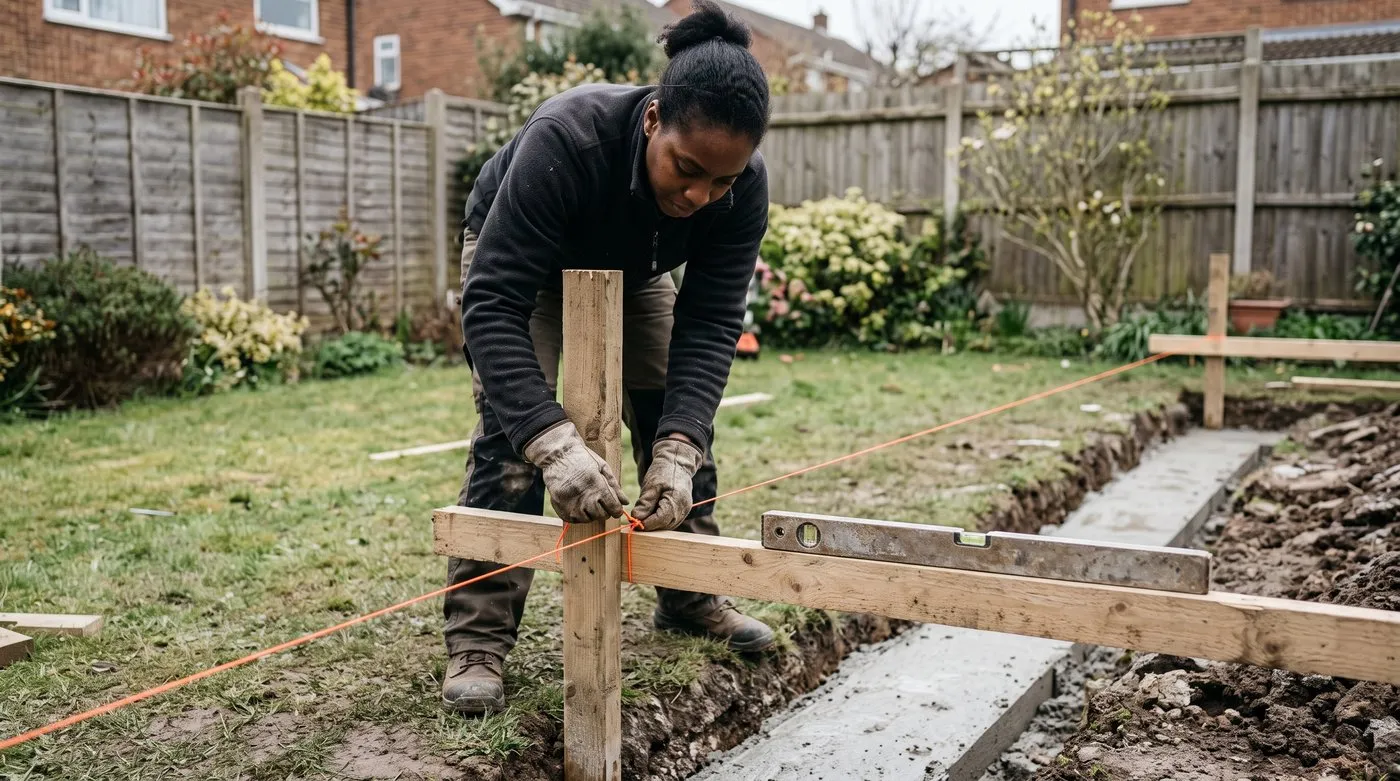
Profile boards sit clear of the trench, so your string line goes back to exactly the same spot every time.
Because the boards sit clear of the trench, the line survives all the digging and concreting. Mark the line position on each board with a small saw cut so it always goes back to the same spot. The same careful setting out pays off when laying a patio.
What mortar mix does a garden wall need?
Use about 1 part cement to 4-5 parts building sand, with a dash of plasticiser in the water as the bottle says. Plasticiser makes the mortar smooth and easier to spread.
Measure with a bucket, never a shovel. Shovelfuls vary a lot, and uneven batches dry to different colours. A good mix is like soft ice cream. It holds its shape on the trowel, spreads easily and slides off cleanly.
- Too wet and it slumps and smears the brick faces
- Too dry and the bricks won’t bed down, leaving weak, hollow joints
Mix small batches you can use within a couple of hours. Never add water to bring a stiff batch back to life, as it weakens the mortar. On hot, dry days, dip very thirsty bricks in water for a moment so they don’t suck the mortar dry.

A good mix holds its shape on the trowel like soft ice cream. If it slumps, it’s too wet.
How to lay bricks: 10mm joints and a 75mm gauge
Each course of standard UK bricks rises 75mm: a 65mm brick plus a 10mm mortar bed. Mark a straight batten every 75mm to make a gauge rod, and hold it against the wall as you go to check the courses stay even.
- Spread a mortar bed about 10mm thick along the footing, and run the trowel tip along it to make a shallow groove
- Butter the end of each brick with mortar and push it up to its neighbour to make a 10mm joint
- Tap it down to the string line with the trowel handle
- Build up both ends first, three or four courses high, stepping each course back by half a brick
- Run a line between the ends and fill in the middle to it, moving the line up a course at a time
- Check level and plumb every few bricks, not at the end of a course
For DIY, lay about six courses a day. Fresh mortar squashes under too much weight, and the wall can lean by morning. Let it firm up overnight before carrying on.

Lay each brick to the string line, not by eye. The line keeps the whole course straight and level.
Brick bonds and piers that keep the wall standing
Stretcher bond, with each brick overlapping the two below by half, is the usual pattern for a half-brick wall. One-brick walls use bonds such as English or Flemish bond, where some bricks run across the wall to tie both sides together.
A half-brick wall on its own isn’t very stable, so give it piers. These are thicker brick columns, at least one brick square, at each end and about every 3m along the wall. Bond them into the wall as you build, rather than adding them afterwards.
Keep half-brick walls low. For anything much taller than about 1m, build a one-brick wall. For a wall that’s taller than you, near a path where people walk or in a very exposed spot, get advice from a builder or structural engineer.

A pier stiffens a single-brick wall. The gauge rod beside it checks every course rises the same 75mm.
Adding a coping to finish the wall
A coping is the top layer that keeps rain out of the wall. Without one, the top bricks soak up water, and when it freezes, the faces can flake and crumble. This is called spalling, and it slowly works its way down the wall.
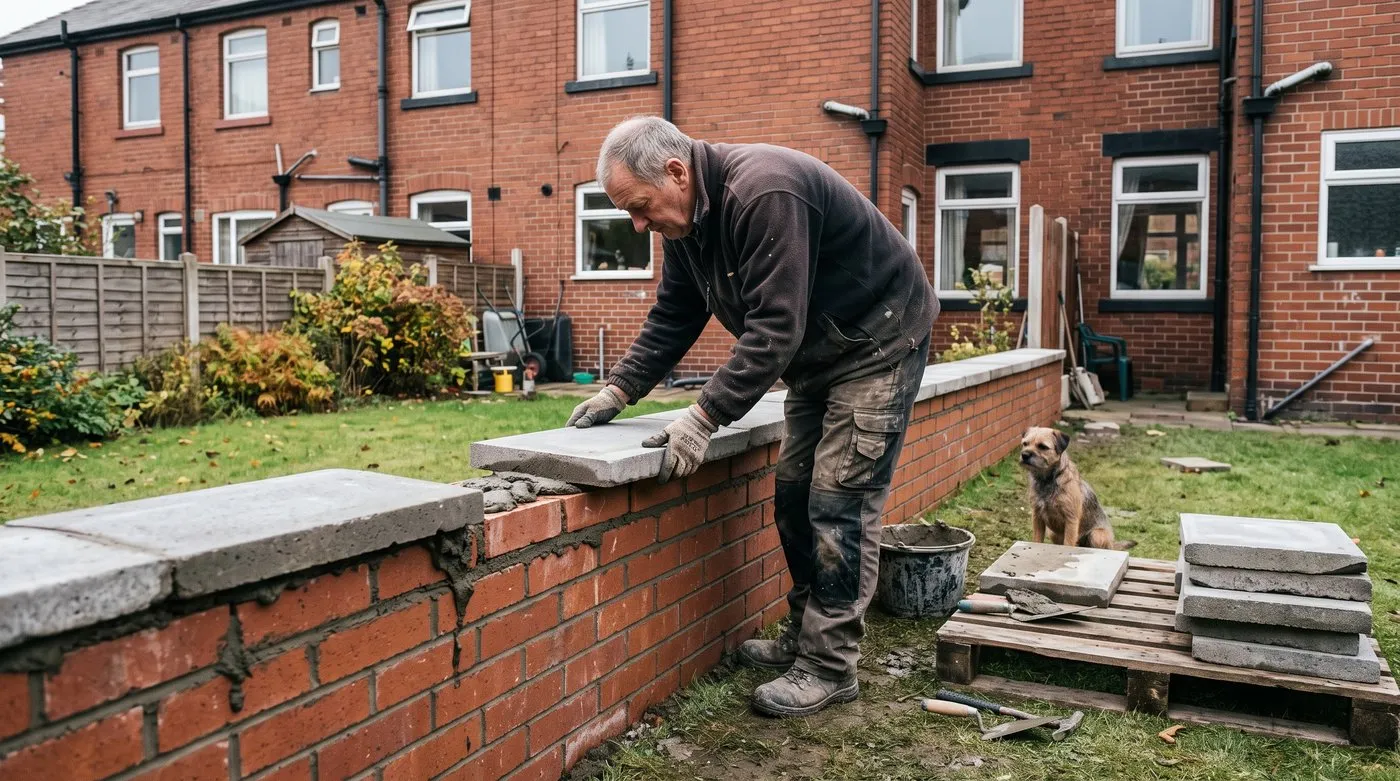
Copings that overhang both sides let rain drip clear, so the bricks below stay dry through the winter.
Three options work well:
- Bricks on edge, laid on their sides along the top for a traditional look
- Bricks on edge over creasing tiles, two layers of flat tiles that stick out slightly so drips fall clear
- Concrete or stone coping stones, which are quick to lay and overhang each side so water drips off
Fit the coping as soon as you reach full height. Then finish the joints with a jointing tool, shaping them so rain runs off rather than sitting in them. Once the wall has set, it makes a great home for climbers for fences and walls. Our walled garden ideas show how to plant against warm brick.
The best time of year to build a garden wall
Build between April and October. Mortar needs temperatures above 3°C to set properly, so winter is risky. Hot, dry spells bring the opposite problem, as mortar dries out too fast.
| Month | What to do |
|---|---|
| January to February | Plan, measure and order materials. Too cold to lay in most years |
| March | Dig footings late in the month once hard frosts have passed |
| April to May | Pour footings and start laying. Cover work if frost is forecast |
| June to August | Lay freely. Work in the cooler part of the day and keep fresh work damp in heat |
| September to October | Settled, mild weather. Watch overnight temperatures from October |
| November to December | Frost risk returns. Small repairs on mild days only |
Common mistakes when building a garden wall
Shallow footings. Stopping in loose topsoil means the wall moves and cracks. Dig down to firm subsoil.
No gauge rod. Without one, the mortar beds creep thicker or thinner and the top ends up wonky. Make one before you mix.
Building too high in one day. The lower joints squash and the wall leans. Stop at about six courses.
No piers or coping. A long half-brick wall without piers can wobble, and a wall without a coping soaks up water and spalls. Plan both from the start.
Laying in frost. Frost ruins fresh mortar. Check the overnight forecast and cover new work if in doubt.
Frequently asked questions
Do I need planning permission to build a garden wall?
Usually not for a low garden wall. Walls up to 1m next to a road and up to 2m elsewhere are normally permitted development. Listed buildings, conservation areas and some new estates have extra rules, so check with your council first.
How deep do garden wall footings need to be?
Dig down until you reach firm, undisturbed subsoil. For a low wall, that’s often 400-500mm in total. Pour at least 150mm of concrete, about 300mm wide for a half-brick wall and wider for a one-brick wall.
What is the best mortar mix for a garden wall?
About 1 part cement to 4-5 parts building sand, plus plasticiser. Measure with a bucket, not a shovel, so every batch matches. Use each batch within a couple of hours and don’t add water to revive a stiff batch.
How many brick courses can you lay in a day?
For DIY, about six courses a day is plenty. Fresh mortar squashes under the weight of too many courses. Let it firm up overnight before carrying on.
Why do garden walls need coping?
Coping stops rain soaking into the top of the wall. Wet bricks can flake and crumble when they freeze. Use bricks on edge, or concrete or stone copings that overhang so water drips clear.
Can you lay bricks in cold weather?
Not below 3°C, or if it’s falling towards that. Frost damages fresh mortar before it sets. Cover new work with hessian or polythene if frost is forecast.
Wall finished and fancy a different material next time? Our guide to building a gabion wall needs no mortar at all, or browse more how-to guides.
Our team produces practical UK gardening guidance from source research, contributor records and established horticultural practice. Editorial standards are overseen by Matt W.