
Key takeaways
- Decks more than 300mm off the ground need planning permission in England
- Fit a balustrade if the deck is more than 600mm off the ground
- Sit posts on concrete pads, never straight into soil
- Space joists 400mm apart unless the board maker says otherwise
- Use stainless steel or coated decking screws so they don't rust
- Softwood needs treating every year, composite just needs a wash
A raised deck turns a slope, bumpy ground or a dull corner into a lovely flat spot to sit out. It sits above damp soil, catches the evening sun and makes the garden more usable. If you’re handy with a circular saw and a spirit level, it’s a very doable DIY project.
Do you need building regulations for a raised deck?
Check the rules before you start. Getting it wrong could mean having to take the deck down.
In England, a deck that’s 300mm or less off the ground is usually fine without planning permission. Higher than that, you’ll need to apply. Building regulations mostly matter for safety at the edges: if there’s a drop of more than 600mm, you’ll need a proper balustrade. The GOV.UK Approved Document K covers guarding against falls.
 A raised deck frame on concrete pads. Diagonal braces stop it wobbling.
The key heights to know:
- 300mm or less: no planning permission needed in most cases (as long as decking and outbuildings don’t cover more than half the garden, and your home isn’t listed)
- Over 300mm: planning permission needed
- Over 600mm: you’ll also need a balustrade that people, especially children, can’t fall through or climb
- Next to a boundary: have a chat with your council about privacy and overlooking
Scotland, Wales and Northern Ireland have their own rules, so always check with your council.
Planning your raised deck
A bit of planning saves costly mistakes. Measure carefully and think about these points before you buy anything.
Choosing the right position
South or west-facing spots catch the afternoon and evening sun. Put the deck where you’ll actually use it, not just where it’s easiest to build. Think about privacy, shelter from the wind and how far you’ll carry food and drinks from the kitchen.
A deck right outside the back door flows nicely from inside to out. If it’s further away, plan a path or stepping stones. Think about garden lighting now too, as running cables under the deck while you build is far easier than adding them later.
Size and shape
Some handy sizes:
- 2m x 3m: fits a bistro table and two chairs, perfect for morning coffee
- 3m x 4m: seats four round a table, a really popular size
- 4m x 6m: room for dining, loungers and planters
Rectangles use materials best. L-shapes and curves look great but mean more offcuts and trickier framing.
Height considerations
The height decides what foundations, railings and permissions you need. Measure from where the deck surface will be down to the lowest bit of ground underneath.
- Up to 150mm: a simple frame on concrete paving slabs
- 150-300mm: posts on concrete pads
- 300-600mm: concrete pads, planning permission and diagonal bracing
- Over 600mm: a balustrade too, and it’s wise to get advice from a builder or engineer on the foundations
Decking materials compared
The board you choose affects cost, how long it lasts, upkeep and how slippery it gets.
| Material | Cost | Upkeep | Grip when wet | Best for |
|---|---|---|---|---|
| Treated softwood | Cheapest | Stain or oil every year | Poor if not looked after | Budget builds, easy DIY |
| Hardwood (oak, iroko) | High | Oil once a year | Fair | A natural, upmarket look |
| Composite | Medium to high | A wash once a year | Good, textured surface | Low upkeep, families |
| PVC | Highest | A wash once a year | Good | Poolside and wet spots |
 Fixing boards with stainless steel screws and spacers. Two screws per board at each joist, pre-drilled.
Softwood timber decking
Treated softwood is the cheapest option and the easiest to work with. It cuts, drills and screws like any building timber, and the pressure treatment helps it resist rot.
The catch is upkeep. Softwood soon fades to grey and gets slippery when wet if you don’t look after it. Plan to clean it and stain or oil it every year.
Hardwood decking
Oak, iroko, balau and garapa are harder, heavier and naturally longer-lasting than softwood. They resist rot without chemical treatment.
They’re tougher to cut, so you’ll get through saw blades faster. Pre-drill every screw hole, as hardwood splits easily. It costs a lot more than softwood but lasts much longer.
Composite decking
Composite boards are made from recycled wood fibres and plastic. They don’t rot, splinter or need staining. Most have a textured surface for grip in the wet, and you can get greys, blacks and wood tones.
Composite moves more than timber as it warms and cools. Leave 5-6mm gaps between boards and at the ends. It also gets hotter than timber in full sun, which matters if you like going barefoot.
PVC decking
PVC boards have no wood in them at all. They’re waterproof, grippy and need no upkeep beyond a wash. They’re the top choice by water, but also the most expensive, and feel less natural underfoot.
Tools and materials list
Get everything together before you start. Dashing to the builders’ merchant halfway through is no fun.
Tools needed
- Circular saw or mitre saw
- Cordless drill and impact driver
- Spirit level (at least 1200mm long)
- String line and pegs
- Post hole spade or auger
- Tape measure
- Speed square or combination square
- Adjustable spanner and socket set
- Shovel and wheelbarrow
- Safety glasses, ear defenders and a dust mask
- Chalk line
Materials needed (for a 3m x 4m deck about 450mm high)
- Posts: 6 treated 100mm x 100mm posts, cut to suit your height
- Beams: 3 treated 50mm x 200mm timbers, 4m long
- Joists: 11 treated 50mm x 150mm timbers, 3m long, for 400mm spacing
- Decking boards: about 28-30 boards, 4m long
- Bracing: treated 50mm x 100mm timber
- Concrete: postcrete, or ballast and cement, for the pads
- Fixings: stainless steel decking screws, M10 coach bolts and joist hangers
- Damp-proof membrane: to keep timber off the concrete
- Weed membrane: for the ground under the deck
Step-by-step build guide
Step 1: Mark out and prepare the ground
Mark out the deck with string lines and pegs. Check it’s square by measuring both diagonals. They should match to within 5mm.
 A timber balustrade with upright spindles. You’ll need one on any deck more than 600mm off the ground.
Clear the plants and lay weed membrane over the whole area, overlapping joins by about 150mm. Hold the edges down with gravel. Don’t use plastic sheeting, which traps damp and rots the timber.
Step 2: Dig foundations and set posts
Dig holes about 450mm deep and 300mm square. Space posts no more than 1800mm apart along each beam. A 3m x 4m deck needs 6 posts in two rows of three.
Pour concrete into each hole and set a galvanised post shoe or bracket into it while it’s wet. Level each one before the concrete sets, then leave it to harden.
Or cast square concrete pads, set bolt anchors in them while wet, and bolt the posts on once they’ve set. This keeps timber out of the ground completely, so the posts last longer.
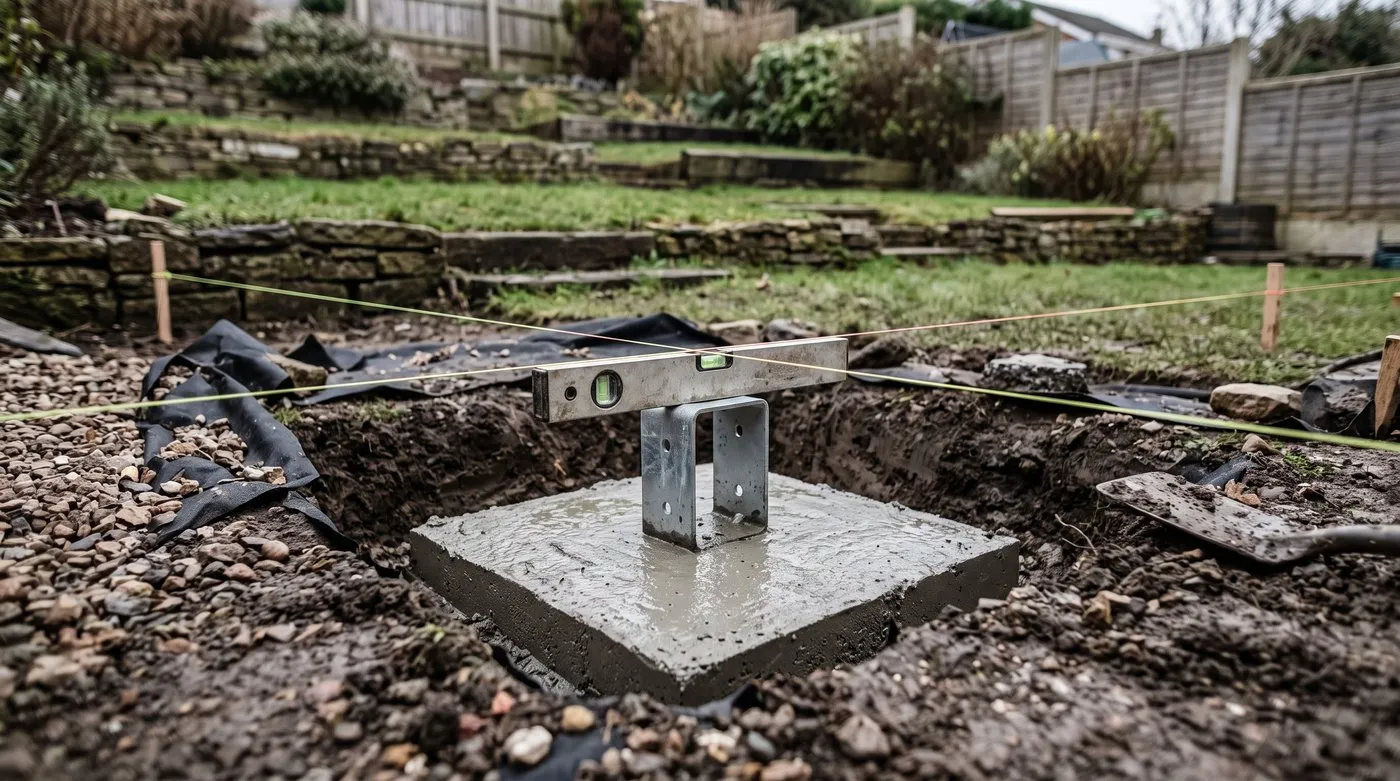
Level each post shoe while the concrete is still wet. Keeping the timber out of the ground like this helps the posts last much longer.
Step 3: Fix beams to posts
Cut the posts to height using a spirit level and a string line stretched across them all. Bolt the beams to the sides of the posts with M10 coach bolts, two per post.
Check the beams are level both ways. Use thin packers between beam and post if needed. Take your time here, because any error shows up across the whole deck.
Step 4: Install joists
Fix joists across the beams, 400mm apart, using joist hangers. The decking boards will run across the joists, so set them out with that in mind.
Add short cross pieces, called noggins, between the joists every 1200mm or so. They stop joists twisting and make the frame stiffer. Double up joists where two boards will meet end to end.
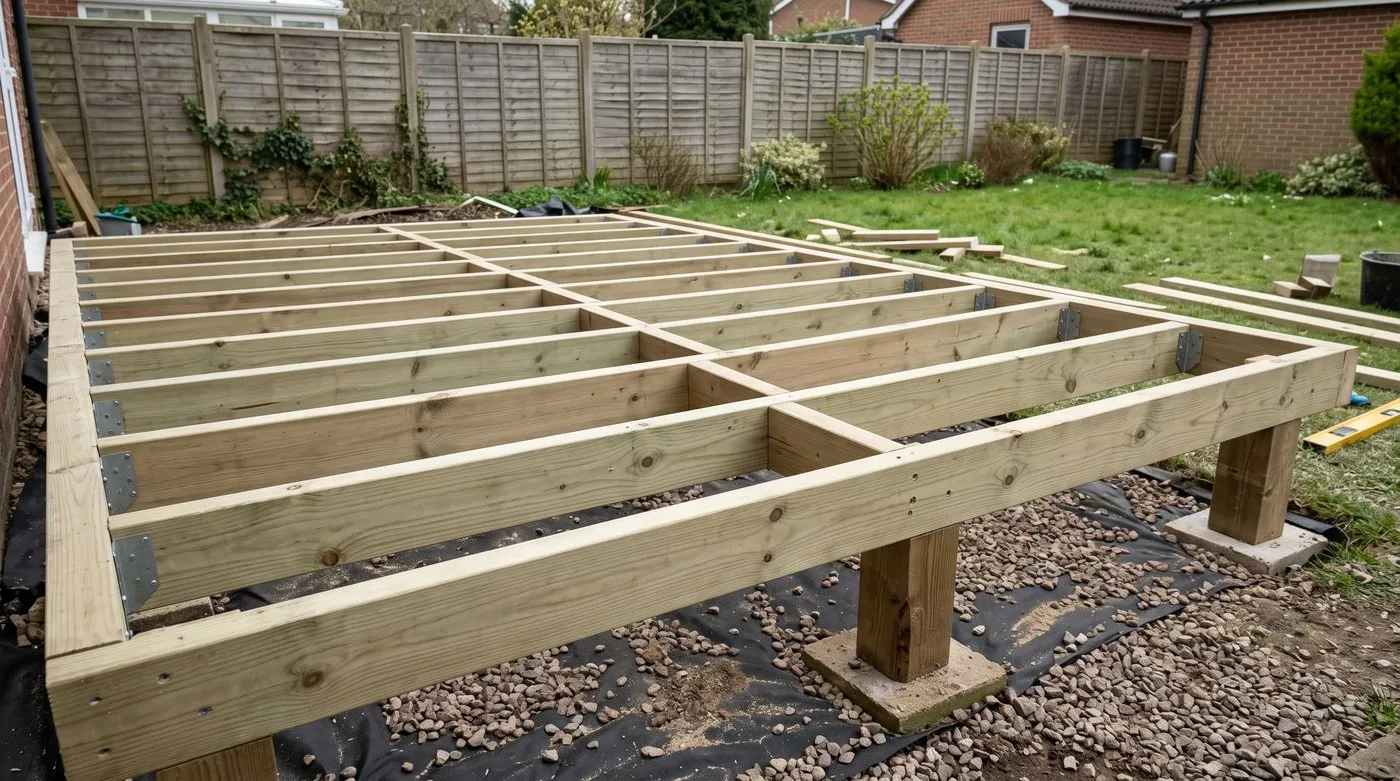
Short noggins between the joists stop them twisting and make the whole deck feel more solid underfoot.
Step 5: Add bracing
Raised decks need diagonal braces to stop them swaying sideways. Fix 50mm x 100mm braces between posts, from the top of one post down towards the bottom of the next. Use at least one per bay.
On taller decks, add extra cross-bracing between joists too. You’ll feel the difference underfoot.
Step 6: Fix decking boards
Start by the house and work outwards. Leave a 10mm gap at the wall for drainage and movement.
For timber boards:
- Pre-drill two holes at each joist so the wood doesn’t split
- Screw through the board into each joist with stainless steel screws
- Use a spacer to keep an even gap of about 5mm between boards
- Stagger the end joints so they never line up on neighbouring boards
- Let boards overhang the frame a little, then trim them all in one straight line at the end
For composite boards:
- Use the maker’s hidden clip system if there is one
- Leave 5-6mm gaps between boards for movement
- Leave bigger gaps at the ends where boards meet walls, as the maker advises
- Cut with a fine-toothed blade to avoid chipping
- Screw through the first and last boards and use clips for the rest
Step 7: Trim and finish edges
Snap a chalk line along the overhanging ends and cut them in one go with a circular saw run along a clamped straight edge. Fix fascia boards around the edge to hide the joist ends. They also stop animals moving in underneath.
Building a balustrade and handrail
You’ll need a balustrade on any deck more than 600mm off the ground. On lower decks, a rail still adds safety and makes the space feel finished. Our garden fence ideas guide has privacy ideas that go well with a deck.
The rules for balustrades
- Make it high enough to stop people falling over. For an outdoor raised area, Approved Document K suggests 1100mm, so check with building control
- Keep gaps between spindles under 100mm, so a child’s head can’t fit through
- Avoid horizontal rails that children could use as a ladder
- Make it strong, fixed to the deck frame and not just the boards
Balustrade construction
- Bolt 100mm x 100mm newel posts to the deck frame (not the boards) with M12 coach bolts through the outer joist
- Fix a bottom rail between the newels, a little above the deck surface
- Cut spindles to length and fix them between top and bottom rails, close enough to keep gaps under 100mm
- Top it with a smooth, rounded handrail that’s comfy to lean on
- Sand all edges and corners smooth, as splinters on a handrail are a pain
Material options for balustrades
- Timber: matches a wooden deck, easy to build, needs yearly treatment
- Metal: powder-coated aluminium or stainless steel, no upkeep, modern look
- Glass panels: keeps the view open, pricey but striking
- Wire rope: steel cables between timber posts look modern, but horizontal wires can be climbed, so check with building control first
Anti-slip treatment options
 A finished raised deck with furniture and lighting. Composite boards just need a wash.
Grooved or textured boards, timber or composite, give the best long-lasting grip. If your boards are smooth, use an anti-slip stain each year.
On shady or north-facing decks, green algae is the biggest slip risk. Scrub with a stiff brush and some deck cleaner in spring. Avoid pressure washers on softwood, as they rough up the grain.
Budget guide by deck size
Costs vary a lot by area, supplier and board choice, so get a few prices before you buy. Here’s what drives the bill.
| Deck size | Area | DIY time |
|---|---|---|
| Small (2m x 3m) | 6 sq m | About a weekend |
| Medium (3m x 4m) | 12 sq m | About two weekends |
| Large (4m x 6m) | 24 sq m | About three weekends |
Composite costs more than softwood for the same deck. Remember balustrades, steps and finishing products are extra. If you’re paying a carpenter or landscaper, get three quotes.
Finishing and protecting your deck
Treat a timber deck soon after you finish it. Bare timber soaks up water, swells and soon starts to go grey.
Timber finishing options
- Decking oil: soaks into the grain and brings out the colour. Reapply every year. Best for hardwood.
- Decking stain: adds colour and protection, and lasts a couple of years a coat. Best for softwood.
- Decking paint: solid colour that hides marks, but it can peel in busy areas.
Apply on a dry, mild day, out of direct sun. Two thin coats beat one thick one.
Composite maintenance
Composite just needs a yearly clean. Sweep often so leaves don’t stain it. Scrub with warm soapy water and a stiff brush each spring, and use a composite cleaner for any mould or algae. Never use a wire brush or harsh scourer.
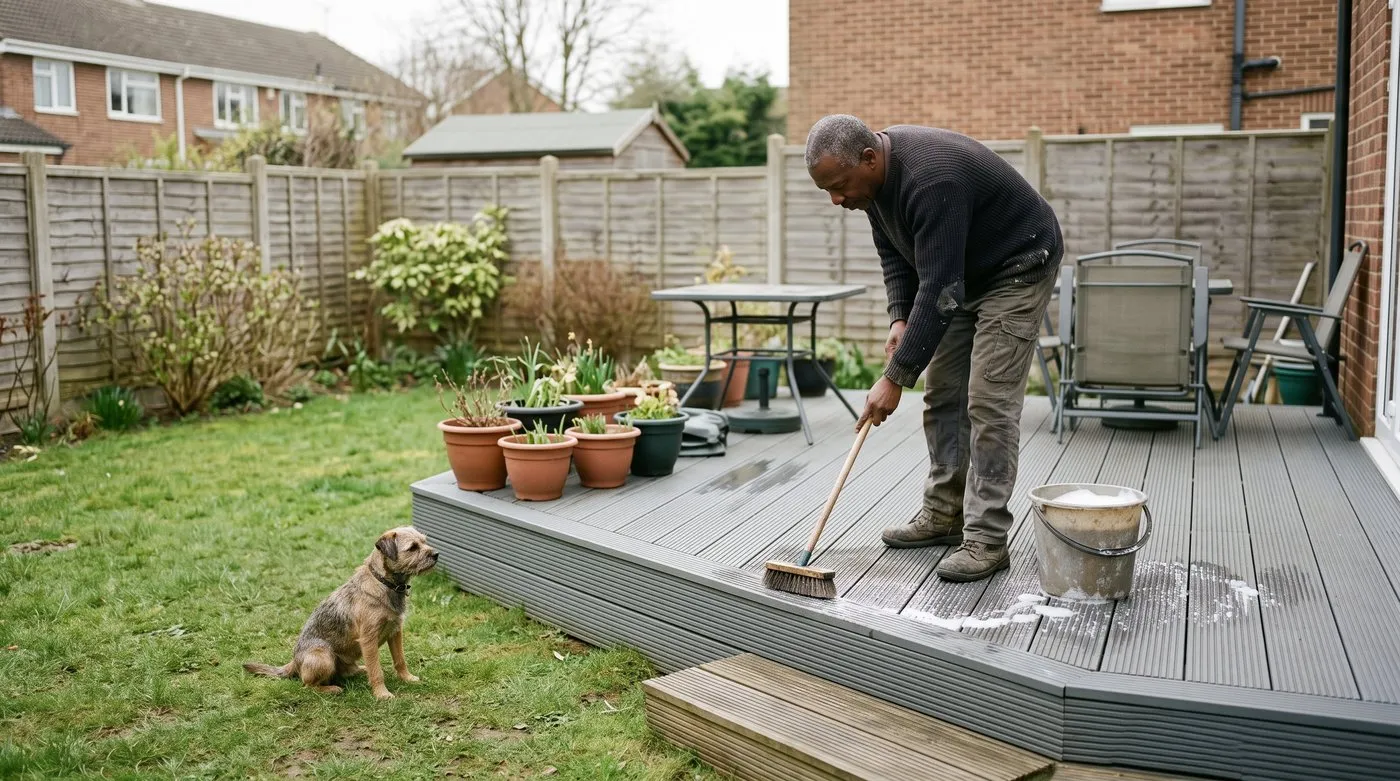
A spring scrub with warm soapy water and a stiff brush is all composite boards need. Skip wire brushes, as they scratch the surface.
Five common mistakes to avoid
These slip-ups turn up again and again, and they’re all easy to avoid.
1. Skipping proper foundations. Posts pushed into bare soil soon move. Clay heaves in frost and sand settles. Always use concrete pads or bolt-down post bases on concrete.
2. Using the wrong fixings. Ordinary zinc screws rust and streak the boards brown. Use stainless steel or coated decking screws. They cost a little more, but rust stains are there for good.
3. No gaps between boards. Boards swell in damp weather, and composite moves in the heat. Butt them tight and they’ll buckle. Leave about 5mm between boards and 10mm at walls.
4. No air underneath. A deck built tight to the ground traps damp, and the underside rots before you notice. Leave at least 150mm under the lowest joist, or add air gaps in the fascia.
5. Ignoring drainage. Water pooling on or under the deck speeds up rot and makes it slippery. Slope the ground underneath away from the house, leave gaps between boards, and never build over drains or downpipes.
Frequently asked questions
Do I need planning permission for a raised deck UK?
Not if it’s 300mm or less off the ground in England. Higher than that, you’ll need planning permission. You’ll also need it if decking and other outbuildings would cover more than half the garden, or if your home is listed. Scotland, Wales and Northern Ireland have their own rules, so check with your council.
How high can a deck be without building regulations?
Building regulations mostly come in when there’s a drop to fall from. Guidance asks for a balustrade where the drop is more than 600mm. If in doubt, ask your council’s building control team before you start.
What is the best joist spacing for decking?
400mm apart suits most decking boards. That stops boards feeling bouncy underfoot. Some thinner composite boards need 300mm, so always check the maker’s instructions before you fix the boards.
Is composite decking worth the extra cost?
It can be, if you hate maintenance. Composite costs more than treated softwood at the start. But it doesn’t need sanding, staining or oiling every year, just a wash. Over many years, that saves time and money on treatments. For a small garden with a small deck, the price gap is smaller too.
How do I stop a raised deck from wobbling?
Add bracing. Fit diagonal braces between posts and cross pieces between joists. Use posts at least 100mm x 100mm and bolt them to concrete pads instead of sticking them in soil. Check all fixings are tight after the first month.
What screws should I use for decking?
Stainless steel or coated decking screws, 60-75mm long. Ordinary zinc-plated screws soon rust and leave brown stains on the boards. Use two screws per board at each joist, and pre-drill so the wood doesn’t split.
How long does treated timber decking last?
Usually around 10-15 years, if you look after it. That means cleaning and re-treating it every year. Hardwood lasts much longer, and composite lasts many years with just a wash now and then.
Can I build a raised deck on a slope?
Yes, a slope is a great spot for one. Use longer posts on the low side and shorter ones on the high side, setting heights with a string line and spirit level. On a steep slope, try a stepped deck with each level 150-200mm lower than the last.
Our team produces practical UK gardening guidance from source research, contributor records and established horticultural practice. Editorial standards are overseen by Matt W.


