Key takeaways
- Use porcelain pavers sold as frost resistant for outdoor use, usually 20mm thick
- Indoor ceramic floor tiles soak up water and crack in UK frosts
- Choose an R11 slip rating for a patio and R12 for steps and slopes
- Lay every tile on a full mortar bed with a slurry primer on the back, never on dabs
- Slope the surface about 1:60 to 1:80 away from the house so rain runs off
- Always cut porcelain with a wet saw to keep the dust down
Garden tiles can look smart for years, as long as you pick the right tile and lay it the right way. For UK gardens that means porcelain made for outdoor use, a grippy surface and a full bed of mortar underneath. Get those three right and your patio will shrug off wet winters.
This guide helps you choose outdoor tiles and avoid the mistakes that make them crack, lift or turn slippery. If you’re still deciding between tiles, slabs and gravel, have a look at these paving slab alternatives first.
Why do indoor tiles crack outdoors?
Indoor ceramic floor tiles soak up water. In winter that water freezes inside the tile, expands and pushes it apart. You see flaking faces, lifting glaze and cracks that wander across the tile. This is called frost spalling.
It isn’t one hard frost that does the damage. It’s frost after frost, night after night, through a damp British winter. A tile can look fine in autumn and be flaking by spring.
Porcelain is fired much harder, so it soaks up almost no water. With nothing inside to freeze, it copes with frost that would wreck ceramic. Always check the box or product page says the tile is frost resistant and suitable for outdoor use.

The broken tile on the left soaked up water and flaked in the frost. The porcelain paver next to it is untouched.
Which outdoor tiles cope best with UK weather?
Outdoor porcelain is the easiest choice for most gardens. Dense natural stone works well too. Standard indoor ceramic should stay indoors.
| Material | Copes with frost? | Upkeep | Good for |
|---|---|---|---|
| 20mm outdoor porcelain | Yes | Low, rarely needs sealing | Patios, paths, garden room thresholds |
| Granite or slate | Yes | Low | Hard-wearing patios with natural character |
| Sandstone or limestone | If good quality and sealed | Sealing and regular cleaning | Traditional look, softer colours |
| Indoor ceramic floor tile | No | Not suitable | Indoors only |
Natural stone varies a lot. Dense granite and slate handle frost well. Softer sandstone and limestone soak up more water, so buy good-quality stone and ask the supplier whether it should be sealed. If you’re comparing costs and looks, these ideas for small patio gardens can help you picture the finish.
What slip rating do you need outside?
Choose R11 for a general patio and R12 for steps, ramps and slopes. Outdoor tiles carry an R rating from R9 to R13. The higher the number, the more grip when wet.
A shady, north-facing patio that grows algae needs more grip than a sunny terrace that dries quickly. Steps deserve the most grip, because a slip there hurts more. It’s simplest to pick one R11 or better tile that works across the whole space.
In the UK, slip resistance is also measured with a pendulum test. A wet reading of 36 or more means a low slip risk. Ask the supplier for this figure if it isn’t on the box.

That textured surface is what gives grip when the tiles are wet. Polished-look tiles might be pretty, but they turn slippery in the rain.
Tiles around a pool or hot tub
Around water, barefoot slip ratings matter more than the R rating. These run from A to C. Use class B for pool surrounds and showers, and class C for steps into the water and sloping edges.

A pool surround needs tiles with good barefoot grip, because nobody wears shoes there.
Where garden tiles work best
The same 20mm porcelain that suits a patio also works for paths, outdoor kitchens and garden room thresholds. For paths, pick a grippy R11 or R12 tile, as feet turn at corners. The guide to garden path ideas has more ways to lay out a route.
A popular look is the flush indoor-outdoor floor. Many porcelain ranges sell a 20mm outdoor paver and a matching thinner indoor tile in the same colour. The floor seems to flow straight out into the garden. The risk is rain running back indoors, so this needs a correct fall and a drainage channel along the door line.

A flush threshold looks great. The slim drainage channel at the doors catches rain before it can run inside.
How should outdoor tiles be laid?
Lay outdoor tiles on a full mortar bed over a firm, compacted sub-base. The base matters more than the tile. Even the best porcelain fails if what’s underneath moves or holds water.
The usual build-up, from the ground up, is:
- Dig down to firm ground
- Lay and compact a sub-base of MOT Type 1 crushed stone in layers
- Spread a full, even bed of mortar (sharp sand and cement)
- Brush a slurry primer onto the back of each tile, so the mortar grips
- Bed the tile down and tap it level with a rubber mallet
Porcelain is so dense that mortar won’t stick to its smooth back without the primer. Skip it and tiles can come loose even from a good bed. The patio guide linked at the end covers the digging and sub-base step by step.

A full bed of mortar leaves no gaps under the tile for water to collect and freeze.
Why spot-fixing on dabs fails
Spot-fixing means setting each tile on five blobs of mortar instead of a full bed. It’s quicker, but it leaves hollows underneath. Rain collects in the hollows, freezes and lifts or cracks the tile.
Tap each tile once it’s down. A solid thud means it’s fully bedded. A hollow ring means there’s a gap, so lift it and re-bed it.
Gardener’s tip: Lay a test square metre first and tap every tile. Only carry on once you’re sure your bedding is solid all the way under.
How much fall does a tiled patio need?
Slope the surface about 1:60 to 1:80, which is a drop of roughly 12-17mm for every metre. Steeper feels like a slope underfoot. Flatter lets puddles sit.
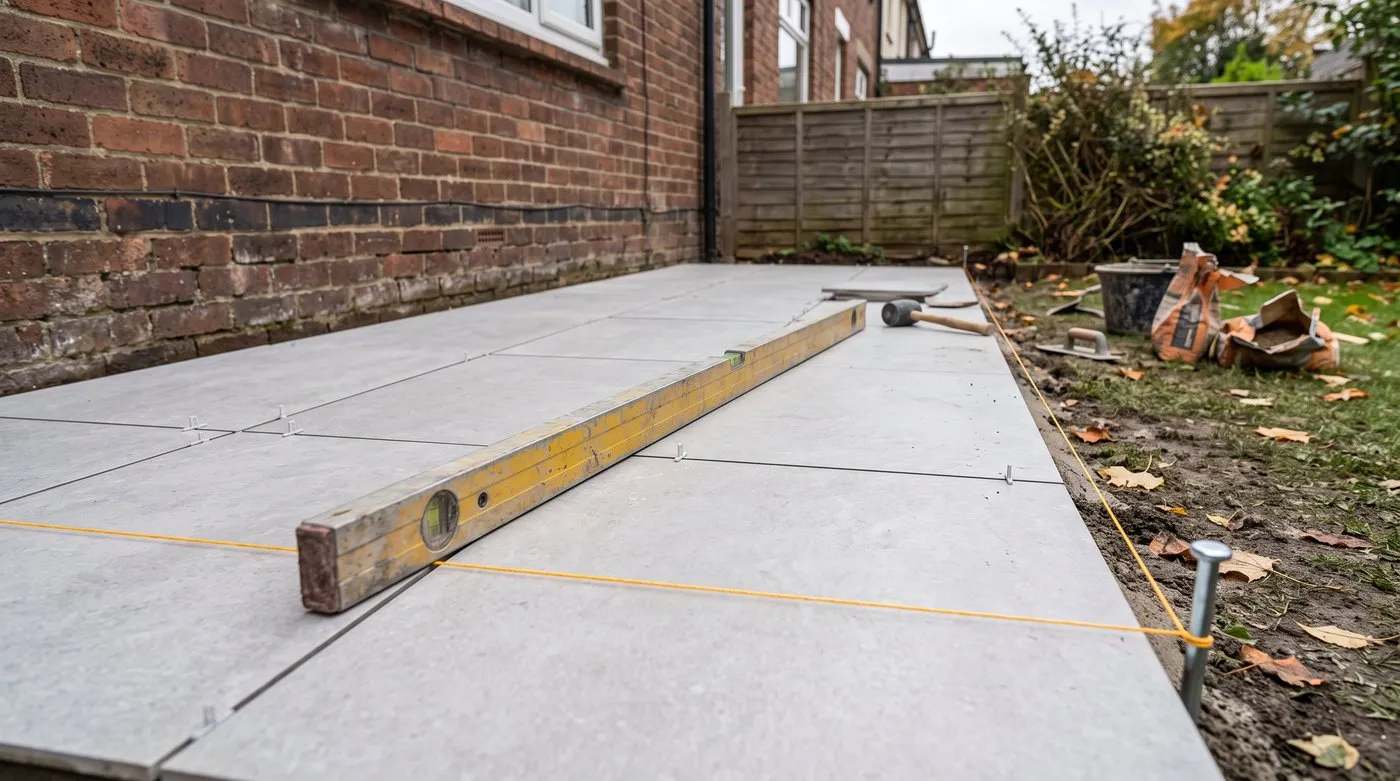
A string line and spirit level help you keep the same gentle fall on every row, so rain runs away from the house.
Always slope it away from the house and any doorway. Keep the finished surface at least 150mm below the damp-proof course of the house wall. Check the fall on every row with a string line and spirit level, not just the first one.
Porcelain pavers vs thinner tiles
20mm pavers are made for the ground. They’re strong enough to sit on a mortar bed or on adjustable pedestals over a roof terrace or balcony. They also cope with table legs and chair feet.
10mm tiles are thinner and have little spare strength. Outside, they need a perfect, fully bonded bed with no gaps, or they snap. They’re better suited to cladding a low wall, a raised planter or an outdoor kitchen worktop surround.
For most patios, the 20mm paver is the safer and more forgiving choice. Most porcelain pavers are made for foot traffic, so check with the supplier before using them on a driveway.
Jointing, sealing and cutting porcelain
Jointing. Leave a gap of a few millimetres between tiles, as butted porcelain chips at the edges. Fill the joints with a brush-in jointing compound or a pourable slurry grout. Follow the product’s guidance on joint width.
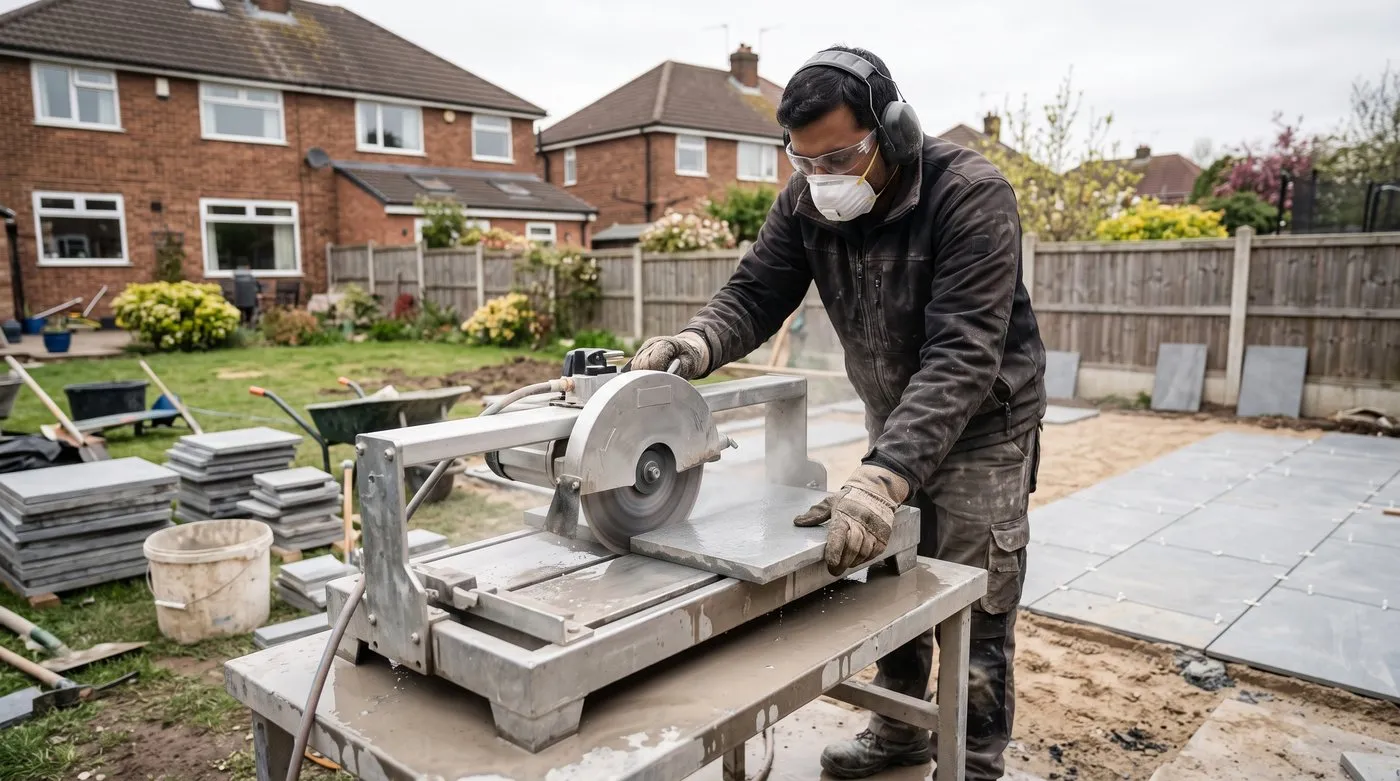
A wet saw cuts porcelain cleanly and keeps the dust down. Wear eye, ear and dust protection every time.
Sealing. Porcelain rarely needs sealing. Sandstone and limestone are more porous, so they’re often sealed to resist stains and algae. To keep any tiled patio looking good, see the guide on how to clean a patio, which covers safe pressure settings for porcelain and stone.
Cutting. Use a wet tile saw with a diamond blade. The water cools the blade and keeps the dust down.
Warning: Never dry-cut porcelain with a grinder. The fine dust contains silica, which damages the lungs. Use a wet saw and wear a dust mask, eye protection and ear defenders.
Should you lay garden tiles yourself?
You can, but the hard part is the groundwork, not the tiling. Digging out, barrowing away soil and compacting the sub-base is heavy work. Bedding porcelain on a full mortar bed, with the right falls, needs patience and care.
Many people dig and prepare the base themselves, then hire a tiler to lay the tiles. Whoever does it, ask for a full mortar bed, a primer on every tile, the right fall and no hollow tiles. A good tiler will agree before you ask.
Remember the costs beyond the tiles themselves. Skip hire for the spoil, sub-base stone, mortar, primer, jointing and saw hire all add up. Keep a little spare tile for cuts and breakages.
Common mistakes with outdoor tiles
Using indoor ceramic outside. It soaks up water and flakes in the frost. Only use tiles sold for outdoor use.
Laying on dabs. Hollows under the tile fill with water and freeze. Use a full mortar bed and tap-test every tile.
Forgetting the primer. Mortar won’t grip the back of dense porcelain on its own. Brush slurry primer onto every tile.
Getting the fall wrong. A flat patio, or one sloping towards the house, sends water where you don’t want it. Slope it away from walls and doors.
Choosing looks over grip. A smooth, polished-look tile turns slippery when wet. Go for R11 or better.
Frequently asked questions
Can you use indoor ceramic tiles outdoors in the UK?
No, indoor ceramic floor tiles usually crack outdoors. They soak up water, which freezes, expands and splits or flakes the tile. Only use tiles sold as frost resistant and suitable for outdoor use.
What slip rating do I need for an outdoor patio?
Choose R11 for a general patio and R12 for steps or slopes. The higher the R number, the more grip when wet. Around a pool, barefoot ratings matter more. Use class B for surrounds and class C for steps into the water.
Why do tiled patios crack and come loose?
Usually because the tiles were laid on dabs instead of a full mortar bed. Water collects in the gaps underneath, freezes and lifts or cracks the tile. A missing primer or a fall towards the house makes it worse.
Do I need to seal outdoor porcelain tiles?
Usually not, because porcelain absorbs very little water. Natural stone such as sandstone and limestone is more porous, so it is often sealed. Follow the stone supplier’s advice on product and timing.
How thick should outdoor garden tiles be?
Use 20mm porcelain pavers for most patios and paths. They are strong enough to sit on a mortar bed or on pedestals. Thinner 10mm tiles need a perfect, fully bonded bed and suit walls better. Check with the supplier before using any tile on a driveway.
Can I lay porcelain garden tiles myself?
Yes, if you take your time over the base. Digging out and compacting the sub-base is heavy work. Cutting porcelain needs a wet saw. Many people prepare the base themselves, then hire a tiler for the laying.
Once you’ve picked your tiles, follow our guide on how to lay a patio in the UK for the groundwork, or browse more ideas in the garden design hub.
Our team produces practical UK gardening guidance from source research, contributor records and established horticultural practice. Editorial standards are overseen by Matt W.