Key takeaways
- A wide shallow plot is broad side to side but short front to back
- Split the width into three or four zones so the eye stops at each one
- A diagonal path is the longest line across a short plot, so it adds depth
- Plant the back border in three tiers, low, medium and tall
- Put focal points off-centre, near each side, never dead centre
- Cover the back fence with trellis and mixed climbers so it reads as planting
A wide shallow garden is broad from side to side but short from the house to the back fence. They’re common behind UK new-builds. The trick is to stop the eye taking it all in at once: split it into zones, add a diagonal and layer the planting.
Here’s how to turn an awkward strip into a garden that feels bigger than it is. If your plot is the opposite shape, see our guide to designing a long thin garden instead.
Why does a wide shallow garden feel flat?
Because your eye hits the back fence almost straight away. Picture a plot 9m wide and 6m deep. From the back door you see the whole thing in a glance, with no journey and nothing to discover.
A long thin plot has the opposite problem: it runs away from you like a runway. A wide shallow one spreads sideways, with the back boundary close and obvious. It can feel like a stage with a flat painted backdrop.
A long unbroken run of fence panels makes this worse. You notice the boundary first and the garden second.

A typical new-build starting point: plain panels, a strip of lawn and one thin border along the fence.
Split the width into three or four zones
The most effective change is to stop treating the garden as one space. Divide the width into separate areas, each with its own surface and job.
Keep the dividers low. A change of surface, a clipped hedge about 40cm tall or a pair of pots can mark where one zone ends. Anything tall would block the width you want to keep.
The zones don’t have to be equal. A bigger sitting area plus two smaller planted corners often works better than three matching thirds.
| Problem | Fix |
|---|---|
| You see the whole plot at once | Split the width into three or four zones |
| It feels like a flat corridor | Give each zone its own surface and use |
| The back fence dominates | Trellis and climbers along the whole width |
| No sense of depth | A diagonal path or bed edge |
| The border is just a green wall | Plant in three tiers, low to tall |
| Nothing draws you across | Off-centre focal points near each side |

Low box hedges mark out each area without blocking the view, so the garden reads as several rooms.
Use a diagonal to stretch the view
On a short plot, the longest straight line runs corner to corner. A path at 45 degrees across a 9m by 6m garden is nearly 11m long, almost twice the depth. Your eye follows it and the garden feels bigger.
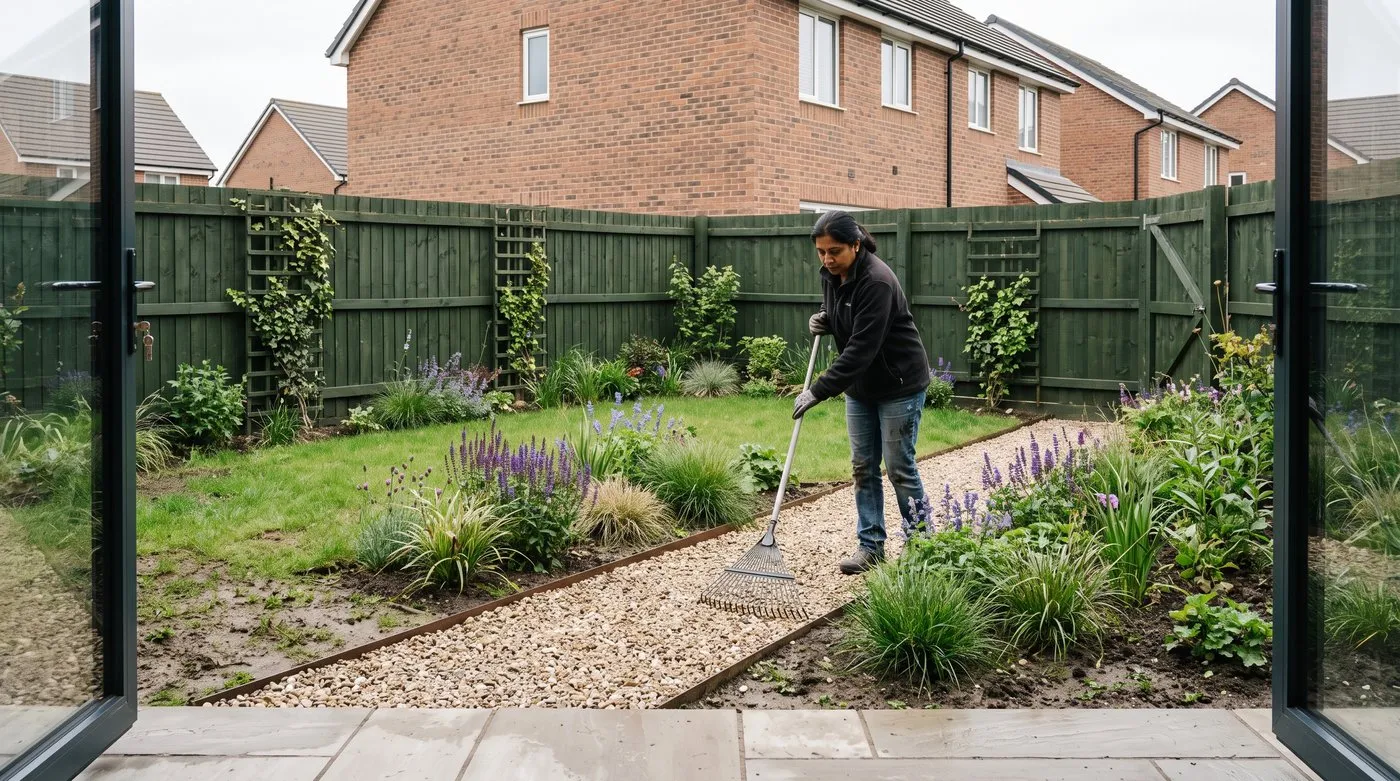
A path running corner to corner is the longest line in a short garden, so the eye travels further.
Diagonal beds work the same way. Angle the front edge of a border instead of running it parallel to the house. The slanting line breaks the corridor feel and adds movement.
Lay any diagonal path before you plant, so the beds follow its angle rather than fight it. Gravel, stepping stones or a run of slabs all work.
Plant in three tiers to fake depth
A single row of shrubs along the fence is a green wall, not a border. Three layers give the eye something to travel through, and that reads as distance. A 1m-deep bed can feel much deeper this way.
- Front (20-40cm): hardy geraniums, heucheras and blue fescue (Festuca glauca)
- Middle (50-90cm): Salvia ‘Caradonna’, calamagrostis grasses and hardy fuchsias
- Back (1.5m plus): a multi-stem amelanchier, a climbing rose or evergreen pittosporum
Repeat two or three of these plants along the whole width. The repeats link the zones, so the garden reads as one scene rather than three patches. Our guide to planning a mixed border covers layering in more detail.
Draw the eye sideways with focal points
A wide plot has width to spare, so use it. Put a focal point off-centre near each side, so the eye moves left and right instead of straight to the fence.
A specimen pot, a small water bowl, a clipped shrub or a bench all work. Avoid the dead centre: a central feature only shows how shallow the middle is.
Set the two focal points at different distances from the house, one near and one further back. That gives the eye a second little journey. It’s one of the classic tricks to make a small garden look bigger.

A potted bay on one side and a bench on the other pull the eye across the garden, not straight to the fence.
How to screen the back fence
On most wide shallow plots, the back fence is the biggest problem. A long run of bare panels looks like a wall, so break it up.
Fix trellis to the fence and grow climbers along the whole width. Clematis, climbing roses, honeysuckle and evergreen star jasmine (Trachelospermum) all soften the panels. Plant one or two taller shrubs or a small multi-stem tree in front of the fence to break the line in places.
Mix things up. One climber along the whole fence still looks like a wall, just a leafy one. Our list of fast-growing climbers for fences and walls has plenty of choices.
Fence colour helps too. Dark green or near-black seems to sink back, so the planting stands forward. Bright orange stain does the opposite and pulls the fence towards you.
A zone plan for a 9m by 6m plot
Here’s one way to lay out a typical new-build garden of this shape.
| Zone | Where | What goes there |
|---|---|---|
| Sitting area | The sunniest third | Paving, table and chairs, a pot as a focal point |
| Diagonal path | Across the middle | Gravel at 45 degrees, linking the zones |
| Lawn or gravel | Centre | Small open patch, bench off to one side |
| Shrub corner | The other third | Multi-stem tree with tiered planting beneath |
| Back boundary | Full width | Trellis, mixed climbers, dark fence stain |
Build it in this order: hard surfaces and the path first, then the fence screening, then the planting, then the focal points. Before you start, our new-build garden design guide covers sorting out compacted soil and builders’ rubble.

Sitting area on one side, a path through the middle and a bench and lawn beyond: several places for the eye to stop.
Common mistakes with wide shallow gardens
One long border along the back fence. It turns the fence into the main feature. Bring planting forward in places and layer it.
Putting everything in the middle. A central path, pond or tree just points at how short the plot is. Work off-centre.
Tall dividers. Screens or hedges over waist height chop up the width, which is the one thing you have plenty of.
Too many different plants. A different plant every metre looks bitty. Repeat a few favourites across the width.
Planting before the path. Laying a path through planted beds wastes plants and time. Do the hard landscaping first.
Frequently asked questions
How do you design a wide shallow garden?
Split the width into three or four zones so the eye stops at each one. Run a path or bed edge on a 45-degree diagonal, plant the back border in three tiers, and cover the back fence with climbers so it stops feeling like a flat wall.
How do you make a shallow garden look deeper?
Use a diagonal path and tiered planting against the back fence. The diagonal is the longest line across a short plot, so the eye travels further. Layers of low, medium and tall plants give it more to look through, which reads as distance.
What is the difference between a long thin and a wide shallow garden?
Long thin gardens are deep but narrow; wide shallow ones are broad but short. Long thin plots need breaks across them to slow the eye. Wide shallow plots need zones side by side and tricks that add depth.
How do you screen a full-width garden fence?
Fix trellis along the fence and grow a mix of climbers across the whole width. Plant one or two taller shrubs or a small multi-stem tree in front of the fence to break the line. A dark fence stain helps the boundary fade back.
What plants suit a wide shallow garden border?
A three-tier mix works best. Use hardy geraniums or heucheras at the front, salvias and grasses in the middle, and amelanchier or a climber at the back. Repeat two or three plants across the width to link the zones.
Now your layout is sorted, choose a feature tree from our guide to the best trees for small gardens, or browse more garden design ideas.
Our team produces practical UK gardening guidance from source research, contributor records and established horticultural practice. Editorial standards are overseen by Matt W.