Key takeaways
- Oyster mushrooms grow on straw, cardboard or fresh coffee grounds, with no special kit
- Pasteurise straw in hot water at 65-80°C for 1-2 hours, then cool it below 25°C
- Keep the bucket dark at 18-24°C for 2-3 weeks until the straw is fully white
- Light, fresh air and misting two or three times a day make the mushrooms appear
- Pick clusters while the caps are still slightly cupped, before they shed spores
- Expect two or three flushes from one bucket, then compost the spent straw
Oyster mushrooms are the easiest mushrooms to grow at home from scratch, and a bucket of straw is all the kit you really need. They grow fast, cope with ordinary room temperatures and forgive a few beginner slips.
This guide walks you through the bucket and straw method from start to finish, plus a simple outdoor log option. If you’re still deciding which mushroom to try, our guide to growing mushrooms at home compares kits, shiitake and other types first.
Why oyster mushrooms suit beginners
Oyster mushrooms (Pleurotus) are quick and tough. Their mycelium, the white thread-like root system of the fungus, races through straw in two to three weeks. The faster it claims the straw, the less chance moulds have to get in.
Grey oysters also fruit in a wide temperature range, so a cool spare room, utility room or frost-free shed works without heating. There are a few colourful types to try once you’ve got the hang of it:
- Grey oyster (Pleurotus ostreatus): the reliable all-rounder, happy in cool rooms from autumn to spring.
- Pink oyster (Pleurotus djamor): fast and heat-loving, good for a summer batch.
- Yellow oyster (Pleurotus citrinopileatus): delicate golden clusters that like warmth too.
All three grow on the same straw with the same bucket method.

Pink and yellow oysters grow on the same straw as grey ones. They just like it warmer, so save them for summer.
What you need to grow oyster mushrooms
You need grain spawn, a substrate to grow it on, and a clean bucket. Clean spawn from a reputable supplier matters most.
Grain spawn is cooked grain, usually rye or millet, already full of white oyster mycelium. It’s the “seed” you mix into your straw. Use roughly one part spawn to five to ten parts damp straw by weight. Wooden dowel spawn is only for growing on logs.
Substrate choices, easiest first:
- Wheat or barley straw: cheap, reliable and the classic choice. Needs pasteurising.
- Plain cardboard: almost free and fine for a small first go. Use unprinted brown card.
- Fresh coffee grounds: good in small jars or bags. Use within a day of brewing.
- Hardwood logs: slow but low effort, and they fruit outdoors for a few years.
You’ll also want a 10-20 litre food-grade bucket with a lid, a drill, a big pan or tub for pasteurising, a spray bottle, gloves and a clean worktop. Got coffee grounds left over after a batch? Our guide to using coffee grounds in the garden sorts the useful ideas from the myths.
How to pasteurise straw for mushrooms
Pasteurising means heating the straw just enough to knock back moulds and bacteria, so your spawn gets a head start. Straw doesn’t need full sterilising, which is lucky, because that needs a pressure cooker.
Hot water is the simplest method:
- Chop the straw into 2-5cm lengths. Shears or a strimmer in a bin both work.
- Pack it into a mesh bag or pillowcase.
- Hold it in water at 65-80°C for one to two hours. Check with a thermometer.
- Lift it out and let it drain until a hard squeeze gives only a few drops.
- Let it cool below 25°C before adding spawn.
Some growers soak straw overnight in water with hydrated lime (builder’s lime) instead. It needs no heat, but lime is caustic, so wear gloves and eye protection and follow a trusted recipe for the amount.
Straw is the best place to start. Coffee grounds are tempting because they’re free, but they sour fast, so keep batches under about 1kg.
The bucket and straw method step by step
Drill the bucket, layer straw and spawn, keep it dark until white, then bring it into the light. Here’s the full process.
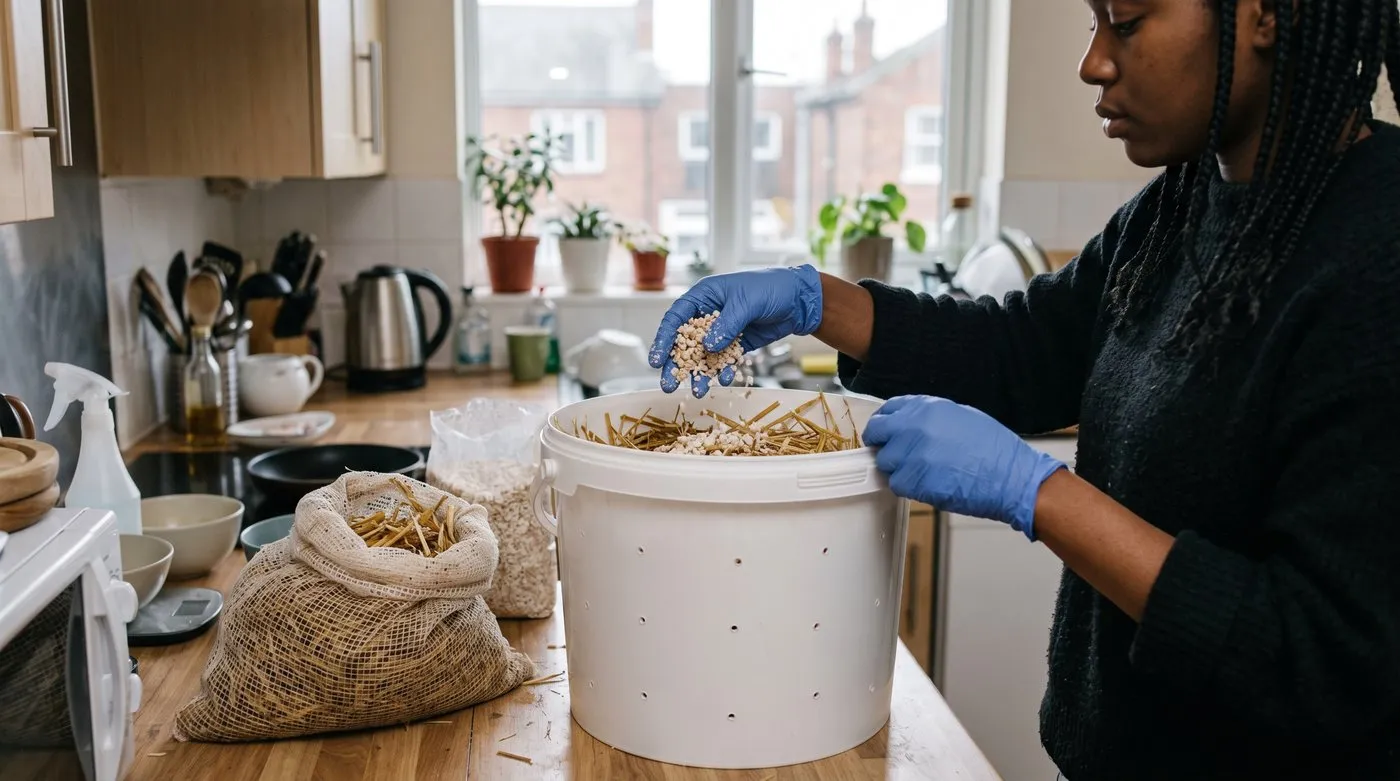
Build up thin layers of straw and spawn, pressing each one down gently as you go.
- Drill the bucket. Make 10-12mm holes about 10cm apart in a staggered pattern over the sides, plus a few in the base for drainage. Twenty to thirty holes suits a 15 litre bucket.
- Pasteurise and cool the straw. Follow the steps above. Test the temperature with your hand: it should feel cool, not warm.
- Layer spawn and straw. With clean gloved hands, add 8-10cm of straw, scatter a handful of spawn, and repeat to the top. Press each layer down gently. Finish with straw.
- Keep it dark and warm. Pop the lid on loosely and leave the bucket somewhere dark at 18-24°C, such as an airing cupboard shelf or spare room.
- Wait for white. Over two to three weeks, white threads spread until the straw is bound into one solid, white mass.
- Start fruiting. Take the lid off, move the bucket into indirect light and somewhere cooler, ideally 12-18°C. Mist the holes two or three times a day.
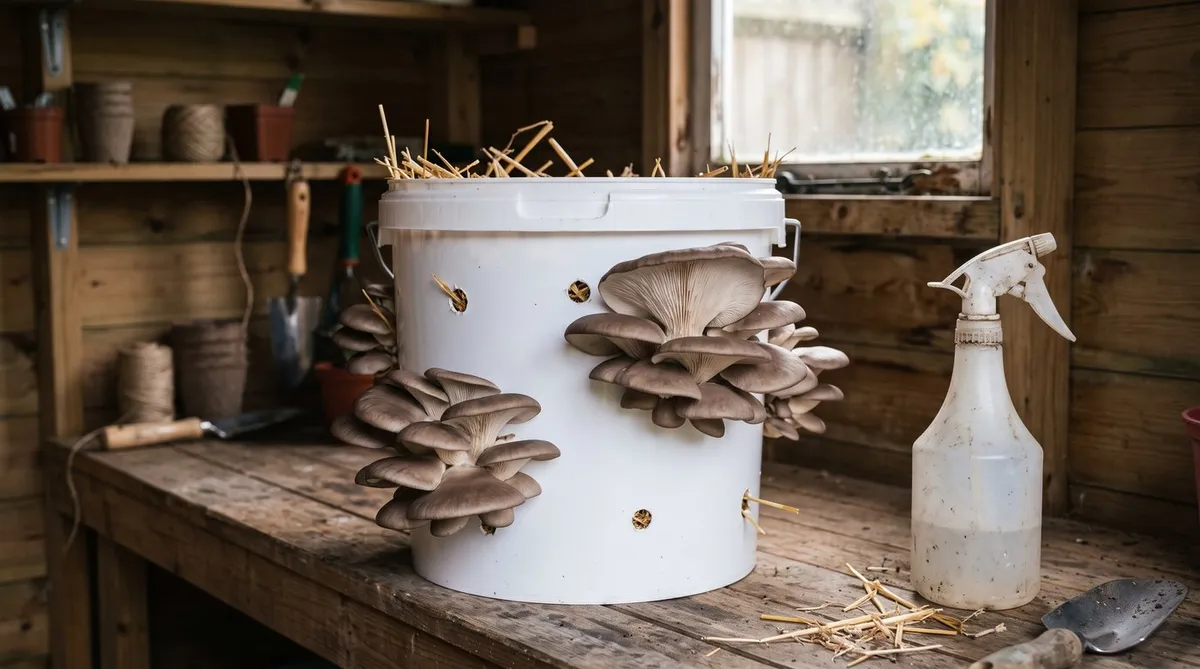
Tiny mushrooms, called pins, usually appear at the holes within about ten days.

Healthy straw turns bright white, like cotton wool binding it together. Any green or grey patches are a bad sign.
How to get oyster mushrooms to fruit
Fruiting needs four things together: moisture, fresh air, light and a cooler spot. Miss one and you’ll get no pins, dried-out caps or long thin stems.
- Moisture: mist the holes and the air around the bucket two or three times a day. Don’t let water pool inside.
- Fresh air: mushrooms breathe out carbon dioxide. Leave the lid off and give the room some airflow.
- Light: indirect daylight is plenty. Avoid direct sun, which dries the caps.
- Cooler air: a drop in temperature after the dark stage helps trigger pins.
Once pins appear, they grow quickly. Keep misting and check them every day.

Slightly cupped caps and crowded pale gills mean this cluster is ready. Another day or two and the edges start to curl.
When and how to harvest oyster mushrooms
Pick oyster mushrooms while the caps are still slightly cupped or just flattening. Wait until the edges curl up and the flesh toughens and drops clouds of white spores.
Twist the whole cluster off at the base rather than cutting individual mushrooms. That leaves no stub to rot.
Spores from mature oysters can irritate the lungs if you breathe a lot of them in a closed room. Picking on time, and growing somewhere with good ventilation, avoids the problem.

Give the whole cluster a gentle twist at the base. Picking before the caps flatten keeps the texture tender.
How many flushes will a bucket give?
Most buckets give two or three crops, called flushes. The first is the largest. After picking, rest the bucket for one to two weeks. Soak it in water for a few hours to rehydrate, drain, and start misting again. Each flush is smaller than the last. When the straw stops producing, it makes good material for the compost heap.
Growing oyster mushrooms on logs outdoors
Logs are the slow, hands-off option for a shady corner. They take a while to get going but can fruit for a few years.
Use freshly cut hardwood logs about 10-15cm thick and 1m long. Softer hardwoods such as beech, poplar, willow and birch suit oysters. Cut them in late winter, while the bark is tight, and use them within a few weeks.
Drill holes the size of your dowel spawn, about 4cm deep and 10-15cm apart in a diamond pattern. Tap a dowel into each hole and seal it with melted wax.

Tap each dowel in flush with the bark, then seal it with wax. That keeps moisture in and other fungi out.
Stack the logs off the ground in deep shade, where they’ll stay damp. Water them in dry spells. Colonising takes six to twelve months, and logs mostly fruit in autumn, sometimes in spring too. Soaking a log in a water butt for a day can help nudge it into fruiting.
Oyster mushroom growing calendar
Buckets can run all year indoors. Logs follow the seasons.
| Month | Task |
|---|---|
| January | Start grey oyster buckets in a frost-free room. Cut logs for spring |
| February | Plug fresh-cut logs with dowel spawn |
| March | Finish plugging logs. Keep indoor buckets going |
| April | Stack new logs in deep shade to colonise |
| May | Start pink or yellow oyster buckets in a warm spot |
| June | Water log stacks in dry spells. Run warm-loving types indoors |
| July | Keep summer buckets out of direct sun and well misted |
| August | Gather straw for autumn grey oyster batches |
| September | Start grey oyster buckets. Established logs may begin fruiting |
| October | Main log fruiting season. Soak sluggish logs |
| November | Move buckets somewhere frost-free. Pick the last log flushes |
| December | Keep indoor grey oyster buckets going |
Why your oyster mushrooms are failing
Most problems come down to contamination, dry air, stale air or too little light. Each leaves its own clue.
- Fuzzy green mould: this is Trichoderma, a competing fungus. The straw was under-pasteurised, too wet or still warm. There’s no fix. Bag it and bin it outdoors, away from other buckets.
- Dry, cracked caps: the air is too dry. Mist more often and keep the bucket away from radiators and draughts.
- Long thin stems, tiny caps: too much carbon dioxide or too little light. Leave the lid off, add holes and move it somewhere brighter.
- White bucket but no pins: fruiting hasn’t been triggered. Add light, fresh air, misting and a cooler spot.

Green mould means the batch is lost. Bag it straight away so the spores don’t drift onto your next bucket.
Common mistakes with oyster mushrooms
- Adding spawn to warm straw. Anything over 25°C stresses the spawn and helps moulds. Wait until it feels cool.
- Soggy straw. Waterlogged straw breeds bacteria. A hard squeeze should give only a few drops.
- Leaving the lid on after colonising. The mushrooms need fresh air to form properly.
- Picking too late. Flat, curled caps are tougher and shed spores everywhere.
- Dirty kit. Wipe tools, buckets and worktops clean before each batch.
How to store oyster mushrooms
Keep fresh oyster mushrooms in a paper bag in the fridge and eat them within a few days. Plastic bags trap moisture and turn them slimy.
For longer keeping, slice and dry them in a dehydrator or a very low oven until they snap. Store in an airtight jar and soak before cooking. You can also fry them and freeze them cooked, as raw mushrooms go watery when frozen.
Fancy more fresh food from indoors? See our ideas for winter vegetables to grow indoors, or browse more unusual crops to grow in the UK. The growing hub has plenty more.
Ready for a new challenge? Try our guide to growing lion’s mane mushrooms next.
Frequently asked questions
Are oyster mushrooms easy to grow at home?
Yes, they are the easiest mushroom to grow from scratch. The mycelium grows fast, so it beats most moulds to the straw. A bucket of pasteurised straw and a bag of grain spawn usually gives a first harvest in four to five weeks. They fruit happily at normal UK room temperatures.
What is the best substrate for oyster mushrooms?
Pasteurised wheat or barley straw is the best choice for beginners. It is cheap, holds moisture well and oyster mycelium spreads through it quickly. Plain cardboard and fresh coffee grounds also work in small batches. Hardwood sawdust is excellent but needs full sterilising, so leave it until later.
Do I need to sterilise the straw?
No, pasteurising is enough for straw. Hold chopped straw in hot water at 65-80°C for one to two hours. That knocks back moulds without needing a pressure cooker. Full sterilising is only needed for rich substrates such as grain or supplemented sawdust.
Why are my oyster mushrooms not fruiting?
Usually there is too little fresh air or light. Once the straw is fully white, take the lid off, move the bucket into indirect light and mist two or three times a day. A cooler spot helps too. Pins normally follow within a week or so.
How long do oyster mushrooms take to grow?
About four to five weeks from spawning to the first harvest. The straw takes two to three weeks to turn white. Pins then form within about ten days of moving the bucket into light. They grow fast and are ready a few days later.
What causes green mould on mushroom straw?
Green mould is Trichoderma, a competing fungus. It usually means the straw was not pasteurised well, was too wet, or was still warm when you added spawn. There is no cure, so bag the batch and bin it outdoors. Cool straw below 25°C next time.
Can you grow oyster mushrooms on coffee grounds?
Yes, in small batches with fresh grounds. Use grounds within a day of brewing and mix in roughly one part grain spawn to five parts grounds. Keep batches under about 1kg. Grounds sour quickly, so they suit a jar or bag more than a big bucket.
How many times will an oyster mushroom bucket fruit?
Most buckets give two or three flushes. The first is the biggest. Rest the bucket for one to two weeks after picking, soak it to rehydrate, and a smaller flush follows. After that, add the spent straw to the compost heap.
Our team produces practical UK gardening guidance from source research, contributor records and established horticultural practice. Editorial standards are overseen by Matt W.