Key takeaways
- A good UV-stabilised cover usually lasts around five years or more
- Mend small tears with clear repair tape on both sides, on a clean, dry cover
- A tight cover and secure anchors stop most storm damage
- Anti-hot-spot tape on the hoops stops the polythene wearing through
- Fit a new cover on a warm, still day so it tightens as it cools
A polytunnel needs a little care to keep going for years. Most of it is quick: patch tears early, keep the cover tight and check everything before winter.
This guide covers the jobs that stop small problems turning into big ones, how to mend tears and storm damage, and when it’s time for a new cover. For what to grow through the year, see our polytunnel calendar.
What damages a polytunnel cover?
Sunlight, wind, hot hoops and sharp objects. Most damage starts small, so it’s worth catching early.
- Sunlight slowly breaks down the plastic. The cover turns cloudy or yellow and becomes brittle. This is what eventually ends every cover’s life.
- Wind is the big one. If the cover is loose, wind gets underneath and lifts it, often tearing it at the base or around the doors.
- Hot hoops can wear through the polythene where it touches bare metal in summer sun. Anti-hot-spot tape on the hoops prevents this.
- Sharp objects such as falling branches, canes or tools can puncture it. These tears are usually easy to mend.
Your yearly polytunnel maintenance routine
Two good checks a year, in early spring and in autumn, catch most problems. Each takes an hour or so.
Clean the cover
Wash the cover inside and out each autumn, so your winter crops get as much light as possible. Use warm water with a little mild soap and a soft sponge or brush. Rinse with clean water. Pick a still, cloudy day and never use anything scratchy. Clear moss and algae from the base and seams too.

An autumn wash lets more winter light in. The cleaned strip shows how much grime builds up over a summer.
Check the tension
A tight cover lasts longer and handles wind better. Press the cover gently with a flat hand. It should feel firm, like a drum skin. If it flaps or pushes in easily, it needs tightening at the base rail or trench. Polythene loosens a little over time, so check every spring and autumn.
Check the hot-spot tape
Walk round inside and check the tape on every hoop. Replace any that has peeled or worn through, especially before summer.
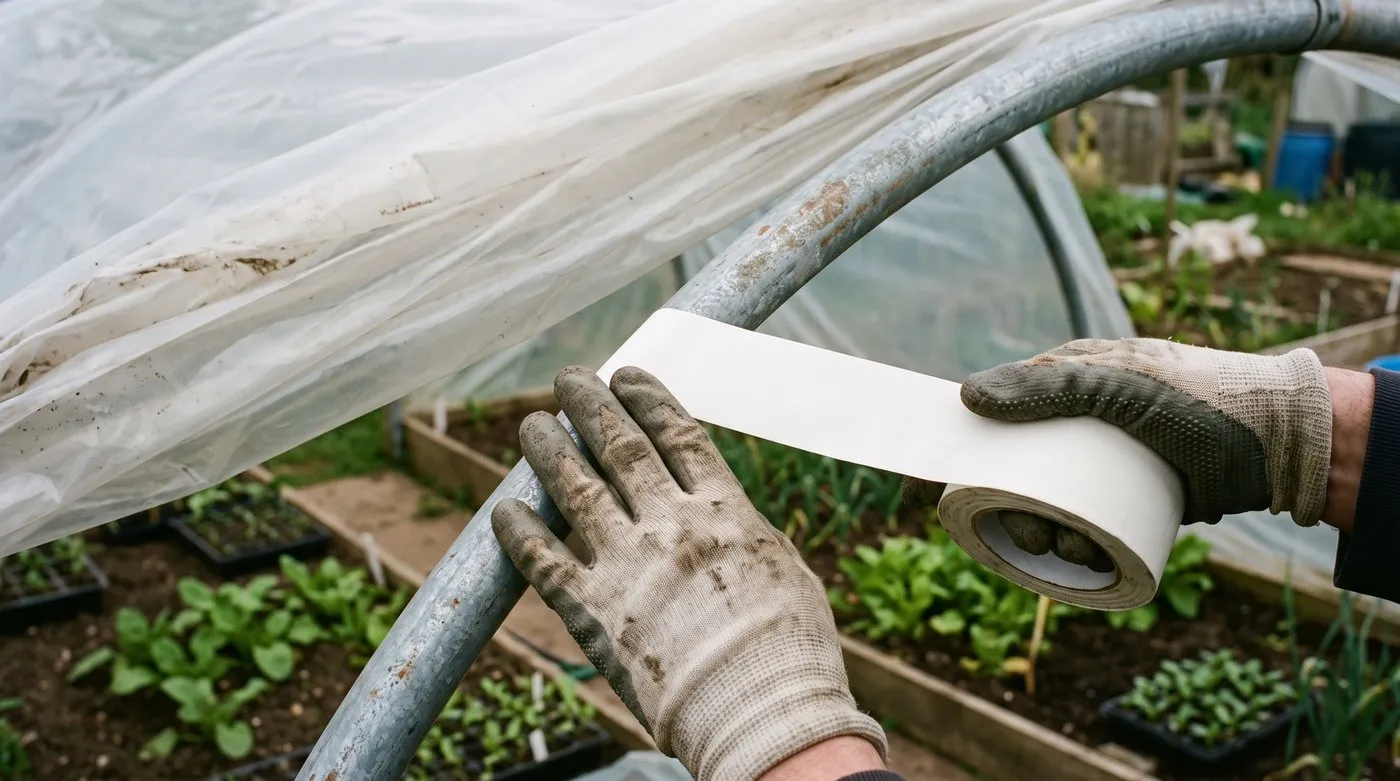
White tape on the hoops stops hot metal wearing through the polythene. Check it every spring before the sunny weather.
Check the doors and zips
Doors take a lot of wear. Make sure hinges are firm, sliding doors run freely and the door panels aren’t torn at the corners. Run zips on roll-up sides and doors, and replace any that stick before winter.
Check the anchors
Walk round the outside and check every ground anchor and base rail fixing. Frost and wet soil can loosen them over winter. Re-drive any that have lifted, and replace rusted ones.

Firm anchors and a tight base are what keep a tunnel in one piece through a gale. Check them every spring.
How to repair a small tear in a polytunnel
Mend small tears straight away with clear polythene repair tape. A small tear grows quickly once the wind gets hold of it.
- Wait for a dry day. Tape won’t stick to wet polythene.
- Clean both sides of the tear with soapy water, rinse and dry thoroughly.
- Cut the tape so it overlaps the tear by a few centimetres all round. Round the corners, as square ones peel.
- Stick it on the outside first, smoothing from the middle outwards to push out air bubbles.
- Put a matching piece on the inside. This is the step people skip, and it makes the repair far stronger.
- Press the edges down firmly and check them again the next day.
Keep a roll of repair tape and a piece of spare polythene in the shed. Then you can mend a tear the day you spot it.
Repairing larger tears and storm damage
For a bigger rip, cover it with a patch of spare polythene and tape all the edges, inside and out. Trim the torn edges first so there are no loose flaps. Repair tape and a spare offcut are all you need.
Damage around a door frame, at the base or across a large area is harder to fix well. A patch can get you through to a calm day, but you may need a new cover. Keep a piece of polythene from your last cover, as it makes the best patch material.

After a storm, check the doors, the base and around the hoops first. That’s where most damage starts.
How to protect a polytunnel from storms and snow
When strong winds are forecast, close and secure both doors. This stops wind getting inside and lifting the cover. Move pots, canes and anything loose that could blow into the polythene.

Brush snow off gently before it piles up. A soft broom from the ground does the job without harming the cover.
Check the base and anchors, and tighten any loose sections if there’s time. Stay away from the tunnel during the storm itself. Afterwards, check it and mend any small tears the same day. Our guide on securing a greenhouse in wind has more tips that work for tunnels too.
In snow, brush the outside gently with a soft broom before it builds up. A heavy load can bend the hoops.
When should you replace a polytunnel cover?
Replace the cover when it’s cloudy, yellow or brittle, or when new tears keep appearing. At that point repairs only buy a little time.
Signs it’s time for a new cover:
- Several new tears in a season, often in different places.
- Yellowing or haziness across much of the cover.
- A large tear across a whole section between hoops.
Order a replacement cut to your tunnel’s exact size. A UV-stabilised cover is a must, and thicker polythene generally lasts longer.
How to fit a new polytunnel cover
Fit a new cover on a warm, still day. Warm polythene stretches, so the cover tightens as it cools. Any wind makes the job very hard. You’ll need at least two people.
- Remove the old cover and keep a piece for future patches.
- Clean the hoops and replace any worn hot-spot tape.
- Unfold the new cover on the grass beside the tunnel.
- Pull it over the hoops from one side, keeping it square.
- Fix one long side into the trench or base rail.
- Pull the cover tight across and fix the other long side.
- Fix the ends, folding neat pleats at the corners.
- Refit the doors and check the tension all round.

Fitting a new cover is a two-person job for a calm, warm day. Warm plastic tightens up as it cools.
Polytunnel maintenance calendar
| Month | What to do |
|---|---|
| January to February | Check after storms. Brush off heavy snow |
| March | Spring check: tension, anchors and doors |
| April to May | Check hot-spot tape before summer. Mend any winter tears |
| June to August | Watch for new tears. A good time to fit a new cover |
| September | Check anchors and base before autumn gales |
| October | Clean the cover inside and out. Tighten it. Check zips |
| November to December | Stock up on repair tape. Check after every storm |
Common polytunnel maintenance mistakes
- Leaving small tears. They grow fast in wind. Mend them the same day.
- Taping a dirty cover. Tape won’t stick to algae or dust. Clean and dry it first.
- Taping one side only. Tape both sides for a repair that lasts.
- Fitting a cover on a windy day. Wait for a calm day, even if it means waiting a week.
- Leaving doors open in a gale. Wind inside can lift the whole cover.
If you’re still choosing a structure, our polytunnel vs greenhouse guide compares the two, and our guide to polytunnel planning permission covers the rules. Your fence probably needs the same post-storm check, so see our fence repair guide. For getting more from your space, read about polytunnel productivity, and find more practical projects in our how-to guides.
Frequently asked questions
How long does a polytunnel cover last in the UK?
Usually around five years or more for a good UV-stabilised cover. Thicker covers and good care help it last longer. Replace it when it turns cloudy or brittle, or tears keep appearing.
How do I repair a tear in my polytunnel?
Use clear polythene repair tape on both sides of the cover. Clean and dry the area first, and round the corners of the tape so it doesn’t peel. Pick a warm, dry day for the best grip.
How much does it cost to replace a polytunnel cover?
It depends mostly on the size of your tunnel and the thickness of the polythene. Thicker UV-stabilised covers cost more but last longer. Get quotes cut to your tunnel’s exact size.
What causes polytunnel wind damage?
Usually wind getting under a loose cover or through an open door. Slack edges at the base, worn door panels and unrepaired tears are the weak points. Keep the cover tight and doors shut in gales.
When should I replace my polytunnel cover?
When it turns yellow, cloudy or brittle, or tears keep appearing. Plan the job for a warm, still day in late spring or summer, before the autumn storms.
How do I protect a polytunnel from snow?
Brush heavy snow off the outside before it builds up. Use a soft broom from the ground, working from the sides. Snow sliding off the outside is fine, but a heavy load can bend the hoops.
Our team produces practical UK gardening guidance from source research, contributor records and established horticultural practice. Editorial standards are overseen by Matt W.