Key takeaways
- Hang tools on the wall, as tools on a damp floor rust much faster
- Wipe tools clean and dry before you put them away
- A bucket of sharp sand mixed with boiled linseed oil cleans and protects blades
- Sharpen secateurs every few weeks through summer
- Rub boiled linseed oil into wooden handles every autumn
- Keep the shed aired, as damp, still air is what makes tools rust
Look after your tools and they’ll last for many years. Leave them damp on the shed floor and they won’t. This guide covers how to lay out your shed and keep rust away. It also covers sharpening and the autumn jobs that see your kit safely through a British winter.
Three things matter most. Fresh air in the shed, tools hung on the wall, and a good clean-up at the end of October.
What goes where in an allotment shed
A typical 8x6 wooden shed has far more wall space than floor space. Use those walls.
Here’s a simple way to lay it out:
| Area | Where | What goes there |
|---|---|---|
| Long-handled tools | Back wall | Spade, fork, rake, hoe, edger, brooms |
| Hand tools | Side wall above the bench | Secateurs, trowel, weeder, dibber, scissors |
| Power tools | Side wall, low down | Strimmer, hedge cutter, drill, hose nozzle |
| Odds and ends | Floor, in a corner | Watering cans, kneeling pad, gloves |
| Workbench | Along a side wall | Sharpening, repairs, seed sowing |
| Shelf | Above the bench | Pots, feeds, seed boxes |
| Clear floor | Middle and doorway | Wheelbarrow, lawnmower, a stool |
The golden rule: if it can hang, hang it. Things on the floor get damp, attract mice and trip you up. Our allotment shed ideas have more ways to organise a small shed.
If you’re choosing a new shed for this kind of layout, the Wooden Sheds range from Greenhouse Stores includes 6x4, 8x6 and bigger sizes, some with installation. Check each listing for the details.
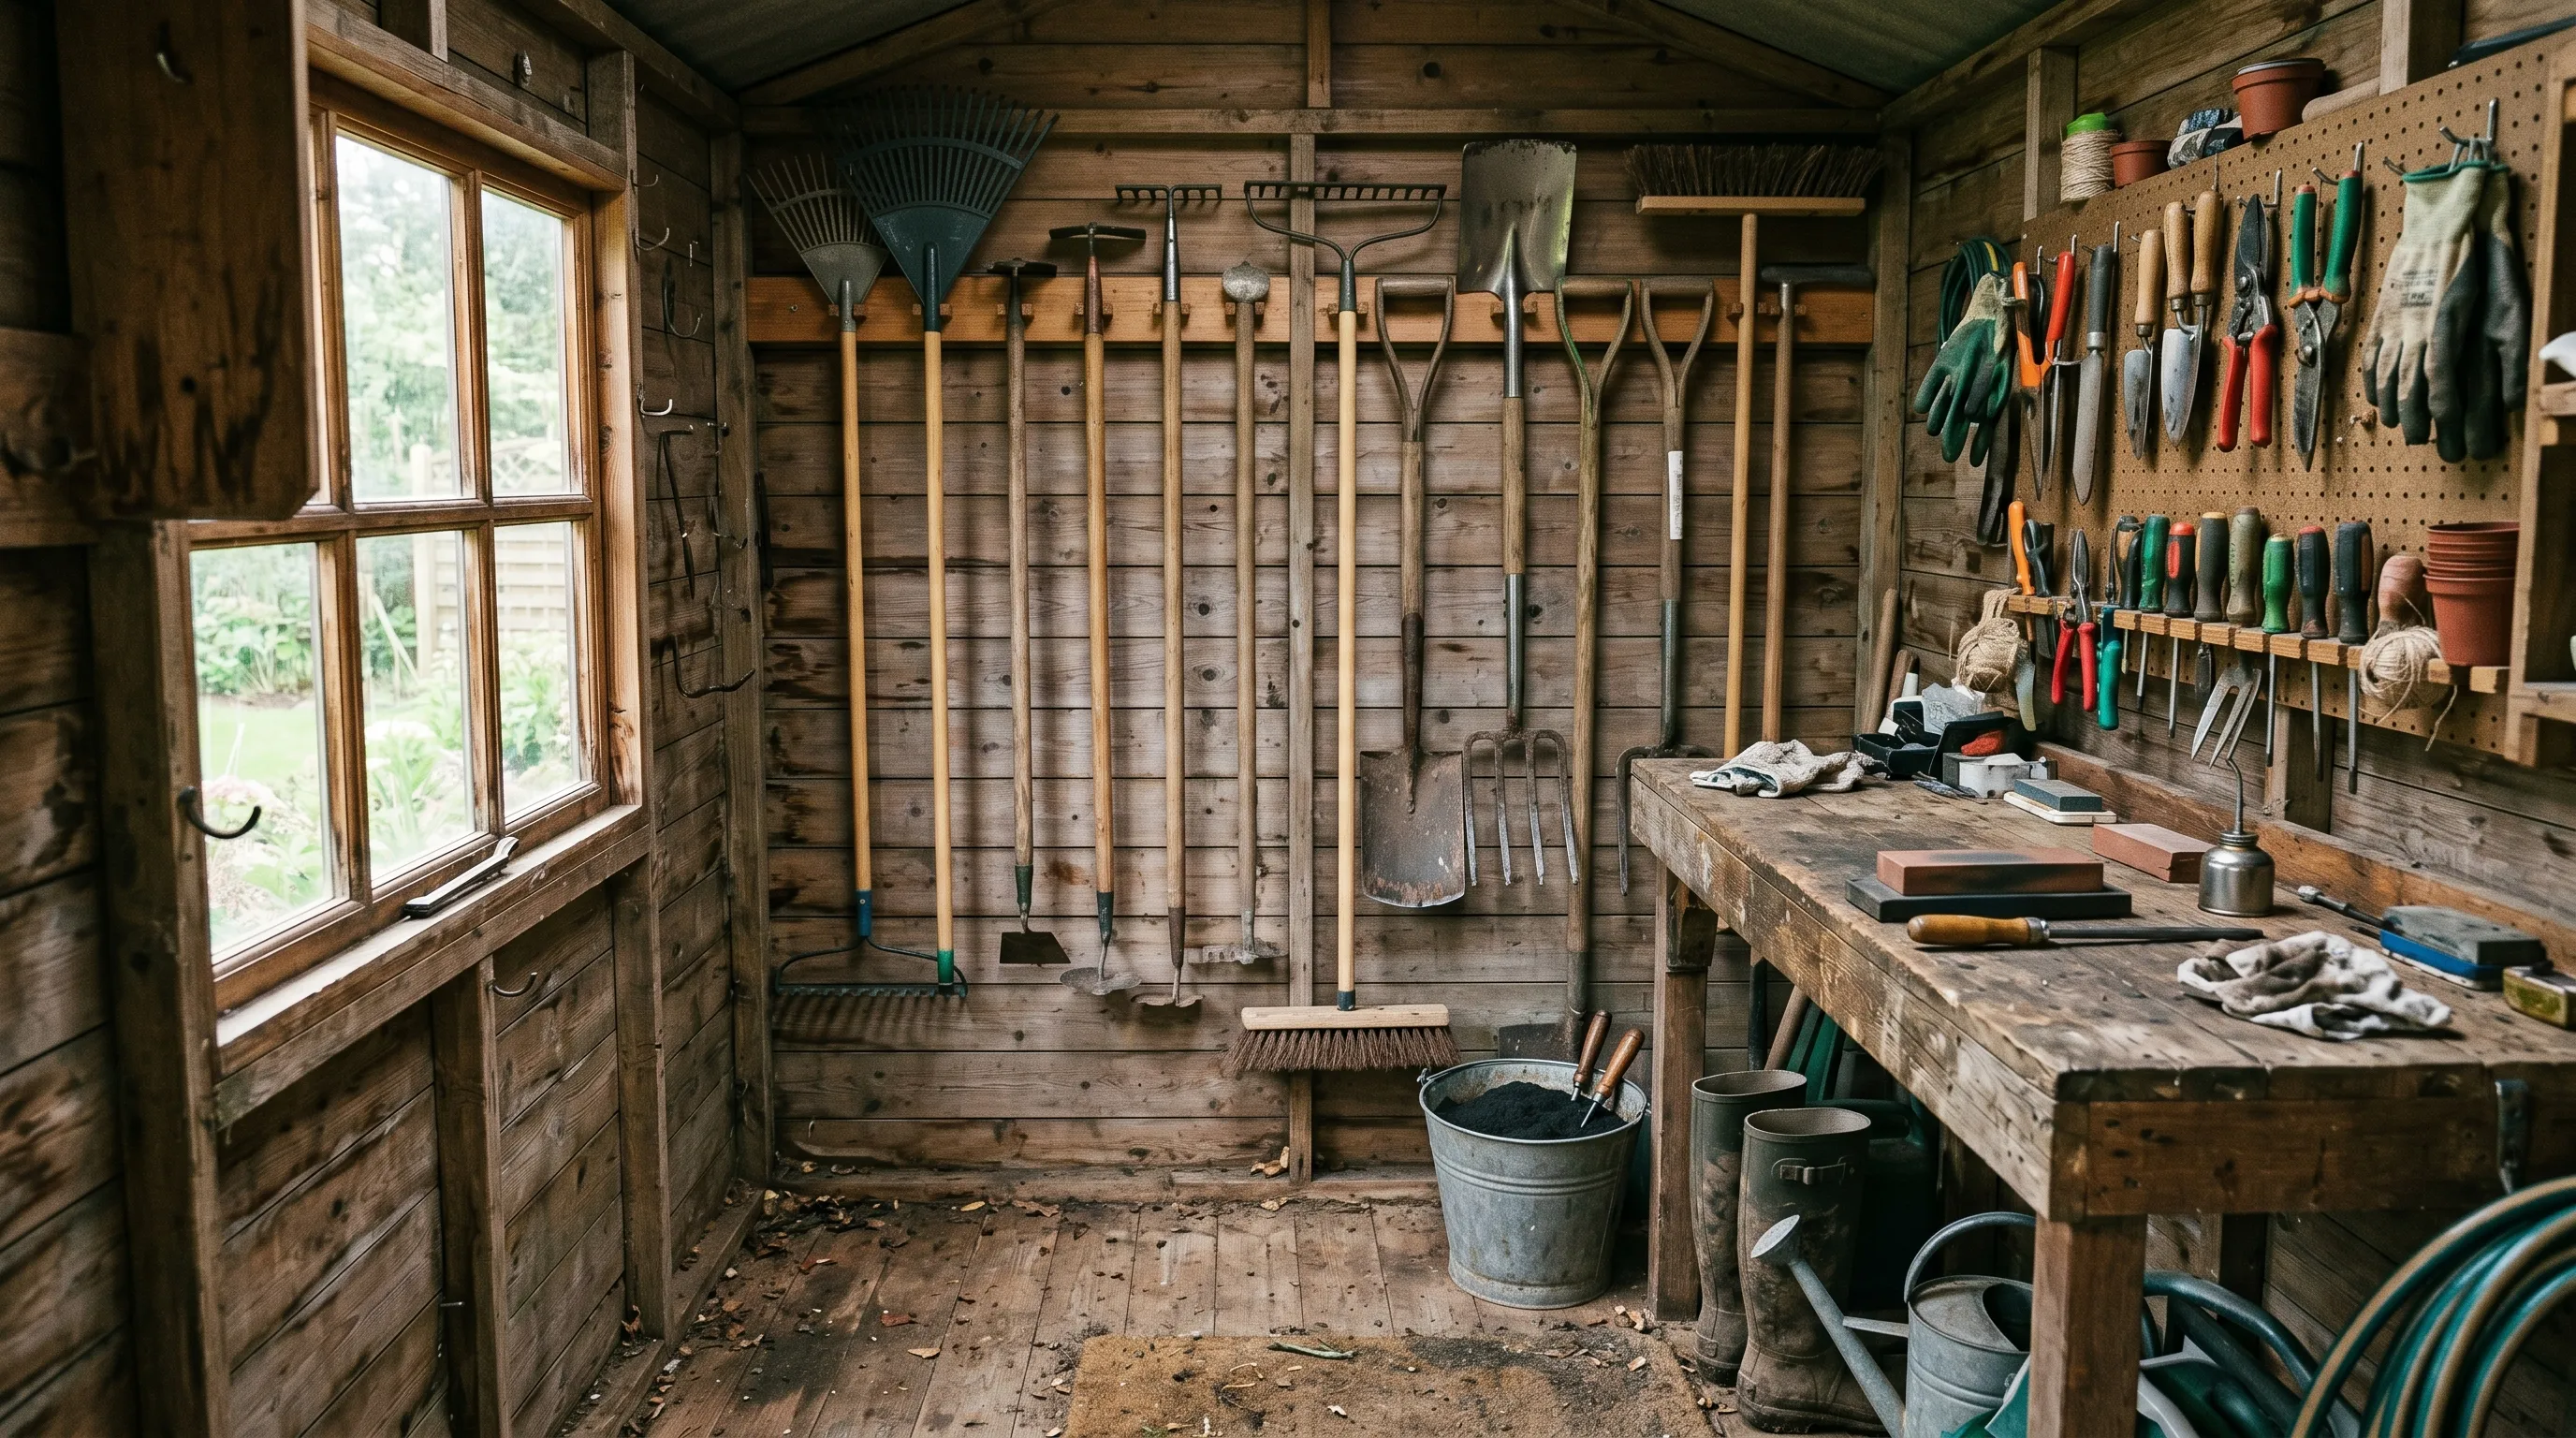 Long-handled tools on the back wall and hand tools above the bench keep the floor clear for the wheelbarrow and mower.
Wall mounting: the biggest improvement
Getting tools off the floor and onto the wall is the best thing you can do for them. It’s cheap and easy too.
What you need:
- A sheet of plywood to fix to the wall
- A set of metal tool hooks
- Wood screws
- A length of timber batten for shelf supports
Screw the plywood to the shed’s wall framing. You can then put hooks anywhere you like and move them around later.
Where to hang things:
- Long-handled tools: high enough that the handles don’t block windows or the door
- Hand tools: on a side wall, within easy reach of the bench
- Power tools: low down, so you don’t have to lift them far
- Hose and reel: on the wall nearest the door
- Spades and forks: blade-up, never tines-up, so nothing catches your clothes or hands
For awkward tools like loppers and long-reach pruners, use clips that hold the tool by its shaft.
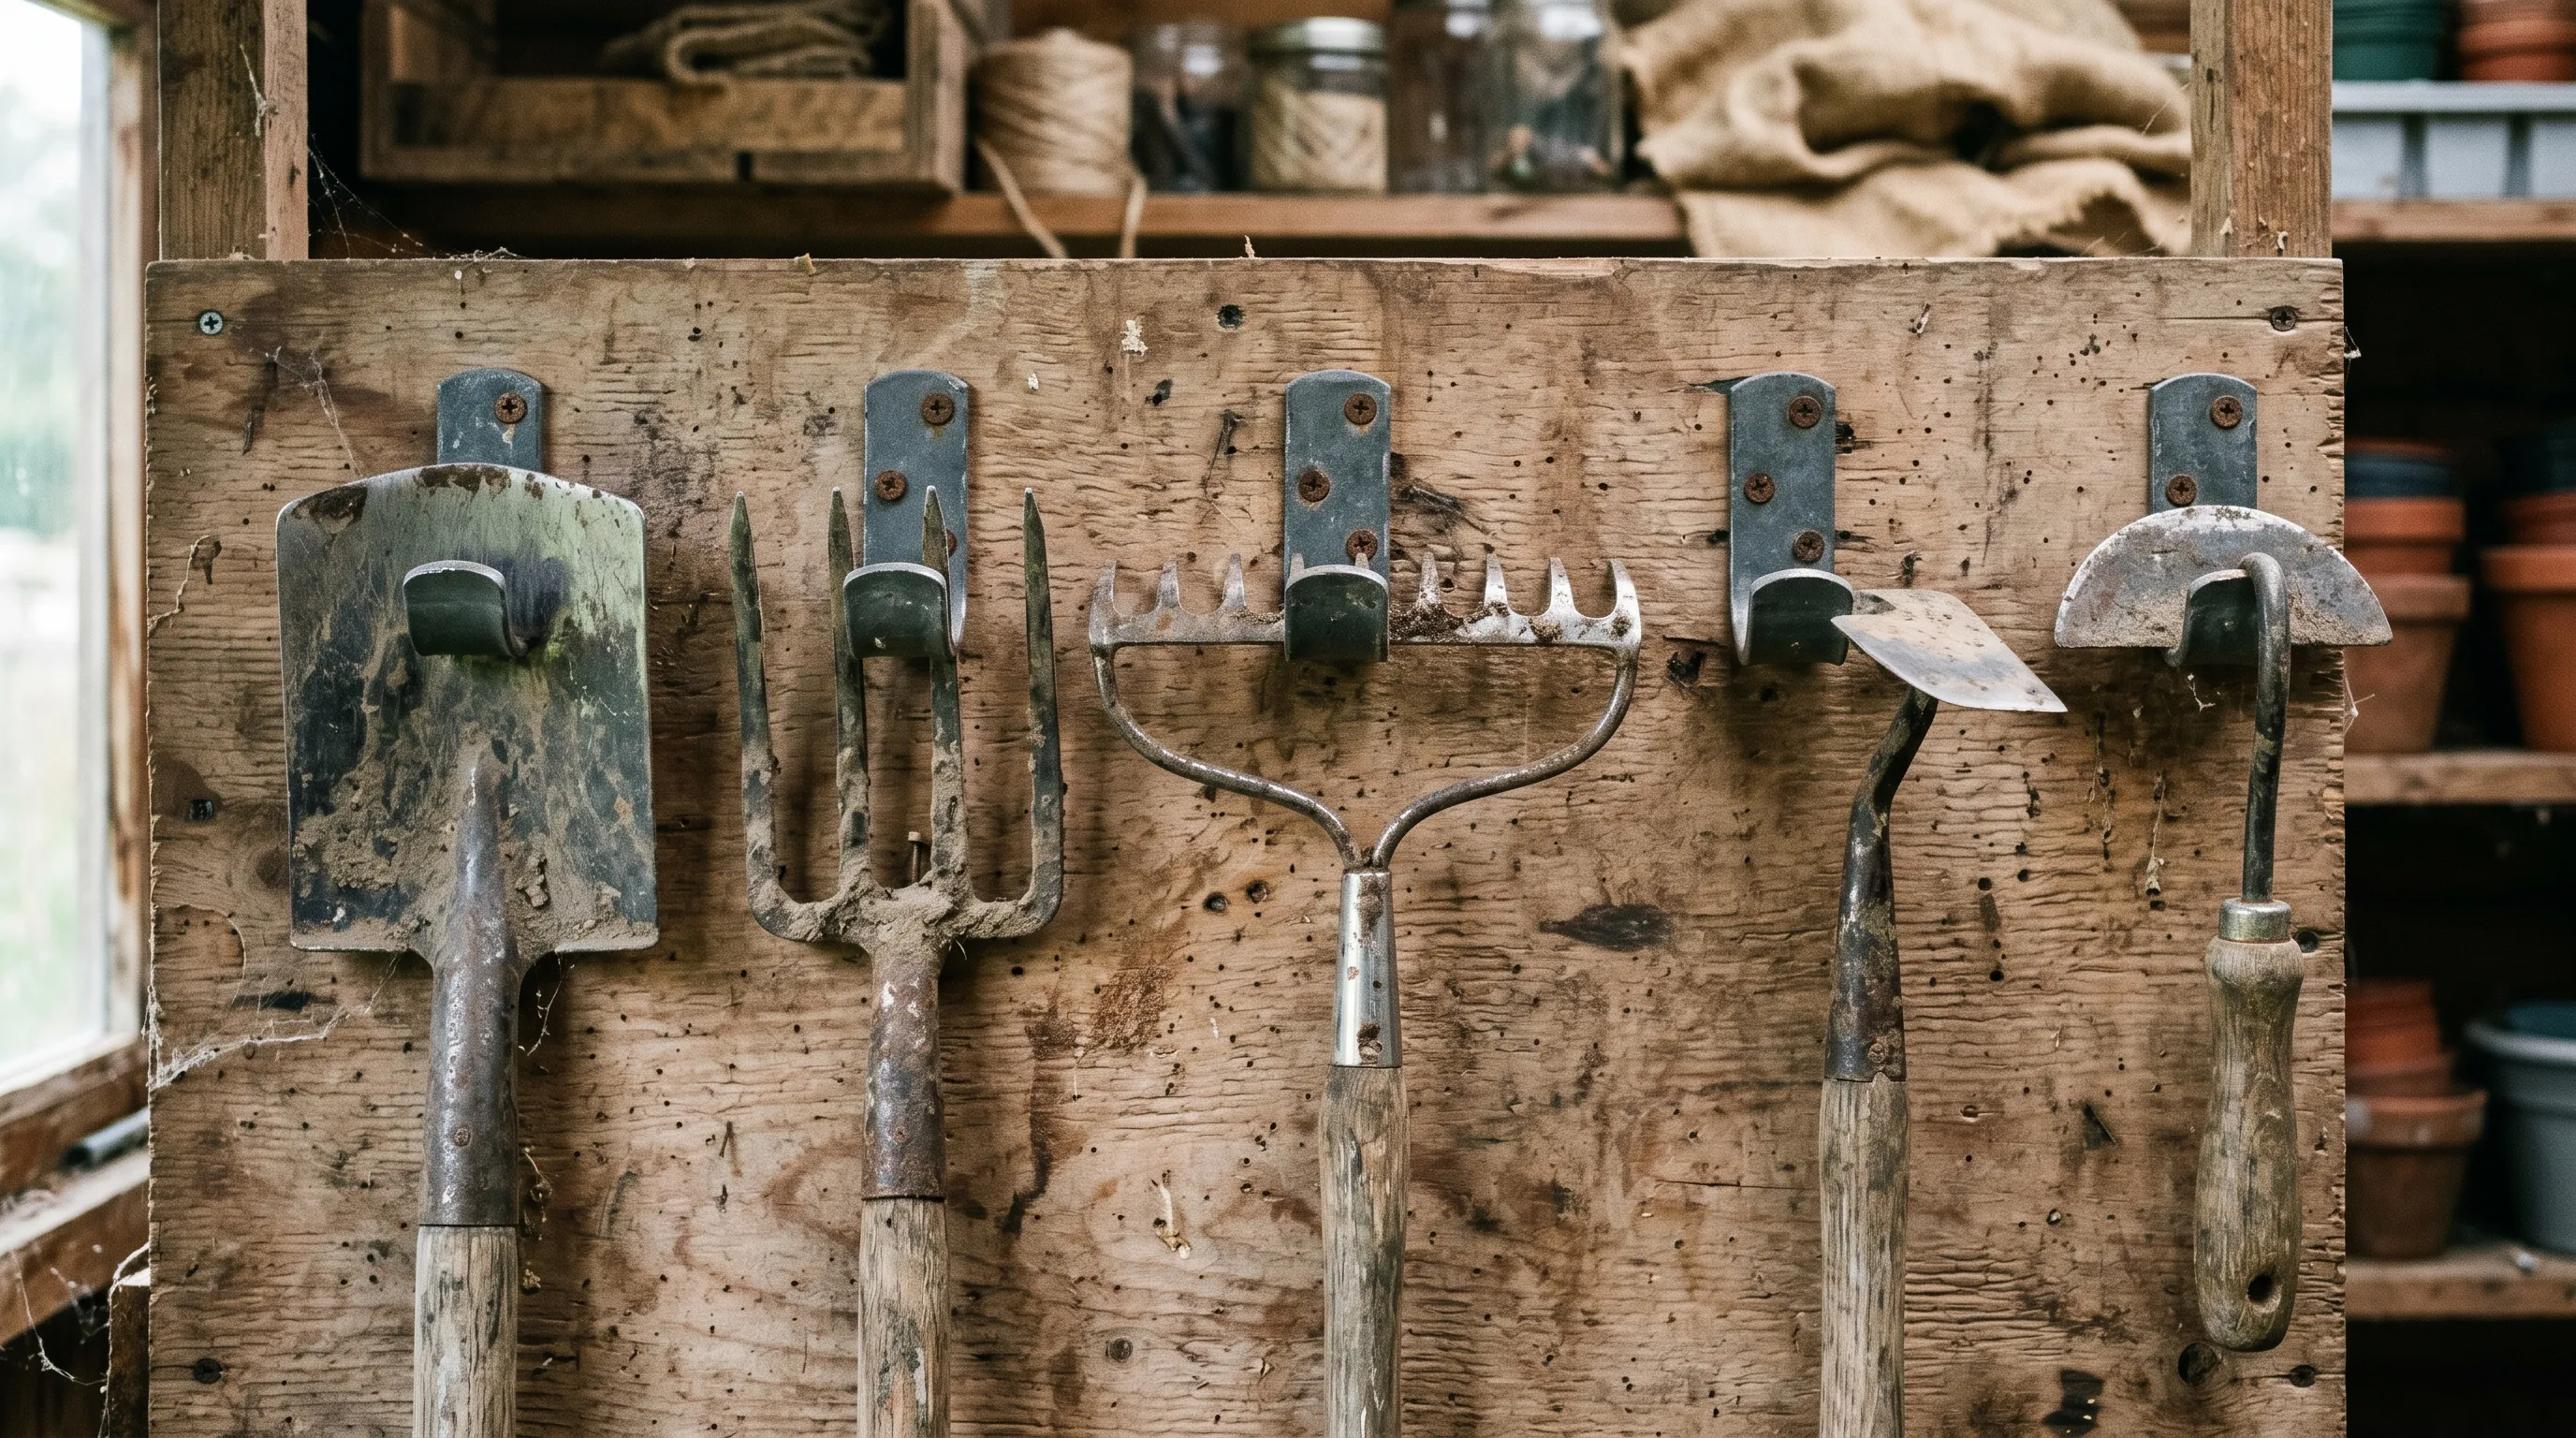 Long-handled tools hanging blade-up on a plywood board. Off the floor, they stay much drier.
The sand-and-oil bucket
The sand-and-oil bucket is an old gardener’s trick that still works brilliantly.
To make one:
- Take a sturdy bucket with a handle
- Fill it most of the way with sharp sand
- Add a good glug of boiled linseed oil
- Mix it well with a stick
Keep it near the door. After using a spade, fork, hoe or trowel, plunge the blade in a few times. The sand scrubs off the soil and the oil leaves a thin protective coat.
When the sand turns black and clogged, tip out half. Add fresh sand and a little more oil, then stir.
Why boiled linseed oil, not vegetable oil? Boiled linseed oil dries to a hard, protective film. Vegetable oil stays sticky, goes rancid and attracts mice.
One safety point: rags soaked in linseed oil can catch fire on their own as they dry. Lay used rags flat outside to dry, or soak them in water before putting them in the bin.
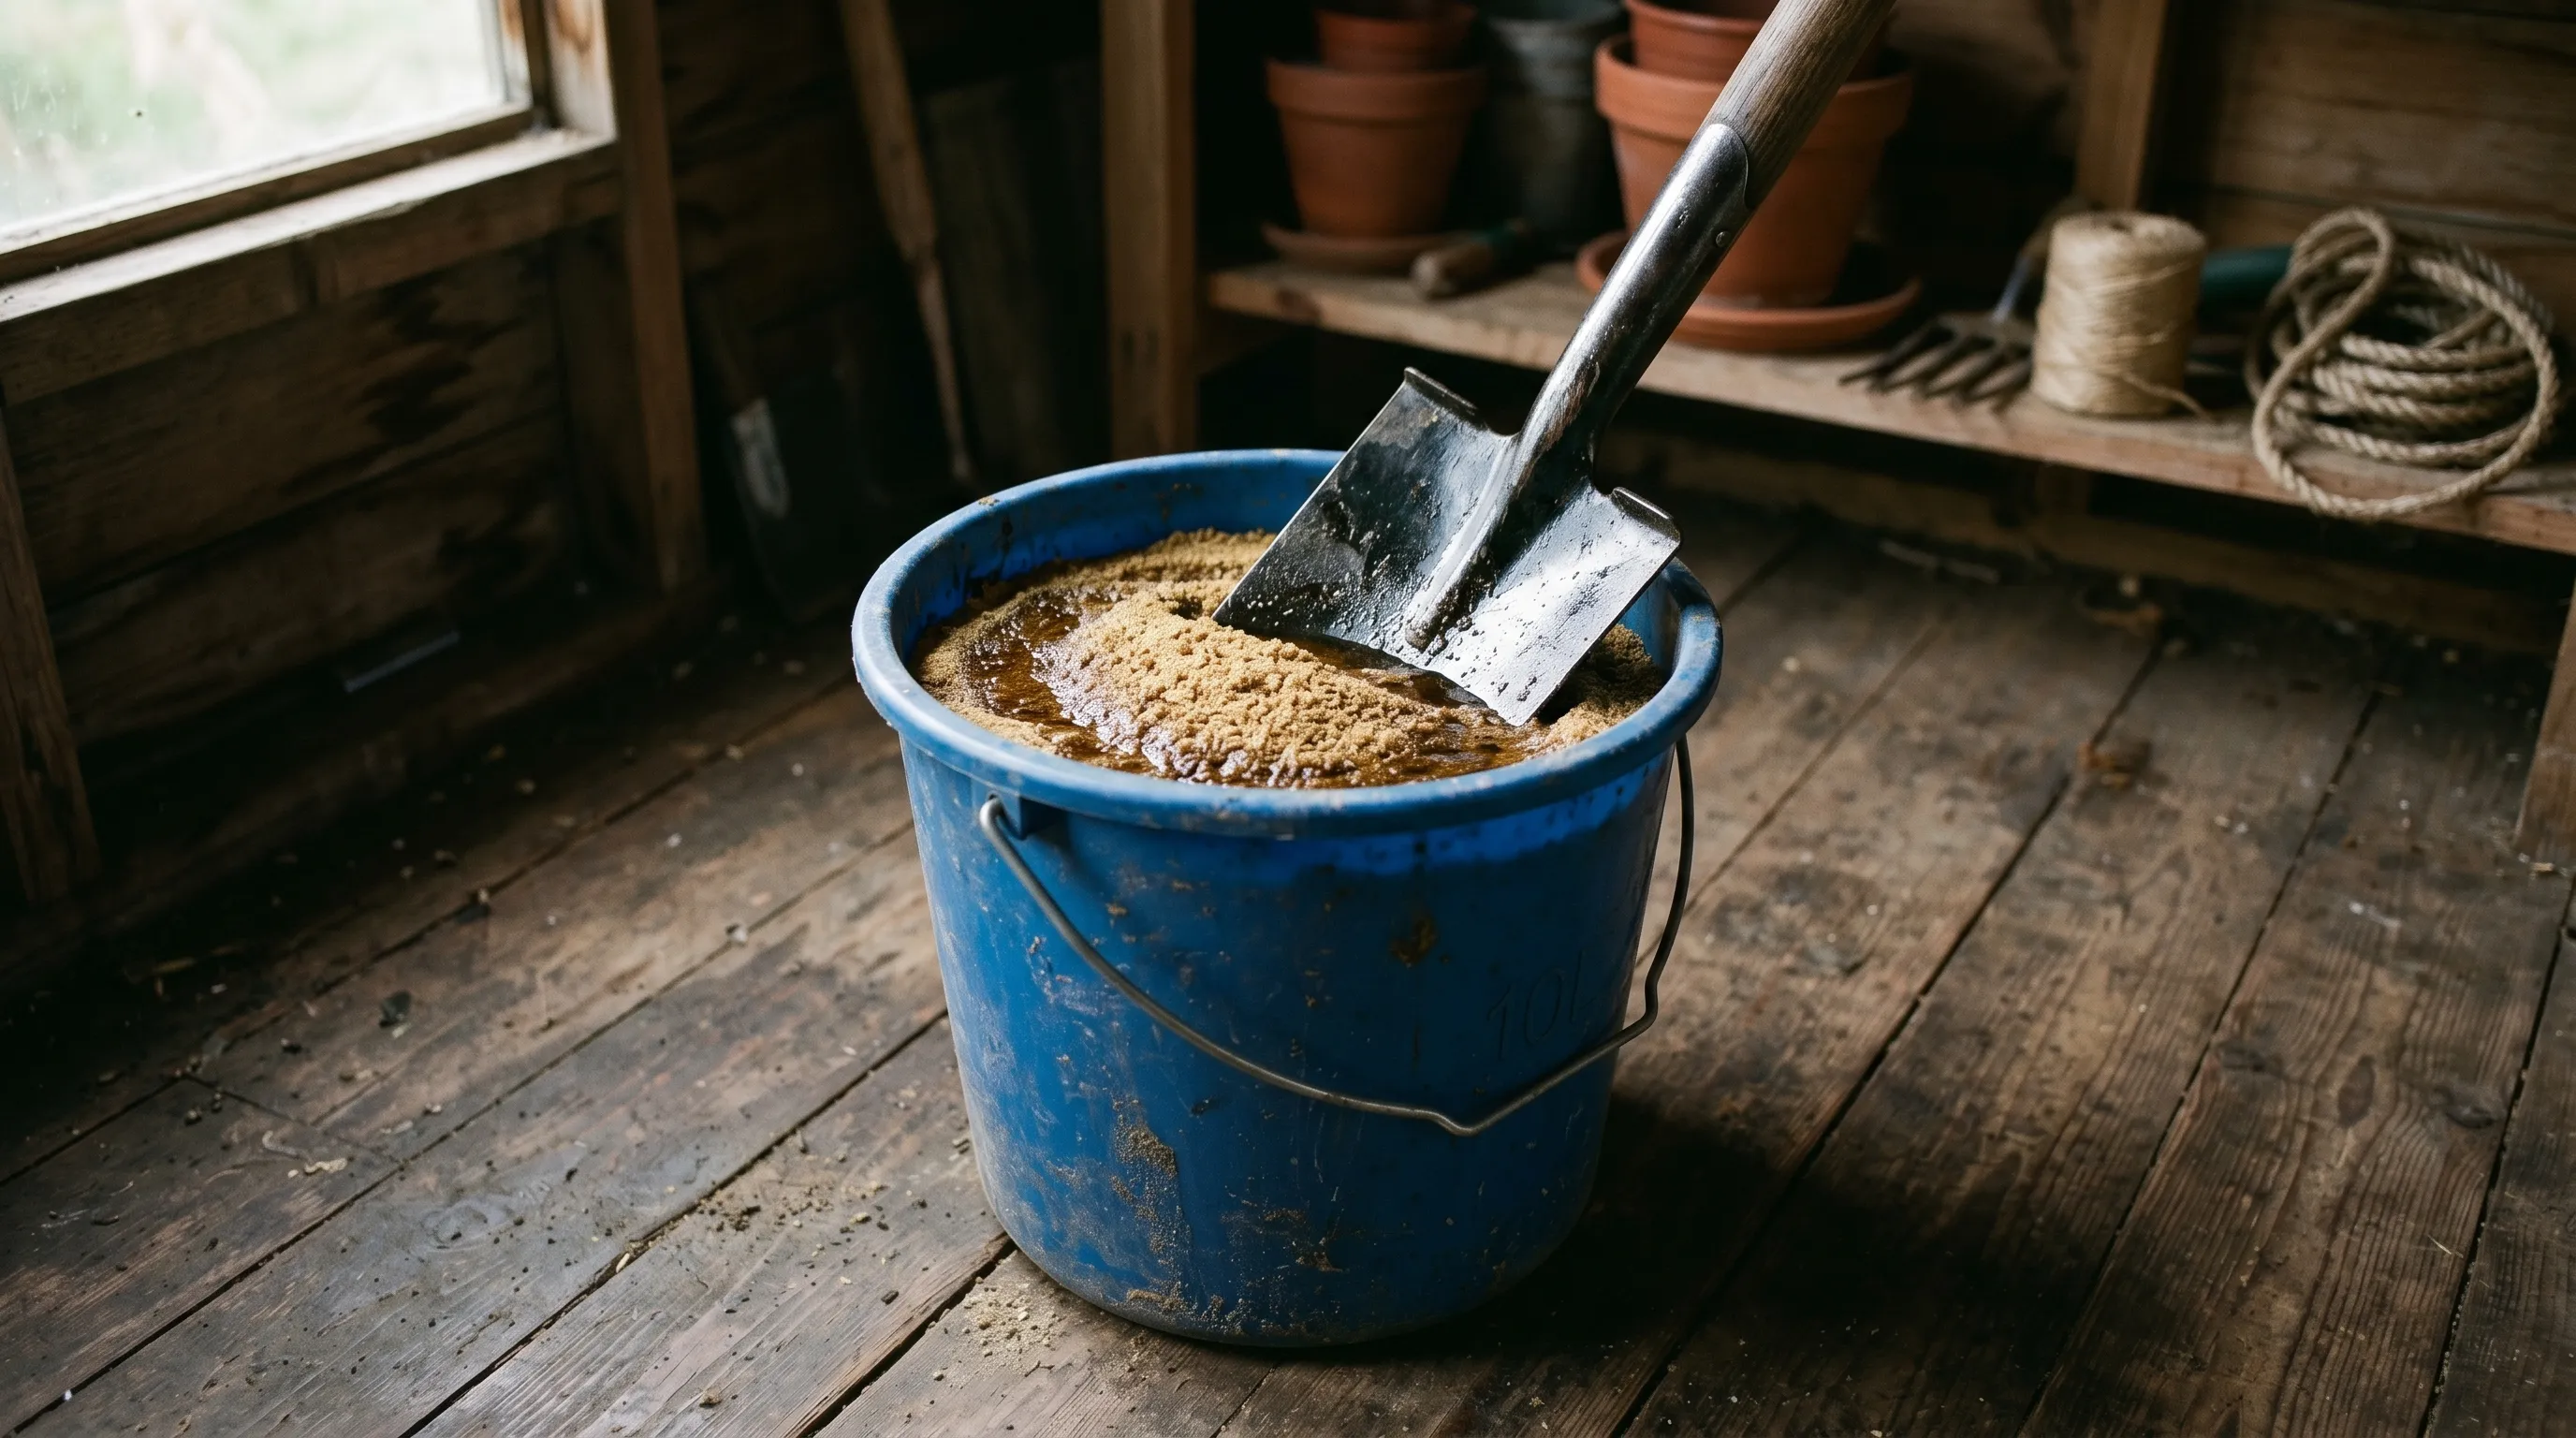 A sand-and-oil bucket. Plunge the blade in a few times after use to clean it and leave a thin coat of oil.
Sharpening: a quick, regular habit
Sharp tools cut cleanly, take less effort and are kinder to your wrists and shoulders. Here’s a simple routine:
| Tool | How often | What to use |
|---|---|---|
| Secateurs | Every few weeks in summer | Diamond file |
| Loppers | Monthly in summer | Diamond file |
| Shears | Before each big trim | Whetstone |
| Spade edge | Twice a year, spring and late summer | Flat file |
| Hoe edge | Monthly in the growing season | Flat file |
| Lawnmower blade | Once a year in spring | Have it sharpened and balanced |
| Garden knives | Often | Whetstone or diamond file |
A basic sharpening kit:
- A double-sided diamond file
- An oilstone (whetstone)
- A flat metal file
- A small round file
A good kit lasts for many years. Keep it in a tin or drawer by the bench. Our guide on how to sharpen garden tools takes you through each tool.
Sharpening secateurs is easy. Hold the file flat against the bevel at the same angle as the original edge. Push it along the edge in one direction only, a few times. Wipe the blade clean. Then test on a soft stem. A sharp blade cuts without crushing.
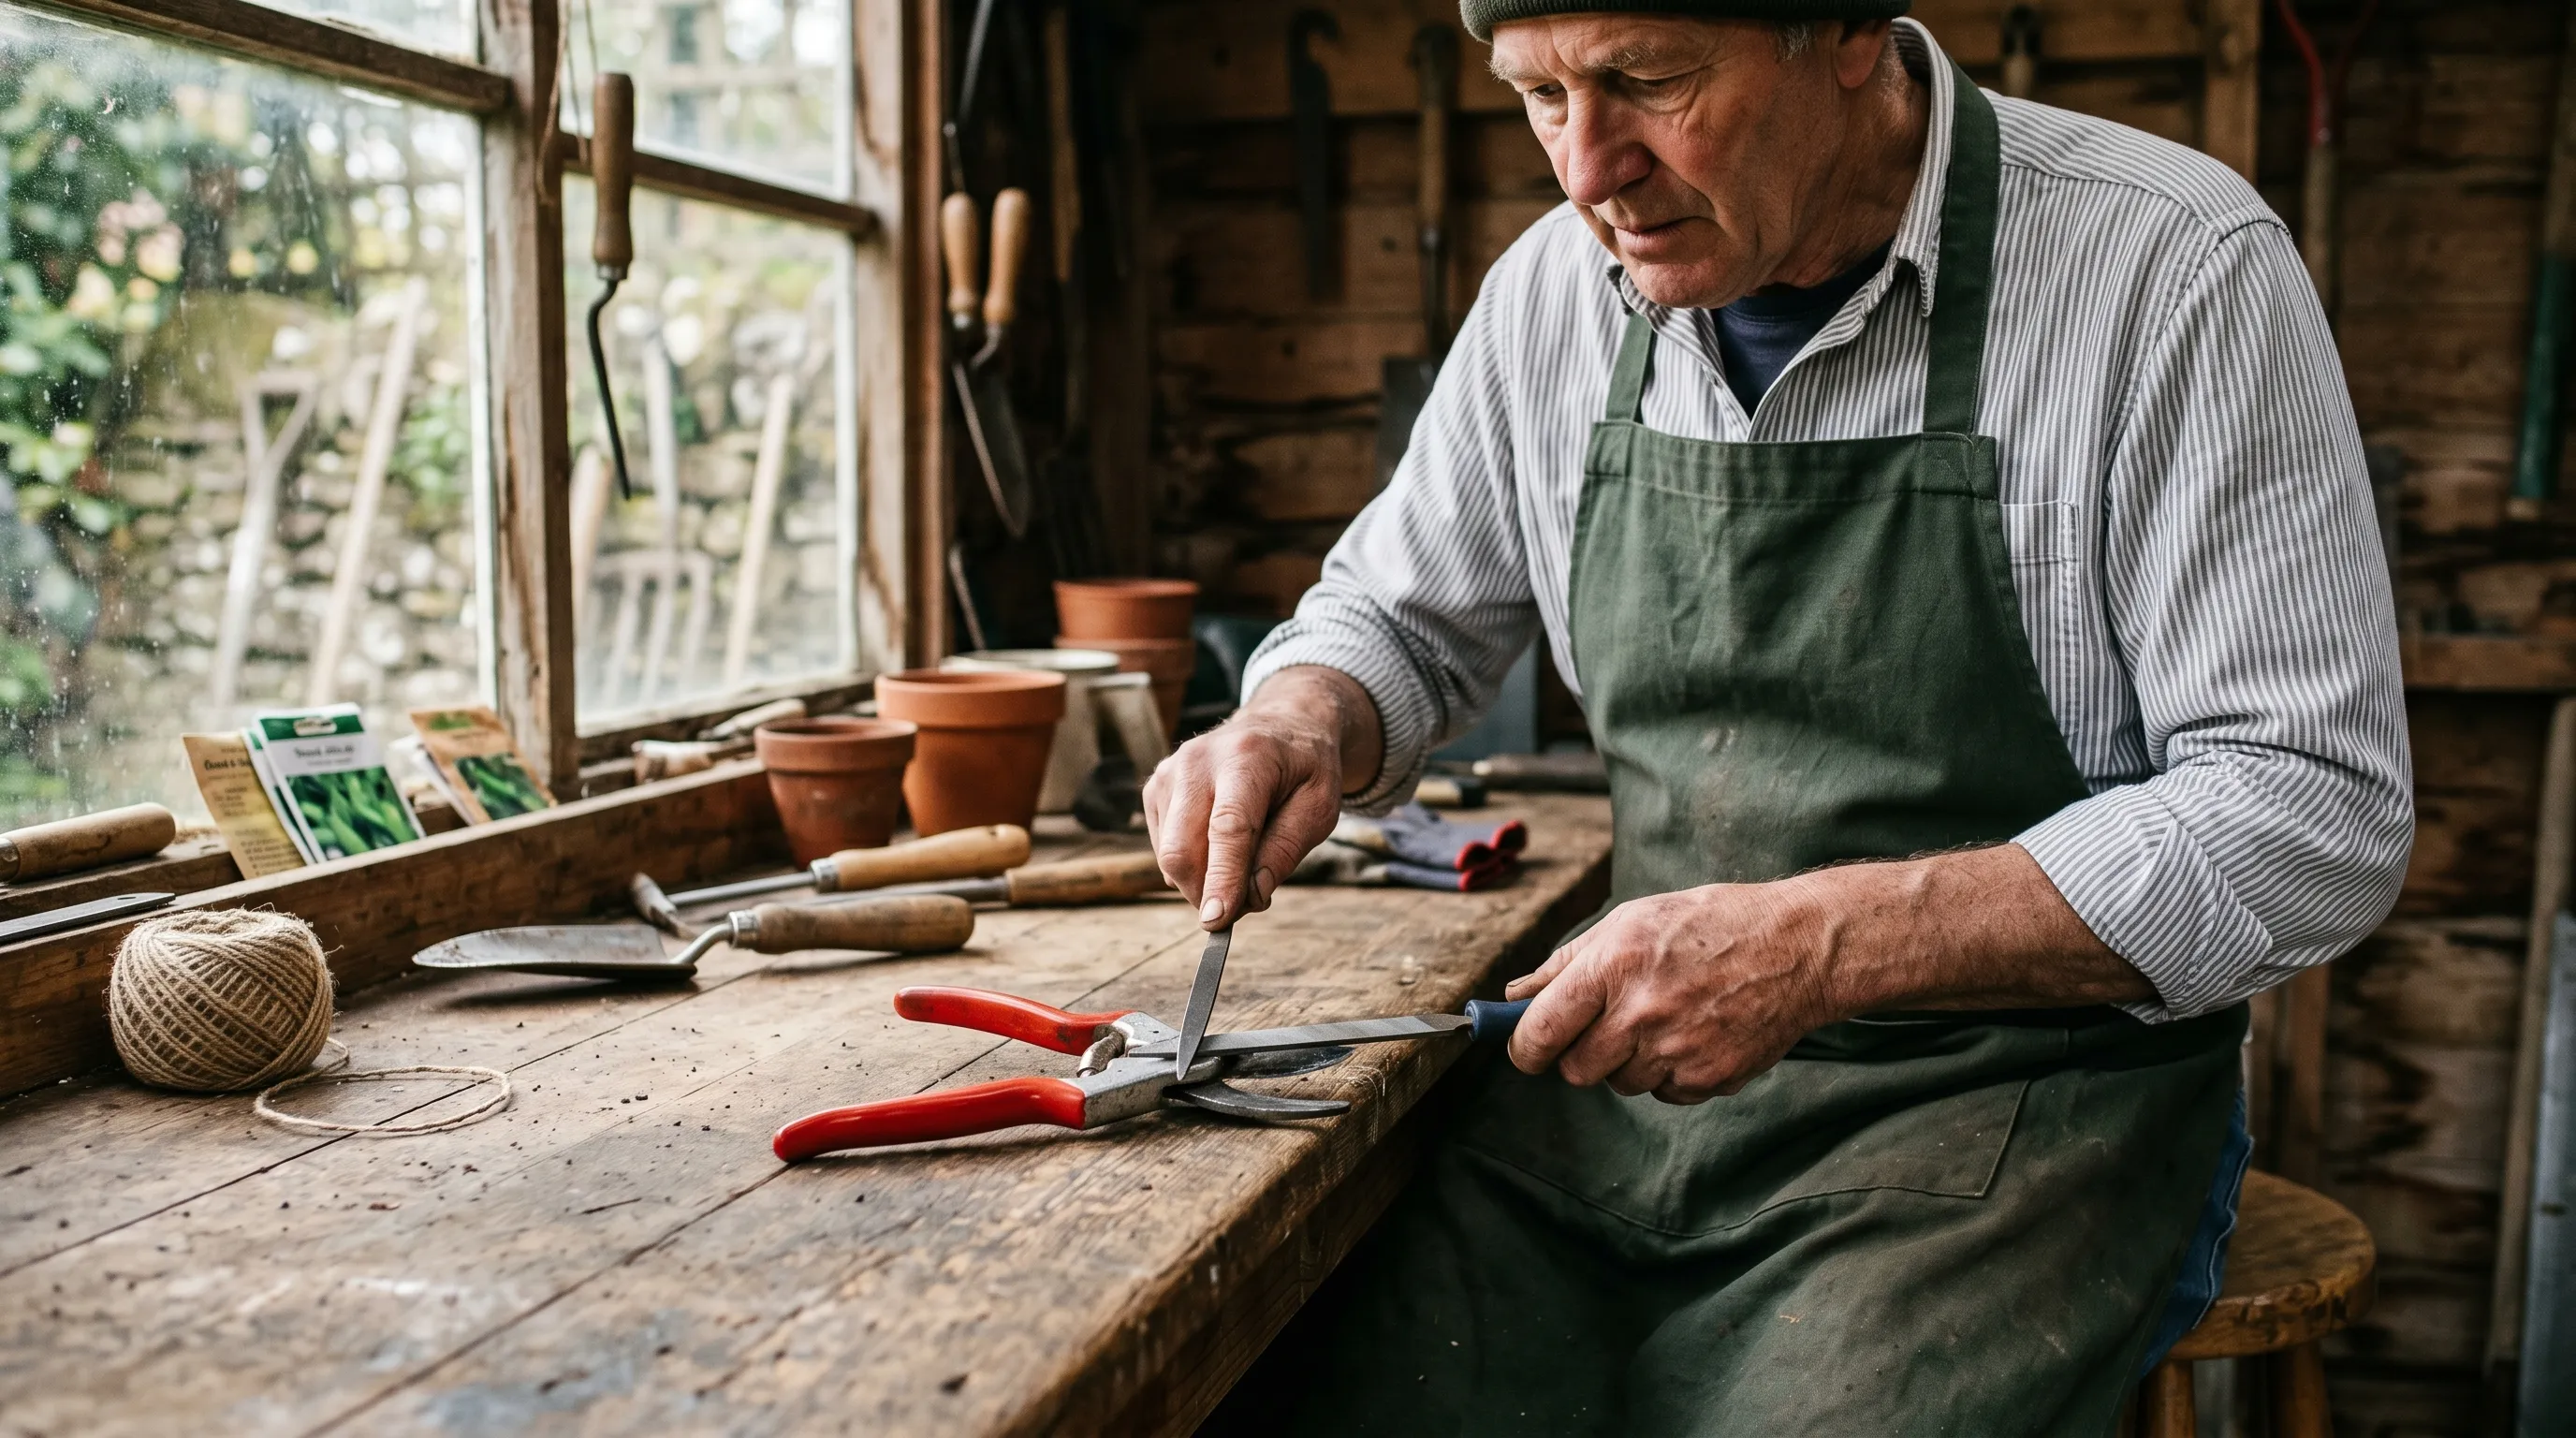 Sharpening secateurs with a diamond file. Follow the original angle and stroke in one direction.
Caring for wooden handles
British weather is hard on wooden handles. Left untreated, they dry out, split and splinter.
Once a year, in autumn:
- Wipe the handle clean with a damp cloth and let it dry
- Smooth any rough bits with fine sandpaper
- Rub in boiled linseed oil with a soft rag, along the grain
- Leave it to soak in for a little while
- Wipe off the excess
- Hang it up to dry for a day before using it
Remember to dry oily rags safely, as above.
Best avoided:
- Varnish, which peels with garden use
- Beeswax on its own, which rubs off quickly
- Raw linseed oil, which takes ages to dry. Make sure the label says “boiled”
 An autumn rub of boiled linseed oil, along the grain, keeps wooden handles from drying out and splitting.
Wooden, metal or plastic shed?
A wooden shed with a couple of vents is usually best for tools. Wood handles changes in damp better than metal or plastic. Two small vents at opposite ends keep air moving through.
Metal sheds suffer from condensation. Cold nights and warmer mornings leave water on every surface. Tools left unprotected soon rust.
Plastic sheds can trap still, damp air, which slowly rusts tools too.
If you’re after a wooden shed, the Greenhouse Stores wooden shed range has sizes from 6x4 upwards.
The October tool routine
The end of October is the most important time for tool care. Do it well and your tools are ready to go in March.
Your October checklist:
- Empty the shed. Lay everything out on a sheet on a dry day.
- Clean each tool. Wire-brush off soil and rust, wash off anything sticky and dry well.
- Sharpen every cutting edge.
- Plunge every blade into the sand-and-oil bucket.
- Oil every wooden handle.
- Wax bare metal, like the backs of spades and fork tines.
- Check the shed. Clear cobwebs, look for signs of mice and fix any damp patches.
- Check the vents are clear.
- Hang everything back up. Nothing on the floor.
- Make a list of anything to replace in spring.
It’s a good afternoon’s work, and well worth it.
Common tool storage mistakes
Putting tools away wet. Even one damp evening starts rust. Always wipe them dry before hanging.
Sealing the shed up for winter. No airflow means damp, and damp means rust. Open a vent or the door now and then through winter.
Leaving tools on the floor. Damp rises from concrete and earth floors. Hang them up instead.
Never sharpening. Blunt tools are hard work and tough on your wrists. A few minutes with a file saves a lot of effort.
Using vegetable oil. It goes rancid and attracts mice. Use boiled linseed oil.
For a new shed or other garden buildings, see the Greenhouse Stores Wooden Sheds range. The Greenhouse Stores homepage also has greenhouses and accessories.
Tool storage calendar month by month
| Month | Job |
|---|---|
| January | Check the shed for winter damage and mice |
| February | Sharpen spade and hoe before spring |
| March | Get the mower blade sharpened. Give everything a once-over |
| April | Top up the sand-and-oil bucket |
| May | Replace any damaged handles |
| June | Sharpen secateurs and loppers |
| July | Keep sharpening secateurs every few weeks |
| August | Sharpen spade and hoe again |
| September | Start clearing the shed. Check the vents |
| October | The big clean-up. Oil all the handles |
| November | Last wipe-down before winter |
| December | Open the shed now and then to let air through |
Frequently asked questions
What size shed do I need for UK garden tools?
A 6x4 shed suits most home gardens. It fits a spade, fork, rake, hoe, wheelbarrow, hand tools and a mower. An 8x6 fits a bigger allotment kit plus a workbench. For a large garden with lots of kit, go bigger.
Should I store garden tools in a wooden, metal or plastic shed?
A wooden shed with a couple of vents is usually best. Metal sheds get lots of condensation, which rusts tools. Plastic sheds can trap still, damp air. Wood copes with damp better.
How do you prevent garden tools from rusting in winter?
Wipe them dry and hang them on the wall. Keep air moving with two small vents at opposite ends of the shed. Plunge blades into a sand-and-oil bucket after use. Wax bare metal in October.
How often should I sharpen garden tools?
Secateurs every few weeks through summer. Sharpen spade and hoe edges twice a year, and the mower blade once a year in spring. Sharpen shears before each big trim. Sharp tools are easier on your wrists and shoulders.
What is a sand-and-oil bucket and why use it?
It’s a bucket of sharp sand mixed with boiled linseed oil. Plunge spade, fork, hoe and trowel blades into it after use. The sand scrubs off soil and the oil leaves a thin coat that helps stop rust.
Now plan the wider garden setup around the shed
With your tools sorted, it’s a great time to think about the rest of the shed. Our allotment shed ideas are full of tips for shelves, seed storage and potting space.
Our team produces practical UK gardening guidance from source research, contributor records and established horticultural practice. Editorial standards are overseen by Matt W.