Key takeaways
- Do the winter tool clean-up on a dry day in late October or November
- Get every bit of soil off, then dry tools fully, as damp soil against steel causes rust
- Shift light rust with an overnight soak in white vinegar, then dry and oil straight away
- Wipe metal with light oil and rub linseed oil into wooden handles
- Bring cordless tool batteries indoors and drain hoses before the frosts
- Hang tools off the floor in a shed with some airflow
Putting garden tools away clean, dry and oiled is the best way to stop winter rust. An afternoon in late autumn means your spades, secateurs and mower are ready to go in spring.
This guide is the end-of-season routine: cleaning, fixing rust, sharpening, oiling, and putting away power tools and hoses. For the best way to lay out the shed itself, see the guide to garden tool storage.
When to put garden tools away for winter
Late October or November suits most of the UK. The leaves are down, the last mowing is done and the hard frosts haven’t arrived yet. In northern England and Scotland, aim for late October.
Pick a dry spell. Tools need to dry fully after cleaning before they go in the shed. A spade put away damp will be rusty by spring, however well you do everything else.
You don’t need to do every tool at once. Clean each one properly the last time you use it, and the big session becomes a quick oil and hang.
Step 1: Clean off soil and sap
Soil left on a blade holds damp against the steel and starts rust. Getting it all off is the most important step.
- Knock off the worst of the caked mud against a paving slab or a log.
- Scrub what’s left with a stiff wire brush. Pay attention to where the blade meets the handle, as soil collects there.
- Clean sticky sap off secateurs, loppers and shears with warm soapy water and an old scourer.
- Dry everything thoroughly with an old towel, especially the pivot and spring on cutting tools.
Leave the tools somewhere warm and dry for an hour before you oil them.

Get every bit of mud off first. Soil left on the steel holds damp against it all winter.
Step 2: Remove rust
Light surface rust comes off easily with a kitchen-cupboard soak. Deep pitting is harder to fix.
- Soak the rusty part overnight in a bucket of white vinegar. Citric acid dissolved in warm water works too and smells less.
- Scrub with a wire brush or wire wool to lift the loosened rust.
- Rinse and dry thoroughly.
- Oil straight away. Freshly cleaned bare steel can rust again within hours.
Wear gloves for the scrubbing. If a blade is deeply pitted or the metal is cracked near the handle, it’s time to replace it rather than restore it.

An overnight soak loosens light rust so it scrubs off easily. Oil the tools as soon as they’re dry.
Step 3: Sharpen the cutting edges
Winter is a good time to sharpen, so everything is ready for spring pruning and digging. Sharp tools are easier on your wrists and make cleaner cuts on plants.
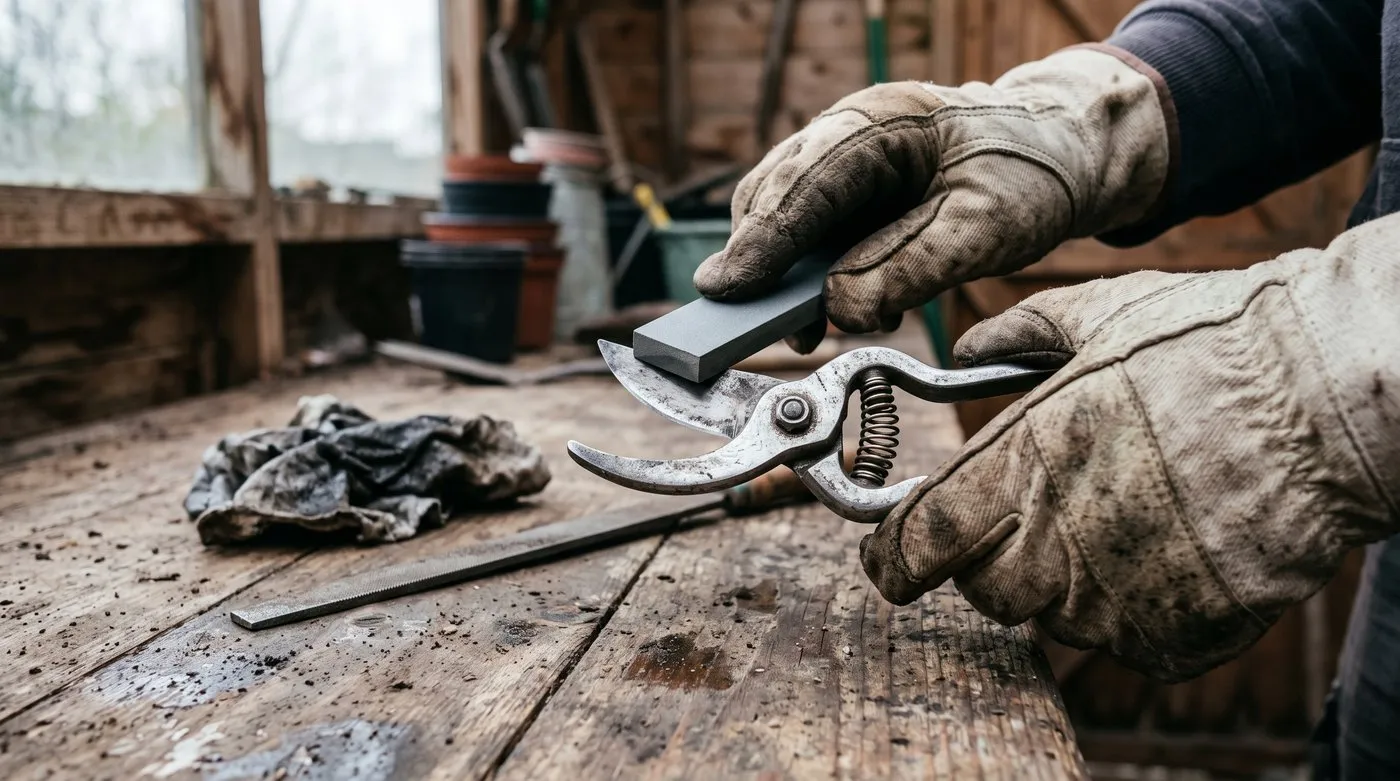
Run the stone along the bevelled edge only and keep the flat side flat. A few strokes make a big difference.
- Spades and hoes: run a flat file along the existing bevel, pushing away from you.
- Secateurs and shears: use a small sharpening stone along the bevelled edge only. Keep the flat side flat.
- Loppers: same as secateurs.
Follow the angle the maker gave the edge, rather than making a new one. The guide on how to sharpen garden tools shows each tool step by step. If your secateurs are past saving, the round-up of the best secateurs can help you choose new ones.
Step 4: Oil blades and handles
Oil keeps damp off the metal and stops wooden handles drying out and splitting.
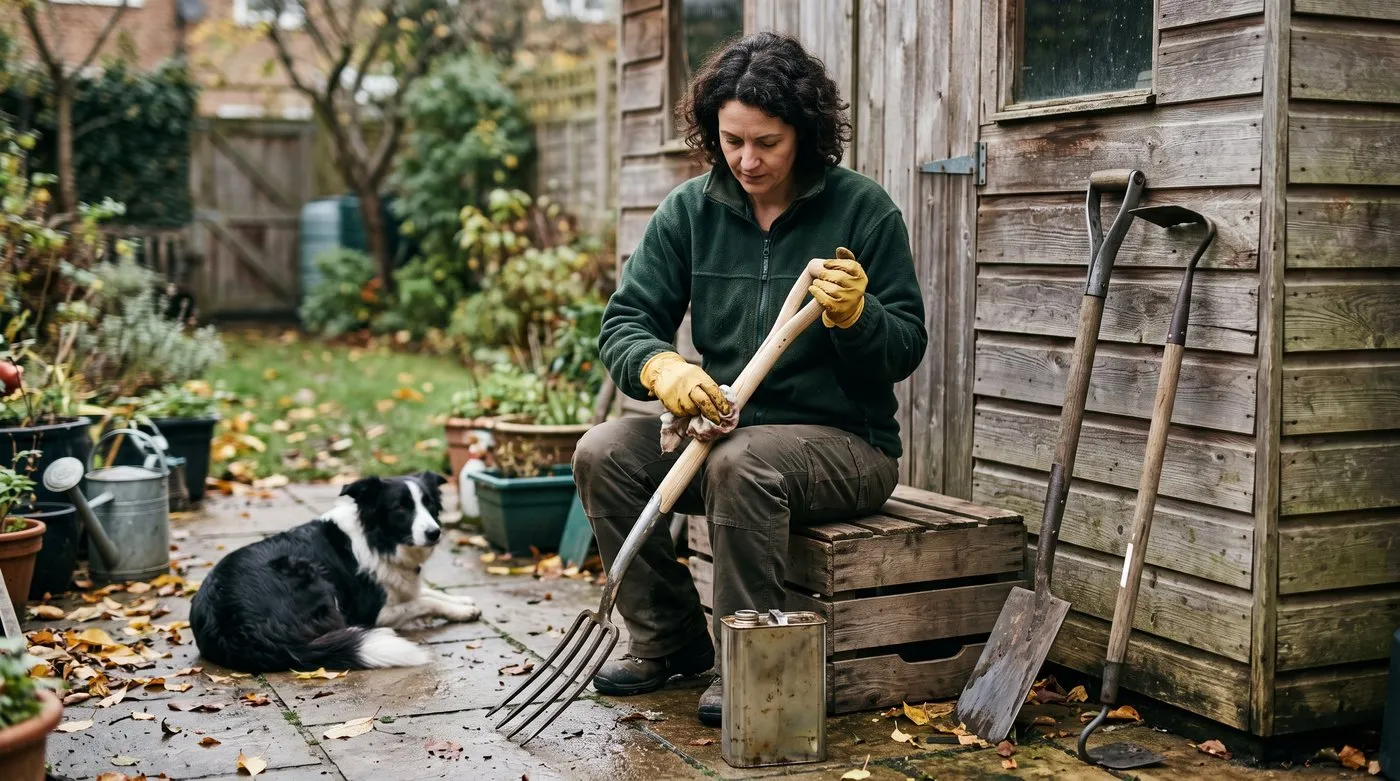
A thin coat of linseed oil once a year stops wooden handles drying out and splitting.
Metal: wipe a thin coat of light machine oil over every blade, tine and pivot with a rag. It should look slightly shiny, not dripping. WD-40 is handy for driving off moisture first, but it doesn’t leave a lasting coat.
Wooden handles: sand off any splinters, then rub in linseed oil with a rag along the grain. Let it soak in for a while, then wipe off the excess. A second thin coat the next day helps very dry wood.
Fire safety: Rags soaked in linseed oil can catch fire on their own as they dry. Lay them flat outside to dry, or soak them in water in a sealed metal tin before disposal. Never leave them screwed up in a heap.
Mowers, strimmers and cordless tools
Power tools need a bit more care before a winter rest. Always check the manual first, as makers’ advice varies.
- Mowers: unplug or remove the battery, then scrape caked grass from under the deck. A petrol mower’s handbook will tell you whether to run the tank dry or add a fuel stabiliser. Winter is a good time to get the blade sharpened, and the guide to mower blade sharpening explains the signs to look for.
- Hedge trimmers and strimmers: clean off sap and grass, then oil the blades.
- Cordless batteries: bring them indoors. Frost and damp are bad for them. Store them somewhere cool and dry, part-charged if the maker suggests it.
Hoses, watering cans and pumps
Water left in kit can freeze, split hoses and crack fittings.
- Hoses: drain them, coil them loosely and bring them into the shed or garage.
- Outside taps: turn off the inside stop valve if there is one, open the outside tap to drain it, and fit a tap cover.
- Watering cans and sprayers: empty them and store them upside down.
- Pond and water-feature pumps: follow the maker’s winter advice.
Where to keep tools over winter
Off the floor and in moving air. Tools on a damp floor or propped in a corner rust first. Hang long-handled tools blade-up on wall hooks, and hand tools on a pegboard above the bench.
A shed with a vent or two lets damp air escape. If yours drips with condensation, add vents at opposite ends. A cheap hygrometer shows how damp the air gets; if it regularly reads above about 70%, more airflow or a small dehumidifier will help. A well-built wooden shed, such as those in the Greenhouse Stores wooden shed range, copes with damp better than a sealed metal one.
For layout ideas, the guide to garden shed organisation has plenty. Lock the shed too, as quiet winter months are when tools go missing.

A pegboard keeps hand tools dry, off the bench and easy to find, and you can see at a glance if something’s missing.
Winter tool care checklist
| Month | Job |
|---|---|
| October | Clean each tool properly as you finish with it for the year |
| November | Remove rust, sharpen, oil blades and handles. Drain hoses, bring batteries in |
| December | Quick look for damp or rust spots. Re-oil any marked blades |
| January | Sharpen secateurs and loppers before winter pruning |
| February | Check the mower and get the blade sharpened before the first cut |
| March | Tools back into use. Wipe them clean after every job |
Common winter tool mistakes
- Putting tools away dirty. Soil holds damp against the steel. Clean first, every time.
- Putting tools away wet. Dry them fully before oiling and hanging.
- Leaving tools on the floor. Damp air sits low. Hang them up.
- Leaving batteries in a cold shed. Bring them indoors for winter.
- Forgetting the hose. A frozen, full hose can split. Drain it and bring it in.

With the tools clean, oiled and hung up, the shed can be shut for winter and everything’s ready for spring.
Frequently asked questions
When should I put garden tools away for winter in the UK?
Late October or November, once the main autumn jobs are done. Pick a dry spell so tools dry fully after cleaning. In colder northern areas, aim for late October before the hard frosts.
How do you stop garden tools rusting over winter?
Store them clean, dry and lightly oiled, hung off the floor. Soil left on a blade holds damp against the steel. An airy shed with a vent or two helps condensation clear.
How do you remove rust from garden tools?
Soak the rusty part overnight in white vinegar, then scrub it. A wire brush or wire wool lifts the loosened rust. Rinse, dry thoroughly and oil it straight away, as bare steel rusts again quickly.
What is the best oil for wooden tool handles?
Linseed oil is the traditional choice. Rub a thin coat in with a rag, let it soak in, and wipe off any excess. Lay oily rags flat outside to dry, as they can catch fire on their own.
Can you use WD-40 on garden tools?
Yes, to drive off moisture, but it’s not the best long-term coat. Follow it with a light machine oil for winter storage. Wipe off excess so it doesn’t collect dust.
How do I store a lawn mower over winter?
Clean it, then follow the manual for the engine or battery. Scrape grass from under the deck. For petrol mowers, the handbook will say whether to run the tank dry or add a fuel stabiliser. Keep cordless batteries indoors.
Tools all tucked away? Browse the how-to hub for more, then use our winter gardening jobs checklist to plan the rest of the season.
Our team produces practical UK gardening guidance from source research, contributor records and established horticultural practice. Editorial standards are overseen by Matt W.