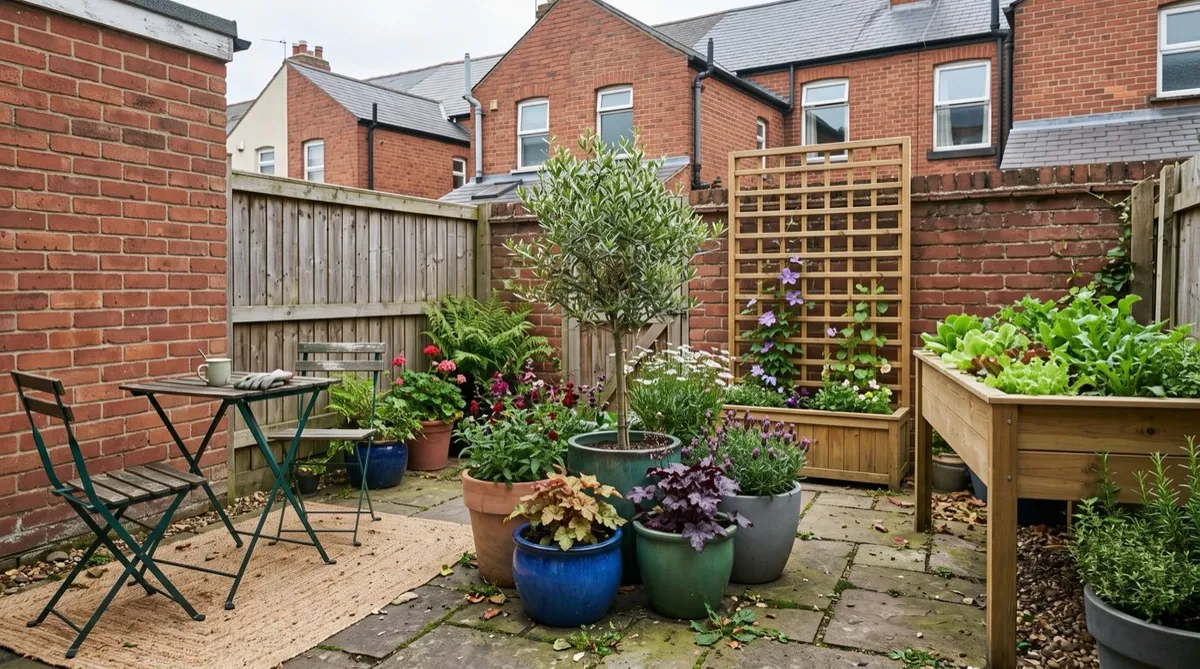
Key takeaways
- Group pots in odd numbers, such as three, five or seven
- Build three height levels, using plinths or upturned pots if you need to
- Repeat one material or glaze colour, and let one bold pot stand out
- Keep a few evergreen pots all year and swap seasonal pots in and out
- Raise every pot on feet so water drains away and frost doesn't crack them
Potscaping simply means grouping your pots into one display instead of scattering them around. A handful of ordinary pots, pulled together and arranged well, looks planned straight away. It uses the same tricks as a good border: odd numbers, different heights, a repeated material and one star pot.
This guide covers how many pots to use, how to build height, which materials and colours work together, and how to keep the group looking good all year. If you’d rather start with what to plant in a single pot, see these container gardening ideas.
Why a group of pots beats scattered single pots
A cluster of pots looks like one display. Scattered pots look like clutter. When pots are dotted around, the eye has nowhere to rest and none of them stands out. Pull the same pots together and you get a clear shape, a focal point and a sense that it was meant.
Grouping also makes it easier to tie things together. You can repeat one glaze, vary the heights on purpose and put your best pot where it counts. The pots shade each other too, so they dry out a little more slowly.

The same pots, scattered on the left and grouped on the right. Together they look like one planned display.
The simple rules of grouping pots
A few easy rules make any group look good.
Use odd numbers
Odd numbers look more natural. Three, five or seven pots form a triangle or a stepped line that reads as one group. Even numbers pair off and split the group in two. Three is the minimum, five suits most patios and seven works on a big doorstep.
Vary the heights
Aim for three height levels: tall at the back, middle in the centre and low at the front. A handy guide is to make the tallest pot about one and a half times the height of the next. A flat row of same-height pots looks dull because there’s no peak for the eye to land on.
Repeat, then add one star
Repeat one thing across the group, such as a material or a glaze colour, so it hangs together. Then let one bold pot, usually the tallest or the brightest, be the focal point. Leave a little breathing space around the group rather than cramming pots edge to edge.
How to build height with plinths and staging
You rarely own pots in three perfect heights, so build the steps yourself. An upturned spare pot or a couple of bricks under a back pot lifts it nicely. Tiered pot staging raises a whole back row at once.
An old timber crate, a low stone step or a sturdy wooden block all make good risers. The trick is to hide the support. Let a trailing plant such as ivy or Bidens spill over the front pot so the riser behind disappears.

A timber plinth and upturned pots create three clear levels. Trailing ivy hides the supports so you just see a cascade of leaves.
Thriller, filler, spiller across the group
You may know thriller, filler, spiller as a way to plant one pot. It works even better spread across a group. Give each role its own pot:
- Thriller: one tall pot with a grass such as Pennisetum, or a clipped bay
- Fillers: two or three middle pots of heuchera, salvia or hardy geranium
- Spillers: one or two low pots of helichrysum, ivy or golden creeping Jenny trailing over the front
For more planting ideas, see these modern container combinations.
Which pot materials work best together?
The material sets the look and the weight, and affects how often you’ll water.
| Material | Look | Frost | Weight | Best role in a group |
|---|---|---|---|---|
| Terracotta | Warm, classic, ages well | Only frost-resistant types | Heavy | The repeating base material |
| Glazed ceramic | Glossy and colourful | If sold as frost resistant | Heavy | The star focal pot |
| Fibreclay | Stone-like and modern | Good | Light | Tall pots, balconies |
| Zinc or metal | Cool grey, crisp | Good, but heats up in sun | Medium | Accents with grasses and herbs |
| Recycled plastic | Plain and practical | Good | Very light | Hidden risers under nicer pots |
Terracotta lets compost dry quickly, which suits lavender, rosemary and pelargoniums. Cheap terracotta can flake in frost, so buy frost-resistant pots if they stay out all winter. Glazed pots hold moisture longer, which suits thirstier plants such as hostas. Fibreclay looks like stone but weighs much less. Metal heats up in full sun, so keep it out of the hottest spots.

All-terracotta pots in different sizes tie the group together. Lavender, rosemary and pelargoniums love the quick-draining clay.
Tonal or contrasting colours?
A tonal scheme keeps every pot in one colour family, such as shades of blue or earthy terracotta tones. It feels calm and lets the plants shine.
A contrasting scheme sets one bold pot among quieter ones. A glossy teal pot among terracotta becomes the instant star. It works best when the bold pot is also the tallest or sits in the centre. Keep it to one bold pot for every three or four quiet ones. If you’re unsure, start tonal and add a bright pot later.

One glossy teal pot with a clipped ball makes the star. The plain terracotta pots around it let it shine.
Front door and doorstep groups
A group of pots by the front door makes a big difference for little effort. A matching pair of tall pots either side suits a formal door. A stepped group of three to five pots on one side suits a cottage or terraced house.
On a narrow doorstep, keep enough clear space to walk past comfortably. Evergreen structure works hard here, as the door is on show all year. Bay, clipped evergreens or a neat euonymus hold the shape through winter, with seasonal pots tucked in front for colour.

A tall bay pot with smaller evergreen pots gives a terraced house a smart welcome all year.
Grouping pots on a balcony or in a courtyard
Small spaces are where potscaping really earns its keep. There’s no room for scattered pots, so a tight, well-planned group gives the most impact.
On a balcony, weight comes first. Wet compost is heavy, so use lightweight fibreclay or plastic pots. Check with your landlord or building manager if you’re unsure what the balcony can hold. Group pots against the wall, where they’re more sheltered from the wind. There are more ideas in this guide to balcony gardening.

Lightweight pots grouped in a balcony corner are sheltered from wind and easy on the floor.
Season-by-season swap calendar
Keep two or three evergreen anchor pots all year, and swap seasonal pots in and out around them.
| Month | Looking good | What to swap in |
|---|---|---|
| January | Evergreens, skimmia, ivy | Bring in pots of hyacinths grown outside |
| February | Snowdrops, crocus, hellebores | Add pots of primroses and violas |
| March | Daffodils, muscari, primroses | Move bulb pots to the front as they open |
| April | Tulips, wallflowers | Start hardening off pelargoniums |
| May | Late tulips, forget-me-nots | Swap tired bulb pots for summer bedding after the last frost |
| June | Pelargoniums, petunias, salvias | Add trailing bidens and lobelia |
| July | Cosmos, salvias, grasses | Deadhead, feed and replace any tired pots |
| August | Late summer flowers, grasses, rudbeckia | Water well. Plan autumn swaps |
| September | Grasses, asters, sedum | Plant daffodil and crocus bulbs in pots |
| October | Ornamental kale, heathers, berries | Swap summer bedding for violas and heucheras |
| November | Evergreens, seedheads | Plant tulip bulbs in pots. Add skimmia |
| December | Evergreens, dogwood stems, ivy | Add pots of hellebores for winter flowers |
When you plant bulbs in autumn, put them in pots that can slip into the group once they flower, then lift them out when they fade. A bulb lasagne packs several bulb types into one pot for a longer show. For tough anchor plants, see the best plants for pots all year round.
If you have pets, remember that many spring bulbs, cyclamen and lilies are toxic to them.

Swapping faded bulb pots for summer pelargoniums in late spring. The evergreen pots stay put while the seasonal ones rotate.
Watering a group of pots
Grouped pots usually need less watering than scattered ones. They shade each other’s sides and trap a little humid air between them, so the compost dries more slowly.
The catch is drainage. After heavy rain, the pots in the middle can stay soggy where you can’t see them. Make sure every pot has drainage holes and use compost with some grit added. Lift a middle pot now and then to feel its weight. In summer, one good soak in the morning beats a light sprinkle. A watering can with a long spout reaches the back pots easily.
Raise every pot on feet
Pot feet lift each pot a few centimetres so water drains away. In a tight group the ground stays wetter for longer. Pots sitting in water can rot roots, shelter slugs and crack in a frost. Terracotta or rubber feet work well, or use offcuts of tile or slate. Three feet are steadier than four on uneven paving.
Common mistakes when grouping pots
Using even numbers. Two or four pots split into pairs. Add a small fifth pot or move one elsewhere.
Mixing too many materials. Three or more materials look busy. Stick to one, or two tied together by a single colour.
Keeping every pot the same height. A flat group looks dull. Build three levels with plinths or upturned pots.
Forgetting drainage. Soggy pots in the middle of a group rot roots and crack in frost. Use pot feet and gritty compost.
For more slip-ups to avoid around the garden, see the biggest garden design mistakes.
Overwintering a group of pots
Winter threats are frozen roots, cracked pots and waterlogged compost. All three are easy to manage.
- Raise every pot on feet so rain drains away instead of freezing underneath
- Move the group against a house wall, ideally south or west facing, for extra shelter
- Cluster hardy pots together so they protect each other
- Bring tender plants under cover, such as pelargoniums and evergreen agapanthus
- Wrap large pots in fleece or hessian during hard frosts, leaving the top open
- Water sparingly, just enough to stop the compost drying out completely
Our guide on how to overwinter plants covers tender plants in more detail.
Warning: Water that freezes inside or under a pot can crack it, especially cheap terracotta. Good drainage and pot feet matter more than wrapping.
Frequently asked questions
What is potscaping?
Potscaping is grouping pots into one styled display. You arrange three to seven pots at different heights, repeat a material or colour and let one pot be the focal point. It looks planned rather than random.
Why do odd numbers of pots look better?
Odd numbers look more natural and hold together as one group. Three, five or seven pots form a triangle or a stepped shape. Even numbers tend to pair off and split the group in two.
How many pots should I group together?
Start with three in a small space and five on a patio. Three gives you one tall, one medium and one low pot. Seven suits a large doorstep or courtyard.
Can I group pots of different materials?
Yes, but stick to one or two materials. Too many look cluttered. Repeat one thing across the group, such as terracotta or a single glaze colour, and let one contrasting pot be the star.
Do grouped pots need more or less watering?
Usually less than scattered pots. Pots in a group shade each other, so the compost dries more slowly. Check the middle pots after heavy rain, as they can stay soggy.
How do I overwinter a group of pots?
Raise every pot on feet so water drains away. Move the group against a sheltered house wall. Bring tender plants under cover and wrap large pots in fleece or hessian during hard frosts.
Ready to plan what goes in each pot through the year? Follow our one pot, one year container plan, or find more ideas in the garden design hub.
Our team produces practical UK gardening guidance from source research, contributor records and established horticultural practice. Editorial standards are overseen by Matt W.