Key takeaways
- Get to know your plot before you design anything
- Watch where the sun falls at different times of day over a few days
- Test the soil and check drainage with a hole full of water
- Build patios, paths and fences before you plant anything
- Plant evergreens for winter shape, then add perennials for colour
- Hard landscaping is usually the biggest part of the budget
Designing a garden from scratch is a great project. Whether it’s a bare new-build plot or a tired garden that needs a fresh start, the order is the same: get to know the site, plan the layout, build the hard bits, then plant.
Why most new gardens fail
Most new gardens go wrong because people skip getting to know the plot. Here are the three usual culprits.
Ignoring the microclimate
Every garden has warm spots, cold spots and windy spots. A south-facing wall soaks up heat and makes a warm, sheltered corner. A north-facing corner behind the house may get little sun for much of the year. Wind can whistle between buildings and dry out or flatten plants.
Sun-loving lavender in a north-facing bed won’t thrive. A patio where the afternoon sun never reaches is a costly mistake. Look first and you’ll avoid both.
Ignoring drainage
A drainage test is quick and free. Dig a hole about 30cm deep, fill it with water and see how long it takes to drain. If it’s still full after a few hours, you’ll need to improve the soil or add drainage before planting.
No structural backbone
A garden full of flowering perennials looks amazing in July and bare in January. Evergreen plants give it shape through winter, when everything else has died back.
Aim for a good share of evergreens: hedging, holly, yew, laurel or evergreen grasses.
 A simple drainage test. If the water takes hours to go, improve the soil before you plant.
Step 1: site assessment (week 1-2)
Spend a week or two getting to know your garden. It makes the design so much easier.
Measure the plot
Use a long tape measure and graph paper. A scale of 1:50 works well, where 1cm on paper is 50cm in the garden. Mark the boundaries, the back of the house, doors, windows, drain covers and anything you want to keep.
Also mark:
- Manhole covers and drains (you can’t build over these)
- Overhead cables and underground pipes
- Any protected trees (ask your local council)
- Who owns which boundary (check your deeds or Land Registry title plan)
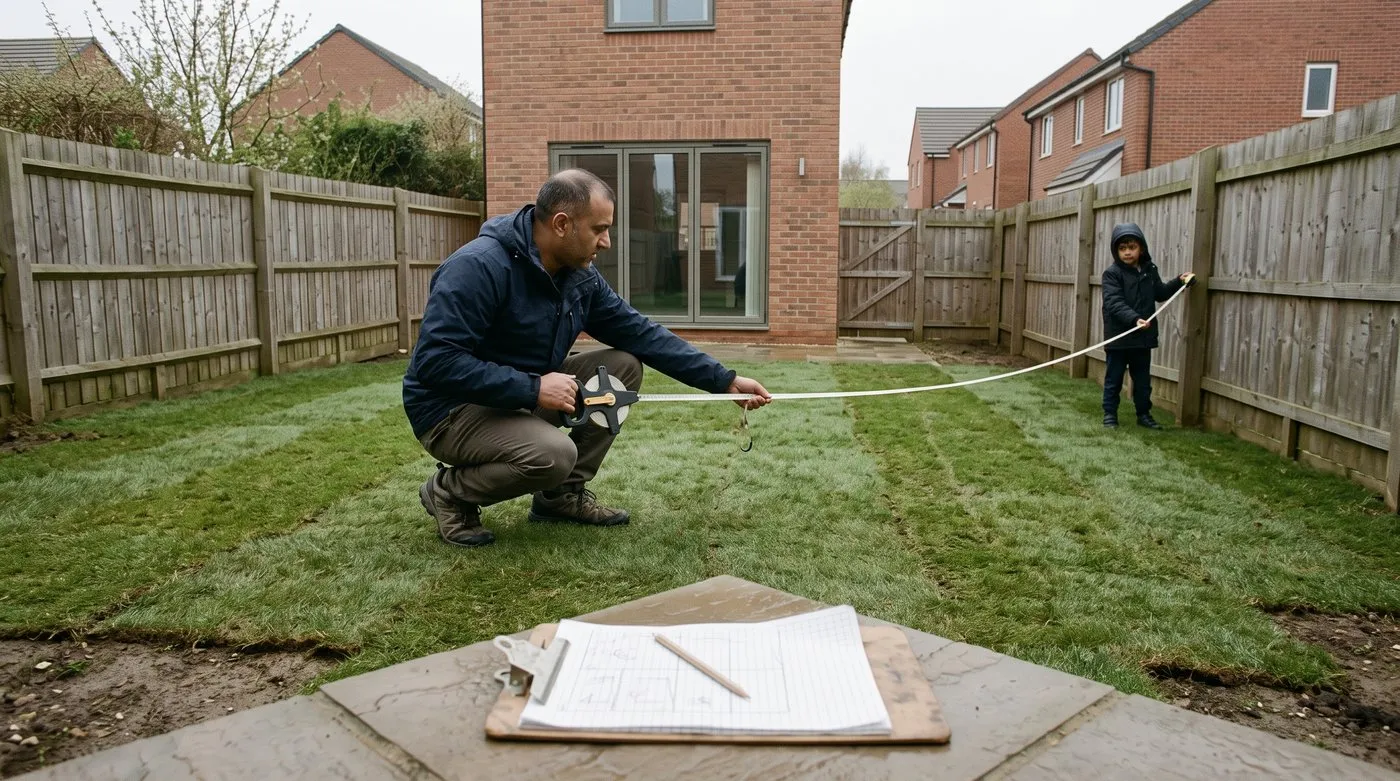
Measuring up is a two-person job and a fun one to share. Note drain covers and anything you want to keep as you go.
Map the sun
Note where the sun falls in the morning, at midday and in the afternoon, over a few days. Mark sunny, part-shaded and shady areas on your plan.
As a rough guide:
- South-facing areas get the most sun
- East-facing spots get morning sun
- West-facing areas get afternoon and evening sun
- North-facing spots may get little or no direct sun in winter
Your sun map shows you where the patio should go (afternoon sun is lovely), where shade-lovers belong, and where to grow vegetables.
Test the soil
Buy a cheap soil testing kit from a garden centre. Test in a few places, as it can vary around the garden. It tells you which plants will be happy.
| Soil | Plants that love it |
|---|---|
| Very acid | Heathers, blueberries, rhododendrons, camellias |
| Slightly acid | Most plants, it’s the sweet spot |
| Neutral | Roses, lavender, clematis, most vegetables |
| Chalky | Dianthus, scabious, buddleja, yew |
Our soil testing guide explains how to read the results and when it’s worth trying to change your soil.
Check drainage
Dig three test holes about 30cm deep in different parts of the garden. Fill them with water and see how long they take to empty.
- Under an hour: free-draining, maybe too quick on sandy soil. Add compost to help it hold water.
- A few hours: good. Most plants will be happy.
- Much longer: poor drainage. Dig in grit and compost, or add a French drain (a gravel trench with a perforated pipe that leads water away).
- Still full the next day: very wet ground. You may need professional drainage.
Gardener’s tip: New-build gardens often have squashed soil from building machines. Break it up deeply with a fork or spade before planting. It helps drainage and roots more than any soil improver.
 A plan on graph paper with the sunny and shady areas marked.
Step 2: design the layout (week 2-3)
Now turn your notes into a layout on paper, before anyone picks up a spade.
Already have a mature garden that just needs less work? The Longmeadow four-zone maintenance audit uses the same zoning idea without starting again.
Draw bubble diagrams
Draw rough circles on your plan for each zone: dining, lawn, borders, storage, a children’s play area, vegetable beds. Don’t worry about exact shapes yet. Just think about what goes next to what.
Handy rules of thumb:
- Put the patio where it gets afternoon sun, often facing west or south-west
- Tuck the compost bin and shed in the least attractive corner
- Put vegetables and herbs in the sunniest spot
- Keep a play area where you can see it from the kitchen window
- Allow about 3m x 3m for a table and four chairs
Choose a layout style
The style sets the feel of the whole garden.
| Style | Plot size | Upkeep | Feel |
|---|---|---|---|
| Formal | Wider plots | High (lots of clipping) | Neat, balanced, clipped hedges |
| Cottage | Any size | Medium (deadheading, staking) | Relaxed, full and romantic |
| Contemporary | Medium and up | Low to medium | Clean lines, simple planting |
| Japanese | Medium and up | Low (raking, pruning) | Calm and simple |
| Wildlife | Any size | Low | Natural, with log piles and wildflowers |
Diagonal and circular layouts
Borders running straight along the house and fences make a garden feel boxy and smaller.
Diagonal layouts use the longest line in the garden, from corner to corner. Turn a path or patio edge at an angle to the house and the eye follows that longer line, so the garden feels bigger.
Circular layouts use overlapping circles for lawn, patio and beds. The curves soften the edges and lead you round. A circular lawn with curved borders suits plots of about 6m wide and up.
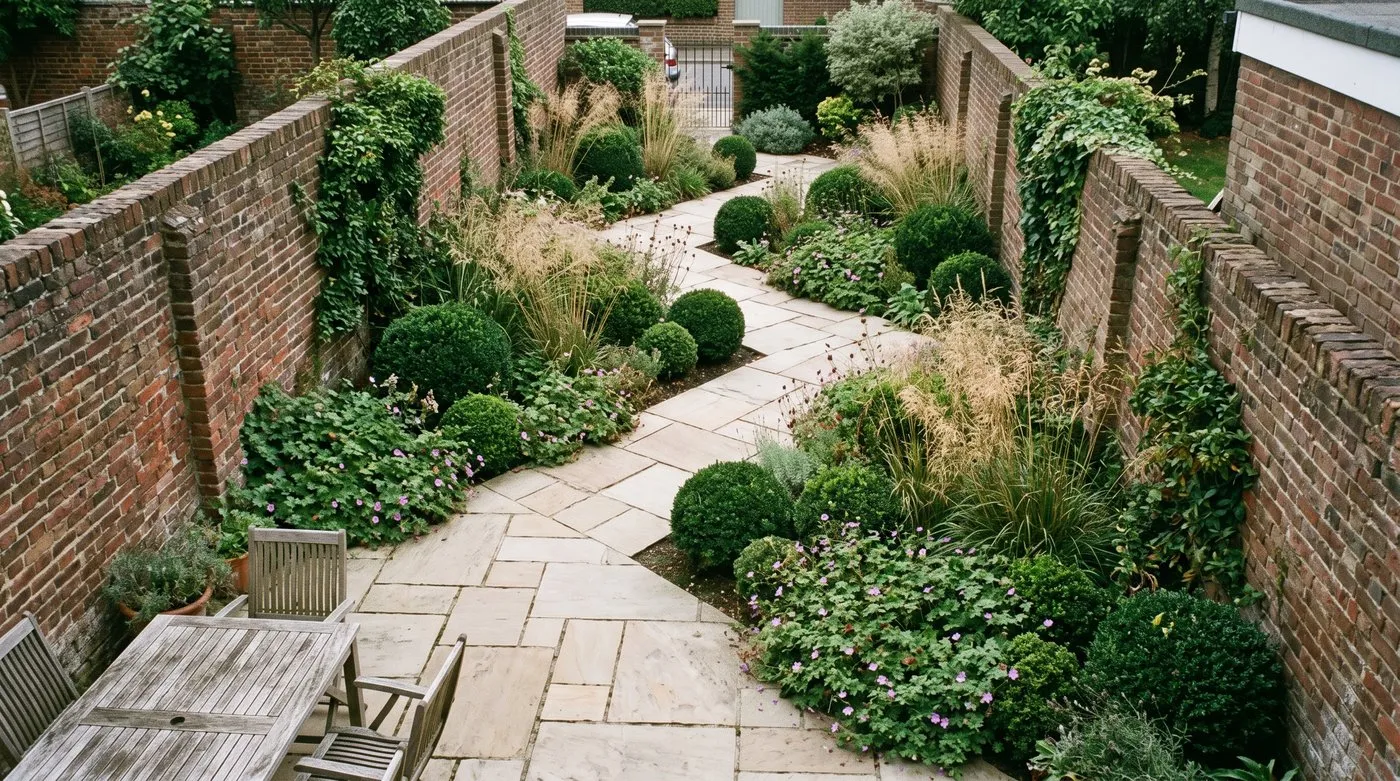
Turning the patio and path at an angle pulls your eye along the longest line in the garden. It’s a simple trick that makes a narrow plot feel wider.
Step 3: hard landscaping (week 3-7)
Hard landscaping means patios, paths, walls, fences, raised beds and steps. It’s usually the biggest part of the budget, and it shapes the garden for years.
Patio and path materials
Pick materials that suit your house. A Victorian terrace looks lovely with natural stone or clay pavers. A new-build suits porcelain or smooth sandstone. Stick to two or three materials so it all hangs together.
| Material | Cost | Lasts | Upkeep |
|---|---|---|---|
| Indian sandstone | Medium | A long time | Clean and seal now and then |
| Porcelain paving | Medium to high | A very long time | Almost none, just wipe clean |
| Concrete slabs | Low | Reasonably long | Wash now and then, can stain |
| Clay pavers | Medium | A very long time | Brush, top up joint sand |
| Gravel | Low | Top up every few years | Rake, weed and top up |
| Timber decking | Medium | Shortest of the lot | Oil yearly, replace boards as needed |
Our patio laying guide walks through it, including the sub-base, which is what makes a patio last. Lay slabs on a firm base of compacted MOT Type 1 and they stay put for decades. Skip it and they’ll soon shift.
Paths
Make paths at least 90cm wide for one person, about 1.2m for two side by side, and 1.5m for a wheelchair or pushchair. Stepping stones through a border can be smaller.
Raised beds
Raised beds made from timber sleepers help on clay, save your back and give the garden shape.
Handy sizes:
- Width: no more than 1.2m, so you can reach the middle from either side
- Height: 30-45cm for most plants, higher for root crops or easier access
- Length: as long as you like, with a cross brace every couple of metres to stop it bowing
Fill with mostly topsoil, plenty of compost and a little grit. Our raised bed guide covers building, filling and planting.
Fences and boundaries
Put fences up early, along with the other hard landscaping. Choose a style that suits the house, and check who owns each boundary before you replace anything.
Gardener’s tip: Always finish the hard landscaping before you plant. Heavy materials, cement mixers and wheelbarrows will flatten new beds. Lay every slab, put up every fence and build every raised bed first.
Step 4: budget breakdown
Knowing where the money goes saves nasty surprises. Costs vary a lot with size, materials and whether you hire help.
Full budget guide by garden size
As a very rough guide, a small garden redesign might start at a few thousand pounds. A medium garden is often around £10,000 or more, and a large or high-end one can run well beyond that. Get several quotes.
Where the budget goes
| What | Share of the budget |
|---|---|
| Patio and paths | The biggest slice |
| Fencing and boundaries | A good chunk |
| Raised beds and edging | Smaller |
| Soil improvement and drainage | Smaller, but don’t skimp |
| Plants and bulbs | A fair share |
| Lighting | Smaller |
| Furniture and extras | Smaller |
| Contingency | Keep about 10% spare |
Labour adds a lot if you hire a landscaper, so doing some jobs yourself makes a real difference.
Money-saving tips
- Do it in stages: hard landscaping one year, planting the next, lighting and extras after that
- Buy bare-root plants between October and March. They’re much cheaper than potted ones
- Take cuttings: one lavender plant can give you lots of cuttings in late summer
- Use reclaimed materials: second-hand York stone costs much less than new
- Plant it yourself: even if a landscaper does the hard work, planting is an easy job to do yourself
 A sandstone patio, timber raised beds and fresh planting come together nicely in a medium-sized garden.
Step 5: the planting plan (week 7-10)
Now for the fun part. Use your sun map and soil test to choose plants that suit the garden you’ve actually got.
Structural planting first
Plant the evergreen backbone first. These plants give the garden its shape all year.
Good structural plants for UK gardens:
- Yew: the best plant for hedges and topiary. Copes with sun or deep shade and can be clipped into any shape.
- Box: for low hedges and balls. It can get box blight, so Japanese holly (Ilex crenata) is a good lookalike.
- Photinia ‘Red Robin’: an evergreen screen with bright red new leaves. Clip it a couple of times a year.
- Portuguese laurel: glossy dark leaves, a smart screen that’s happy on most soils.
- Ornamental grasses: Miscanthus ‘Morning Light’ and Stipa tenuissima add movement and winter shape.
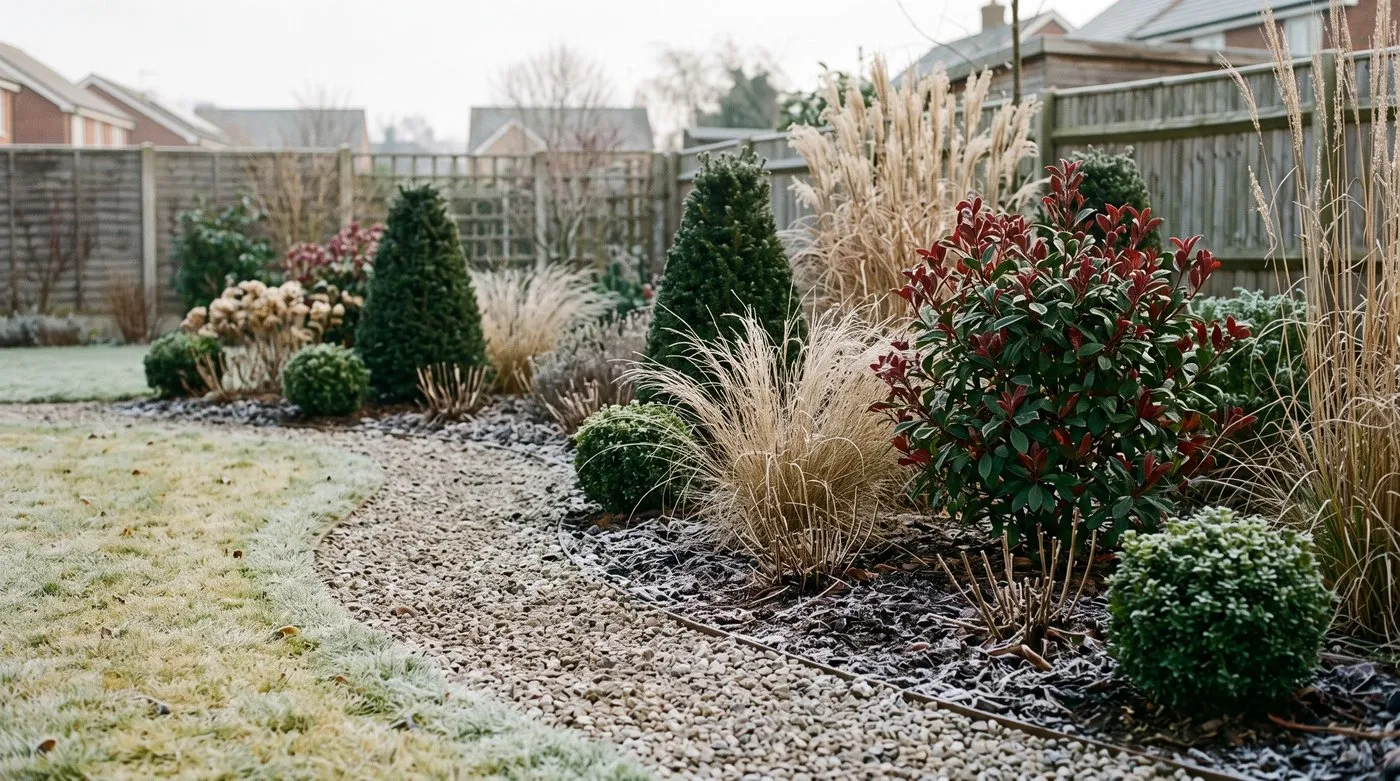
This is why the evergreens go in first. When the perennials have died back in winter, they’re what keeps the garden looking designed.
Perennials for seasonal colour
Plant perennials in groups of three, five or seven so they look natural. Mix flowering times so there’s always something out.
| Season | Perennials | Colours |
|---|---|---|
| Spring (Mar-May) | Brunnera, pulmonaria, hellebores | Blue, pink, white |
| Early summer (May-Jul) | Hardy geraniums, astrantia, lupins | Pink, purple, white |
| Midsummer (Jul-Aug) | Echinacea, phlox, agapanthus | Purple, pink, blue |
| Late summer (Aug-Oct) | Japanese anemones, asters, sedums | Pink, white, purple |
| Winter | Hellebores, cyclamen, snowdrops | White, pink, green |
Planting density guide
New gardens are usually planted too sparsely. Gaps let weeds in and the garden looks thin for years. These spacings fill out within a couple of seasons:
| Plant | Spacing | Per square metre |
|---|---|---|
| Ground cover (geraniums, alchemilla) | 30cm | 9 |
| Small perennials (heuchera, nepeta) | 35cm | 7 |
| Medium perennials (echinacea, phlox) | 45cm | 5 |
| Large perennials (Verbena bonariensis) | 60cm | 3 |
| Shrubs | 90-120cm | 1 |
| Hedging (yew, box) | 30-45cm | 3 per metre |
Plants are a fair chunk of the budget, so bare-root stock in autumn is a good way to save.
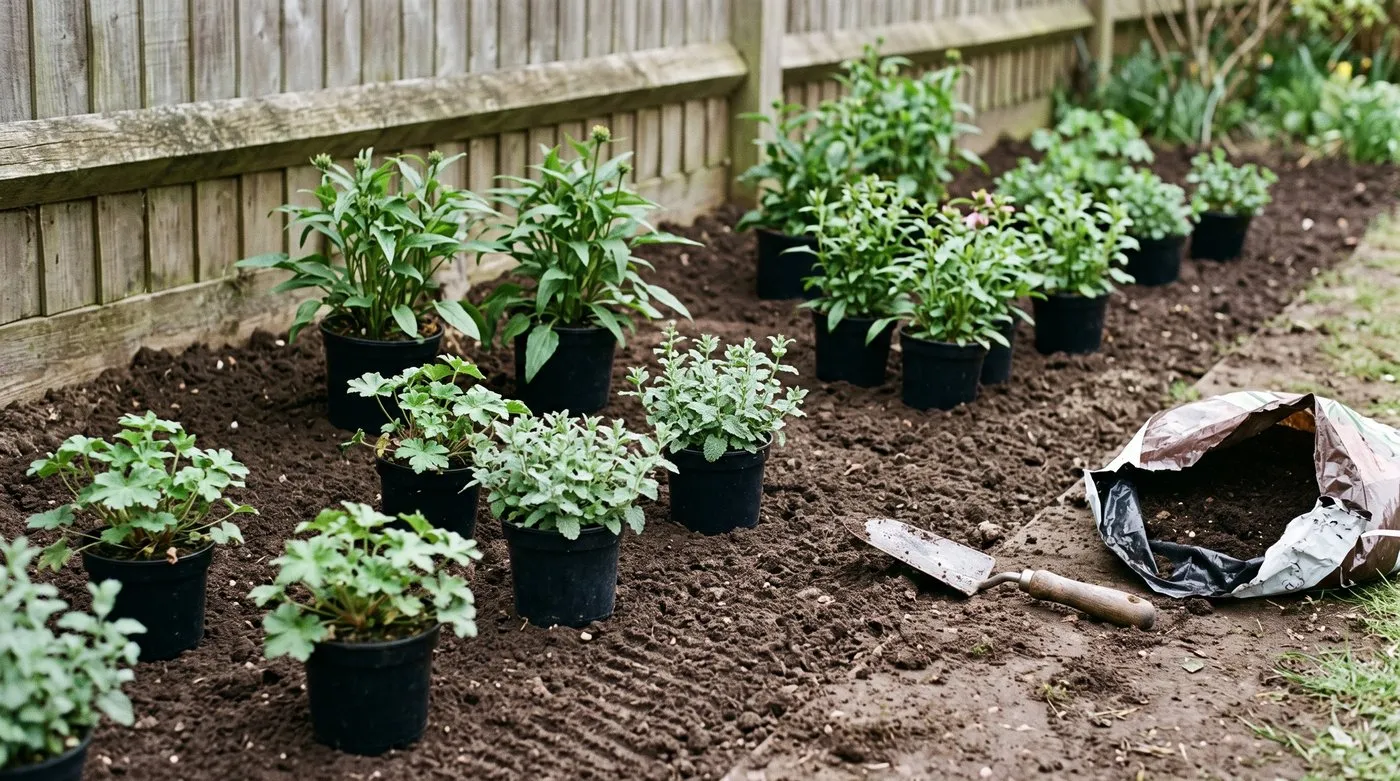
Set the pots out in groups and step back before you dig a single hole. Planting closer than feels natural helps the border fill out within a couple of seasons.
Step 6: the design timeline
Doing things in the right order stops it all getting on top of you. A rough plan for a medium garden:
| Weeks | Stage | Jobs |
|---|---|---|
| 1-2 | Get to know the site | Measure, sun map, soil and drainage tests, take photos |
| 2-3 | Design | Zones, style, materials, quotes |
| 3-4 | Preparation | Clear the site, remove old paving and fencing, break up the soil, add drainage |
| 4-6 | Hard landscaping | Patio, paths, raised beds, fences |
| 6-7 | Soil | Dig in plenty of compost, and grit on clay |
| 7-8 | Structural planting | Evergreen shrubs, hedges, trees |
| 8-10 | Perennials | Fill the borders and mulch well |
| 10-12 | Finishing touches | Lighting, furniture, lawn |
Best times to plant: October and November for bare-root trees and shrubs, March and April for potted perennials, September for spring bulbs. Avoid frozen ground and hot, dry spells.
Five common mistakes when designing a garden from scratch
1. Starting with plants instead of structure
Buying plants before you have a plan gives you a jumble. Sort the bones first: patio, paths, bed shapes and anything tall. Then choose plants to fill it. The structure lasts for years, while plants are easy to change.
2. Underestimating the sub-base
A patio without a proper base will move. Every hard surface needs a layer of compacted MOT Type 1 underneath. New-build gardens often have soft ground, so hiring a mini digger to dig out and level properly is money well spent.
3. Forgetting winter
Design for the whole year, not just summer. Without evergreens, the garden vanishes from November to March. Add winter flowers too, like hellebores, winter jasmine and Viburnum ‘Dawn’, with scented pink flowers through winter.
4. Planting too close to boundaries
Big shrubs and trees right against a fence cause trouble. Roots push posts over and branches hang over next door. Leave a good gap, more for trees than shrubs. The RHS advice on boundaries is helpful if you’re unsure.
5. Ignoring access
Every part of the garden needs a way in. A path to the bins, a wheelbarrow route to the compost heap, a way from the gate that doesn’t cross the lawn. Plan these practical routes first. A hidden path behind a border costs little and saves a lot of bother.
Month-by-month garden design calendar
| Month | Jobs |
|---|---|
| January | Look through catalogues. Plan the layout. Get quotes |
| February | Finish the design. Order materials, which can take weeks to arrive |
| March | Clear the site. Start hard landscaping once the ground is workable |
| April | Keep building. Prepare the soil in planting areas |
| May | Finish paths and raised beds. Plant potted perennials |
| June | Plant the rest of the perennials and annuals. Sow a lawn |
| July | Water new plants in dry spells. Mulch the beds |
| August | Take cuttings of lavender, rosemary and box for free plants |
| September | Plant spring bulbs. Spot any gaps that need filling |
| October | Plant bare-root trees, shrubs and roses, the best month for it |
| November | Plant tulips. Mulch all the beds |
| December | Look after the hard landscaping. Plan next year |
Frequently asked questions
How much does it cost to design a garden from scratch UK?
Anything from a few thousand pounds to well over £20,000. Size and materials make the biggest difference, and patios, paths and walls are usually the largest cost. A professional design adds to that. Doing some of the work yourself, especially the planting, saves a good amount.
What is the first step in designing a garden?
Get to know the plot before you draw anything. Measure it, test the soil, dig a drainage test hole and watch where the sun falls over a few days. That tells you what will grow where and where to put the patio.
How long does it take to design and build a garden?
Roughly two to three months for a medium garden. Planning and design takes a few weeks, building the patio, paths and fences a few more, and planting a week or two. Autumn is the best time to plant bare-root trees and shrubs, while potted plants can go in during spring.
Can I design a garden myself without a landscape designer?
Yes, most people can with a bit of planning. Draw a plan to scale on graph paper or use garden design software. Look at the site, sketch rough zones, then choose plants to suit your soil and light. A designer costs more but can save costly mistakes on big or tricky plots.
What is the best shape for a garden layout?
Diagonal and curved layouts make a garden feel bigger. A path running corner to corner is longer than one running straight down the middle, so it draws the eye further. Overlapping circles of lawn and patio soften the edges. Borders running parallel to the fences make the space feel boxy.
How do I design a garden on a slope?
Turn the slope into level steps, or terraces. Use retaining walls or sleepers to hold each one. Make each terrace deep enough to use comfortably. Get a structural engineer for any retaining wall over about 1m high.
What plants should I put in a new garden?
Start with a handful of evergreen shrubs for shape all year. Add perennials for seasonal colour and a few grasses for movement and winter interest. Plant in groups of three, five or seven. In a shady, north-facing garden, choose shade-lovers.
Our team produces practical UK gardening guidance from source research, contributor records and established horticultural practice. Editorial standards are overseen by Matt W.