Key takeaways
- Most microgreens are ready to cut in one to three weeks
- You only need a tray, compost, seeds and a bright windowsill
- Pea shoots, radish, sunflower and broccoli are the easiest to start with
- They grow all year indoors in a normal warm room
- Sow a new tray every few days for a steady supply
Microgreens are the quickest crop you can grow. They go from seed to plate in as little as a week, on a windowsill, with no garden and no experience needed. A few trays, some compost and a packet of seeds will keep you in fresh greens all year.
For another quick indoor harvest, see how to grow oyster mushrooms on straw.
Microgreens aren’t sprouts. They’re baby seedlings, cut once the first true leaves appear, usually at 3-8cm tall. They pack a lot of flavour into a small leaf, and they’re great fun to grow.
The best microgreens for UK beginners
Start with these four. They come up reliably, grow fast and taste great.
Pea shoots
The best one to start with. Soak dried marrowfat peas from the supermarket overnight, spread them on compost and cut in about two weeks. Sweet, crunchy and familiar. Pea shoots often regrow after cutting, giving you a second crop.
Handy tip: Dried marrowfat peas from the supermarket are much cheaper than garden pea seed and work just as well.
Radish
One of the quickest, ready in about a week to ten days. The peppery taste livens up sandwiches and salads. Any radish variety works, and red-stemmed ones like China Rose look lovely.
Handy tip: Don’t soak radish seeds. They come up quickly on their own and can rot if too wet.
Sunflower
Big seeds give thick, crunchy stems with a nutty taste. Cut at around 8-12 days when the first true leaves appear. They’re chunky enough to make a salad on their own.
Handy tip: Soak the seeds for a few hours or overnight before sowing. Pick out any that haven’t sprouted after a few days so they don’t go mouldy.
Broccoli
Mild and slightly peppery, ready in about 10-14 days.
Handy tip: The seeds are tiny, so sow them thickly, almost touching, for a nice dense mat.
| Variety | Soak first? | Ready in | Flavour | Ease |
|---|---|---|---|---|
| Pea shoots | Yes, overnight | About 2 weeks | Sweet, fresh | Very easy |
| Radish | No | 7-10 days | Peppery | Very easy |
| Sunflower | Yes, a few hours | 8-12 days | Nutty, crunchy | Easy |
| Broccoli | No | 10-14 days | Mild, peppery | Easy |
| Mustard | No | About 1-2 weeks | Hot | Easy |
| Beetroot | Yes | 2-3 weeks | Earthy, sweet | Medium |
| Basil | No | 2-3 weeks | Sweet, aromatic | Medium |
| Coriander | Yes | 2-3 weeks | Fresh, citrusy | Medium |
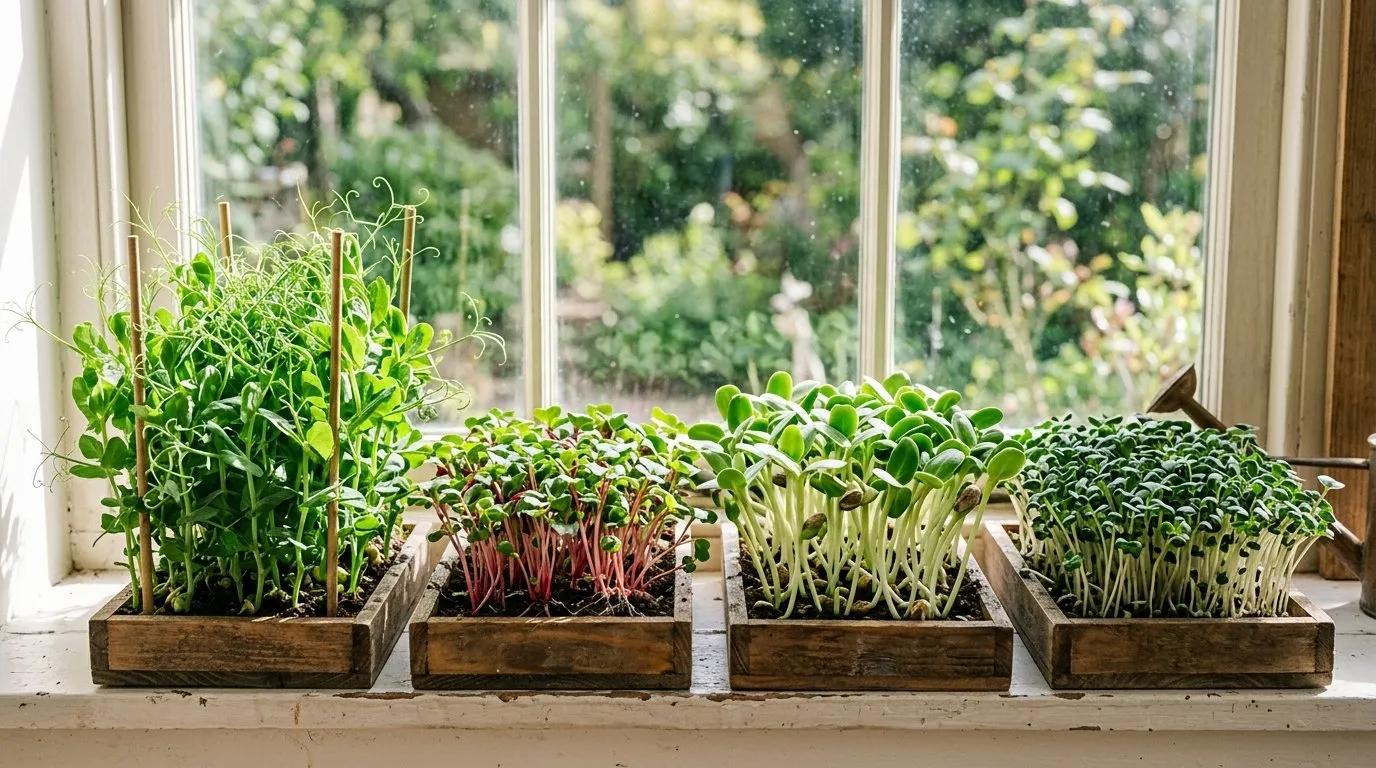
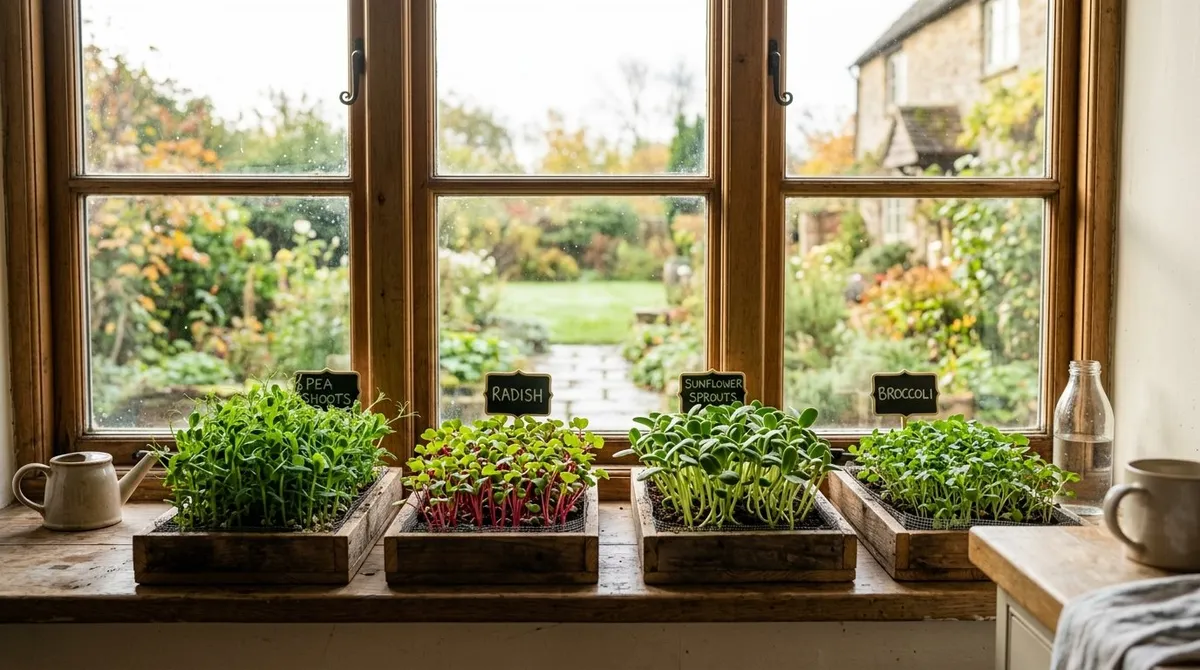
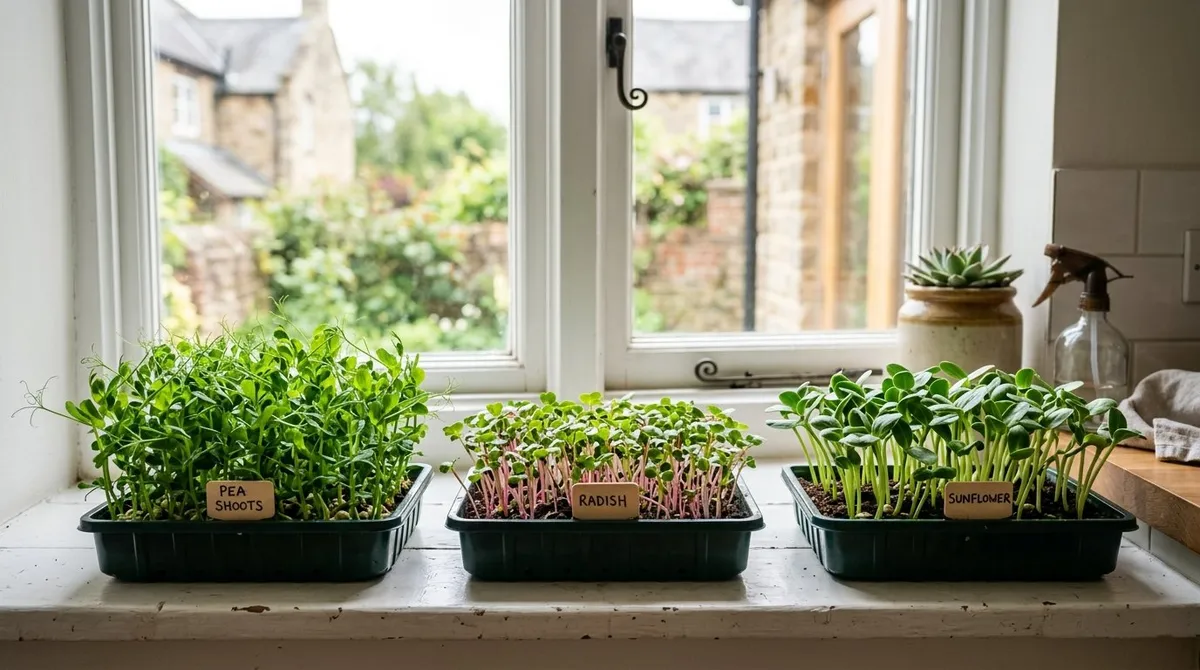
Four microgreens ready to cut: pea shoots, radish, sunflower and broccoli. Sowing each tray on a different day spreads out the harvest.
What you need to get started
You probably have most of this already.
Trays: Any shallow tray with drainage holes, around 3-5cm deep. Standard seed trays are ideal, but mushroom punnets and takeaway tubs with holes poked in the bottom work too.
Something to grow in: Peat-free multipurpose compost, coir, or ready-made microgreen mats. Compost gives the sturdiest greens. Coir is a bit cleaner in the kitchen. Mats are the easiest but cost more.
Seeds: Buy seeds sold for microgreens or sprouting. Supermarket dried peas work for pea shoots.
Light: A bright windowsill, ideally south or east-facing. In the darker months, November to February, a basic LED grow light makes a big difference.
Warmth: A normal warm kitchen is perfect all year. An unheated greenhouse works from spring to autumn. Microgreens are a great winter crop, alongside plenty of other vegetables you can grow indoors through winter.
Step-by-step growing method
Day 0, sow:
- Fill the tray with 2-3cm of damp (not soaking) compost
- Level it and press it down lightly
- Scatter seeds thickly, almost touching but not piled up
- Press them gently into the surface. There’s no need to cover them with compost
- Mist with a spray bottle until evenly damp
- Cover with another tray to keep them dark and moist
Days 1-3, sprouting in the dark: Keep the tray covered somewhere warm. Check daily and mist if the surface looks dry. Most seeds sprout within a few days.
Days 3-5, into the light: When the seedlings are 1-2cm tall, take off the cover and move the tray to a bright windowsill. The pale yellow shoots turn green within a day or two.
Until harvest, grow on: Keep the compost damp but not soggy. Water from below by pouring water into the saucer and letting it soak up. This keeps the seedlings upright and helps prevent mould. Turn the tray every couple of days so the stems grow straight.
Harvest: Snip with clean scissors just above the compost once the first true leaves appear, usually at 3-8cm tall. Morning cuts are the crispest.
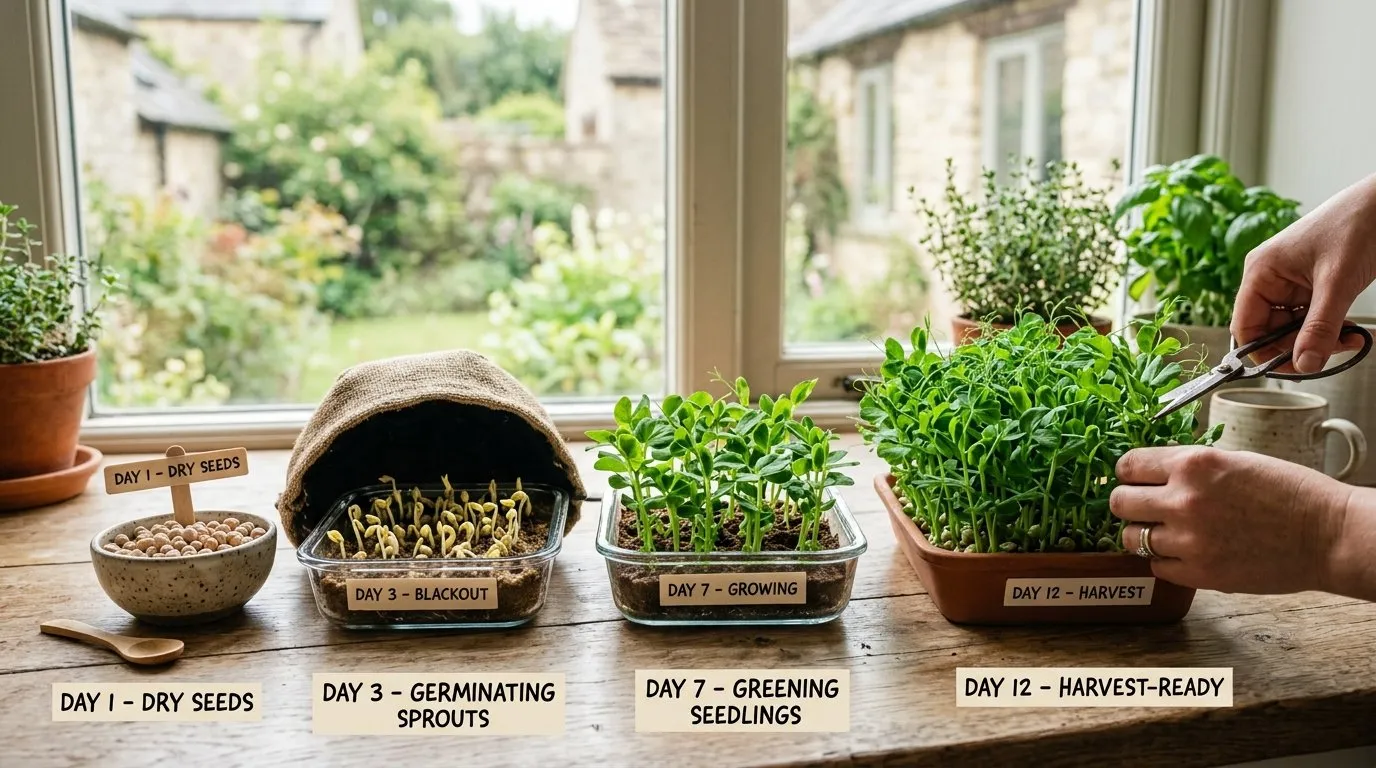
From seed to harvest: dry seeds, sprouting in the dark, greening up on the windowsill, and pea shoots ready to cut.
Setting up a continuous supply
The trick is to sow little and often. Start a new tray every few days, so there’s always one ready to cut.
Space: Six standard seed trays fit on a 60cm windowsill. That’s your whole growing operation.
Through the year: In summer, things grow fast, so sow every three days or so. In winter, growth slows, so every five days is about right unless you use a grow light.
Troubleshooting common problems
Mould (white fuzzy growth): The most common problem. It’s caused by stuffy air, too much water or sowing too thickly. Take the cover off sooner, water from below, sow a little thinner and keep air moving. Don’t confuse it with the fine white root hairs on radish and broccoli, which are perfectly normal. If a tray goes properly mouldy, compost it and start again.
Long, pale stems: Not enough light. Move them somewhere brighter or add a grow light. Leggy microgreens are still fine to eat, just less crunchy.
Seeds not coming up: It’s too cold, or the seeds are old. Find a warmer spot and use fresh seed. Beetroot and coriander like a soak first to soften their tough coats.
Patchy growth: Uneven watering or light. Water evenly, turn the tray often and level the compost before sowing.
Sour smell: Too wet. Tip away standing water and let more air in. If it’s bad, compost the tray and start fresh.
Microgreens versus sprouts
They’re different crops. Sprouts are seeds sprouted in water for a few days and eaten whole, roots and all. Microgreens grow in compost or on a mat and are cut as tiny plants once the first leaves open. If the jar method appeals, our guide to growing your own sprouts on a windowsill covers alfalfa, lentil and mung bean.
Whichever you grow, keep things clean. Use seed sold for sprouting or microgreens, clean trays and fresh water, and give microgreens plenty of air.
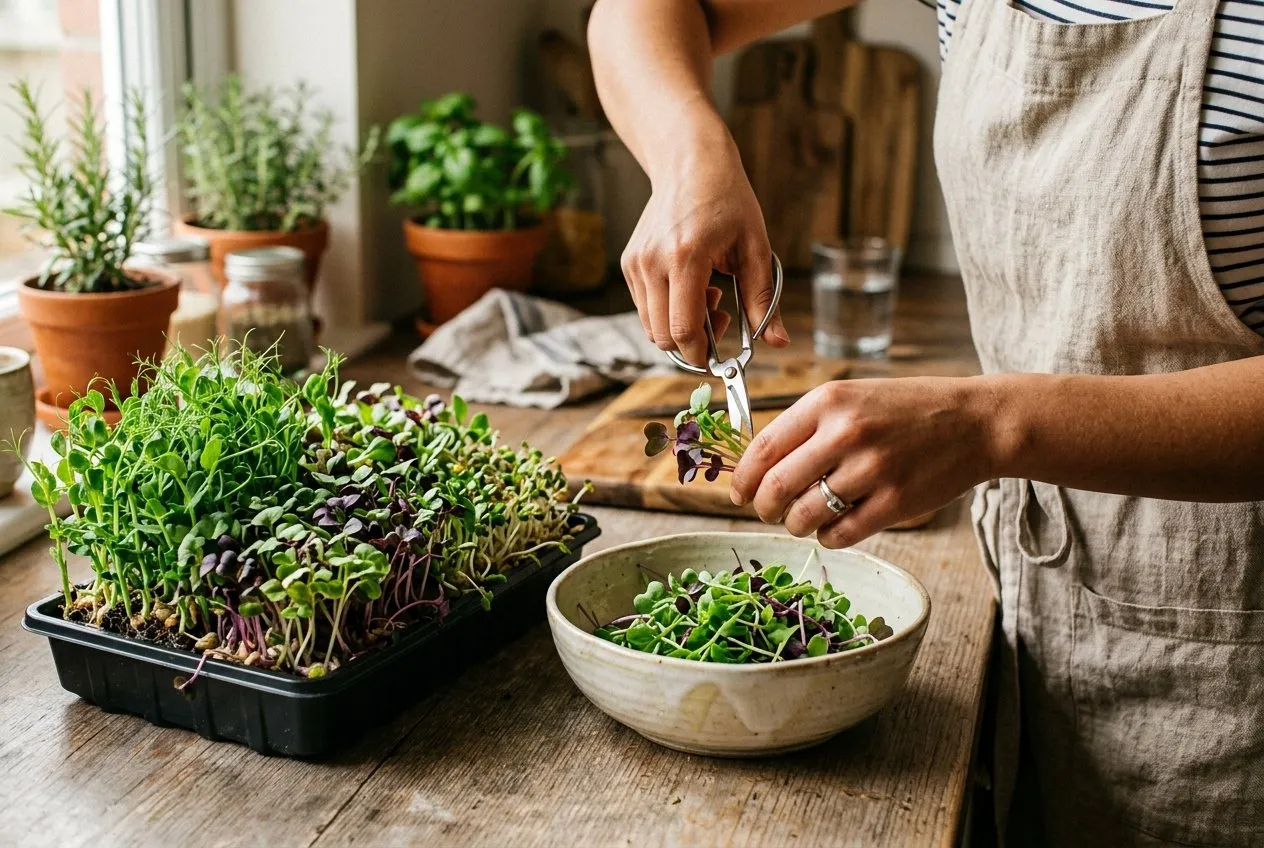
Snipping pea shoots with clean scissors just above the compost once the first true leaves have opened.
Using microgreens in the kitchen
Microgreens are best eaten raw. Add them to food just before serving rather than cooking them.
Lovely ways to use them:
- Scattered over salads for flavour and crunch
- On top of soups, stir-fries and curries just before serving
- In sandwiches and wraps instead of lettuce
- Blended into smoothies (sunflower and pea shoots are good for this)
- As a pretty garnish on any plate
Storage: They’re best eaten straight away. To keep them, wrap loosely in damp kitchen paper in a sealed box in the fridge and use within a few days.
Growing microgreens with children
Microgreens are a brilliant project for kids. The results show up in days, so nobody gets bored, and they get to eat what they grow.
Pea shoots and sunflowers are the best picks. The big seeds are easy for small hands, and you can see them sprouting within a couple of days.
Try a clear container so children can watch the roots grow. Label each tray with the date and variety to turn it into a simple science project.
Frequently asked questions
What are the easiest microgreens to grow UK?
Pea shoots, radish and sunflower are the easiest to start with. Pea shoots are especially forgiving, with big seeds that come up quickly. Radish pops up within a few days and is ready to cut in about a week to ten days. Mustard and cress are quick and simple too.
Do microgreens need sunlight?
They need light, but not necessarily direct sun. A bright windowsill is fine for most of the year. In winter, growth slows and seedlings can go pale and leggy, so a simple LED grow light helps. In summer, keep trays out of strong midday sun, which dries them out fast.
How long do microgreens take to grow?
Most are ready in one to three weeks. Radish and mustard are among the fastest, often ready in about a week. Pea shoots take around two weeks. Slower ones like basil and beetroot can take three weeks or more. Cut them when the first true leaves appear.
Can you regrow microgreens after cutting?
Most don’t regrow, so sow a fresh tray. Pea shoots are the main exception. Cut them above the lowest leaves and they often give you a second, smaller crop. After that, compost the old tray and start again.
Are microgreens more nutritious than vegetables?
They can be, weight for weight. Some microgreens hold more of certain vitamins than the grown-up plant, but it varies a lot between crops. Portions are small, so enjoy them as a tasty extra rather than a swap for your veg.
What do I need to grow microgreens at home?
Just a tray, compost, seeds and a bright windowsill. Use shallow trays or containers with drainage holes, and peat-free multipurpose compost or coir. Buy seeds sold for microgreens or sprouting, and grab a water spray. Lots of kitchen containers can be reused as trays.
Can you grow microgreens without soil?
Yes, they grow fine without soil. Damp kitchen paper, coir mats and hemp mats all work. They’re cleaner indoors but need a closer eye on watering, as they dry out or stay soggy more easily. Compost usually gives slightly bigger, sturdier greens.
Related reading
Our team produces practical UK gardening guidance from source research, contributor records and established horticultural practice. Editorial standards are overseen by Matt W.