
Key takeaways
- Mung bean sprouts are ready in 3-5 days in a jar, with no compost
- Rinse and drain jar sprouts twice a day so they never sit in water
- Cook home-grown jar sprouts until steaming hot before eating
- Pea shoots are ready in about two weeks and often give a second cut
- Sunflower shoots need unhulled seed and a few days covered in the dark
The three easiest sprouts and shoots to grow at home are mung bean sprouts, pea shoots and sunflower shoots. Mung beans need only a jar and water and are ready in three to five days. Pea and sunflower shoots grow in a tray of compost on a windowsill and are ready in about two weeks.
None of them needs a garden, so they suit flats and winter months. This guide covers those three crops. For tiny-seeded sprouts such as alfalfa and lentils, see the guide to jar-grown alfalfa and lentil sprouts.
What’s the difference between sprouts, shoots and microgreens?
Sprouts are germinated seeds eaten whole, root and all. They grow in a jar, with no compost, and are ready in a few days.
Shoots are young plants grown in compost and cut once they have leaves. Pea shoots and sunflower shoots are the big, crunchy ones, usually cut at 8-15cm tall.
Microgreens are much the same idea as shoots, but from smaller seeds such as radish, broccoli and beetroot, cut when tiny. The guide on how to grow microgreens covers those.
| Crop | Method | Ready in | Flavour |
|---|---|---|---|
| Mung bean sprouts | Jar and water | 3-5 days | Mild and crunchy |
| Pea shoots | Tray of compost | About 2 weeks | Sweet, fresh pea |
| Sunflower shoots | Tray of compost | 10-14 days | Nutty and crunchy |
How to grow mung bean sprouts in a jar
Mung bean sprouts are the classic stir-fry bean sprout. They’re forgiving, fast and need almost no kit.
What you need:
- 1-2 tablespoons of dried mung beans, ideally sold for sprouting
- A clean glass jar
- A mesh sprouting lid, or muslin held on with a rubber band
- A bowl or dish rack to prop the jar at an angle
The method:
- Soak: rinse the beans, cover with plenty of cool water and leave overnight.
- Drain: next morning, drain, rinse with fresh water and drain again.
- Prop: stand the jar upside down at an angle in a bowl so the last drops run out. Standing water is what makes sprouts rot.
- Rinse twice a day: morning and evening, rinse well and drain completely.
- Harvest: when the tails are about 2-3cm long, usually after three to five days.
A warm kitchen speeds things up and a cool room slows them down. Keep the jar out of direct sun.

Mung beans from soaking to harvest in a few days. Once the tails are 2-3cm long, they’re ready to cook.
Are home-grown bean sprouts safe to eat?
Yes, once they’re cooked until steaming hot. The warm, damp jar that sprouts love also suits bacteria. The NHS advice on beans and pulses is to cook sprouted seeds until steaming hot unless they’re labelled ready to eat.
Keep the risk low with seed sold for sprouting, a clean jar and fresh water for every rinse. Don’t try sprouting red kidney beans to eat raw: they’re toxic unless boiled hard.
How to grow pea shoots on a windowsill
Pea shoots are the best value windowsill crop. They taste sweet and fresh, and they often give a second cut.
What you need:
- Dried marrowfat peas from the supermarket, or pea seed sold for shoots
- A shallow tray about 5-8cm deep with drainage holes
- Peat-free multipurpose compost
- A bright windowsill
The method:
- Soak the peas in water overnight.
- Sow: fill the tray with 3-4cm of damp compost. Scatter the peas so they almost touch, then press them in.
- Cover: put another tray or a sheet of newspaper on top for a few days to keep them dark and moist.
- Uncover once the shoots are a few centimetres tall and move the tray to a bright windowsill.
- Water from below by pouring into the saucer. Keep the compost damp, not soggy.
- Turn the tray every couple of days so the shoots grow straight.
Cut with scissors when the shoots are 10-15cm tall, just above the lowest pair of leaves. Leave the stumps and keep watering. A second, smaller crop usually follows in a week or two. After that, put the roots on the compost heap and sow again.

Pea shoots about two weeks after sowing. Snip them just above the lowest leaves and they’ll often grow back.
If pea shoots get you hooked, the guide on how to grow peas shows how to grow a full crop of pods outside.
How to grow sunflower shoots
Sunflower shoots have thick, crunchy stems and a nutty taste. They work as a salad base rather than just a garnish.
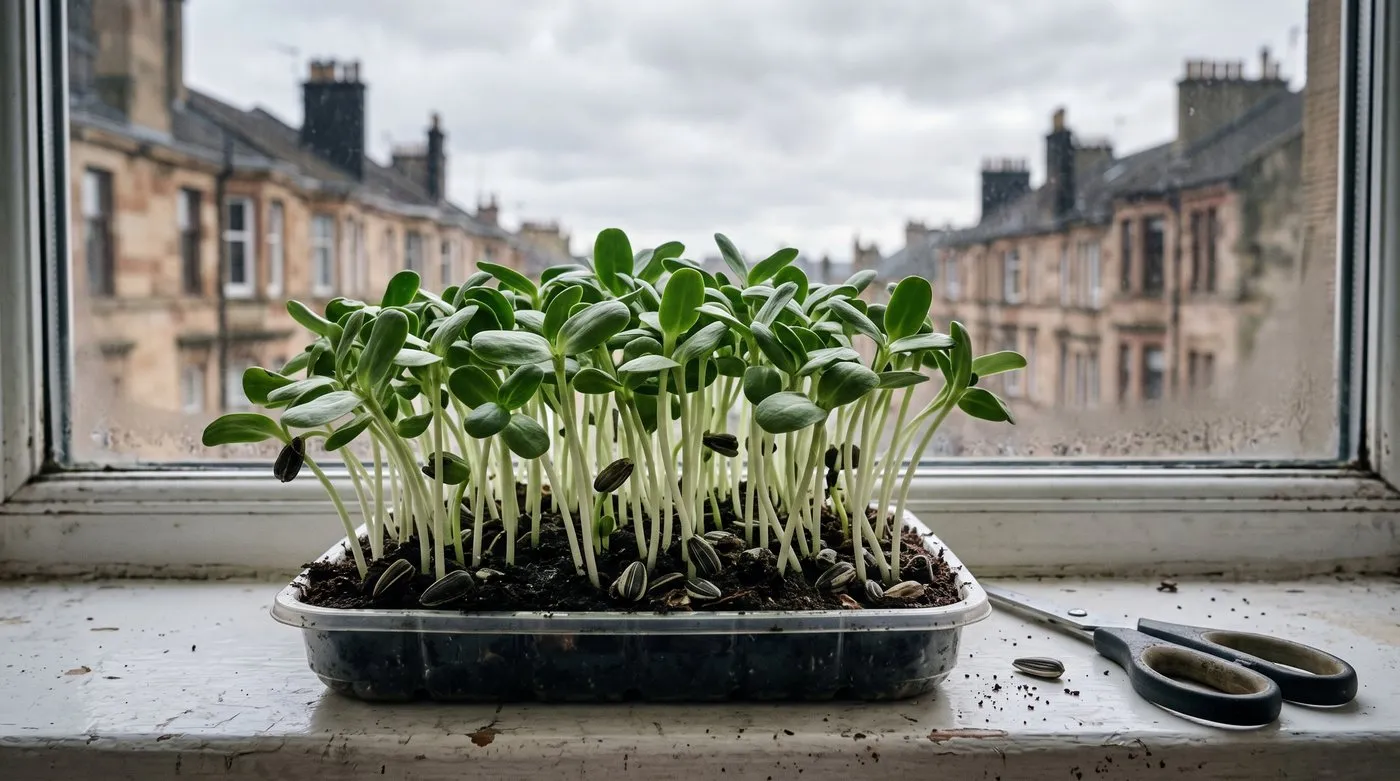
Sunflower shoots are ready once the seed leaves open out flat. Cut them above the compost and eat them fresh.
What you need: unhulled black sunflower seeds sold for sprouting or microgreens. Hulled seeds won’t grow. Skip bird food, as it isn’t sold as food for people.
The method:
- Soak the seeds for 8-12 hours. Throw out any that float.
- Sow them thickly on damp compost and press them in.
- Cover and weigh down: put a second tray on top with a book on it. The weight helps the seedlings push off their shells.
- Uncover after a few days, once the shoots are lifting the tray. Move them to a bright windowsill.
- Harvest when the seed leaves are fully open and the shoots are about 8-12cm tall, usually after 10-14 days.
Cut above the compost and eat them fresh. Sunflower shoots don’t regrow, so sow a new tray every week or so for a steady supply.
How to keep sprouts and shoots coming
Start a new jar or tray every few days rather than everything at once. Two or three jars and two trays on the go give you something ready most of the week.
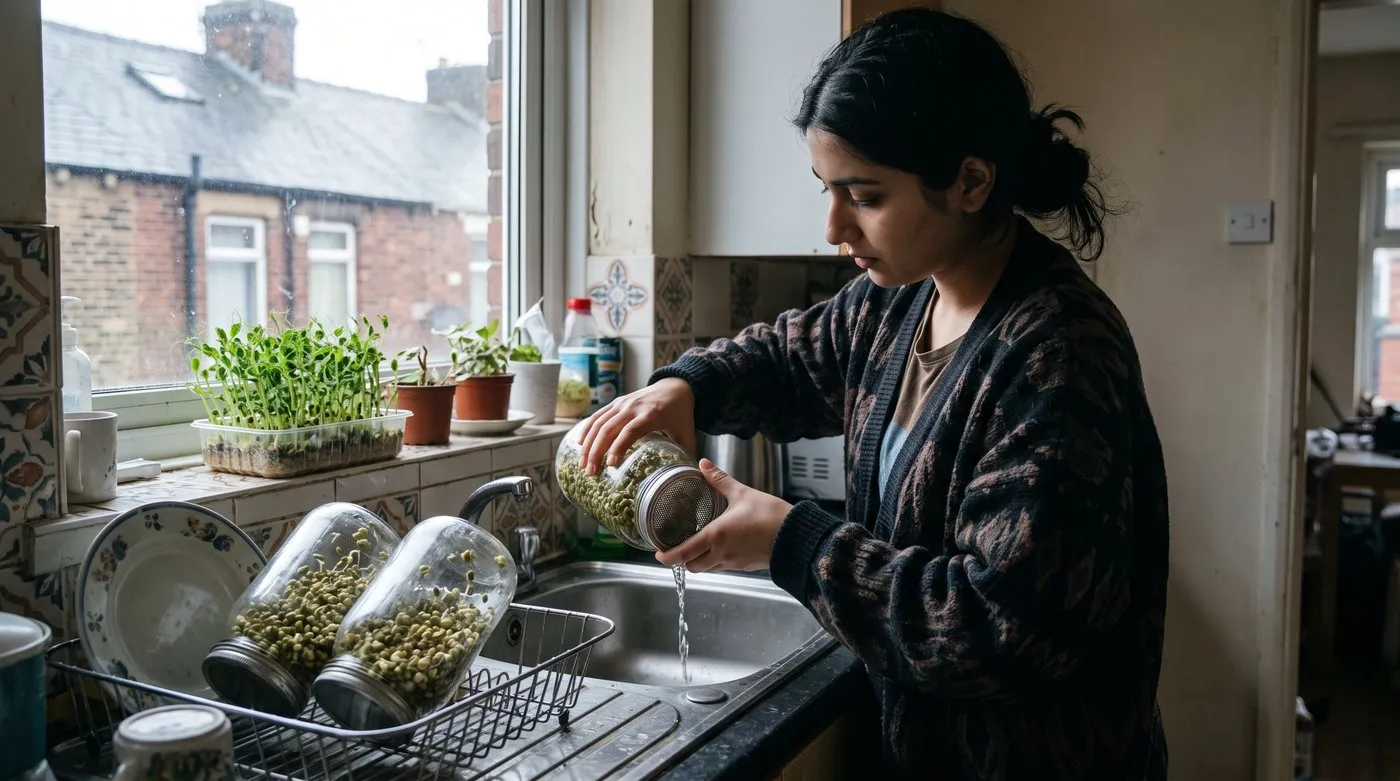
A quick rinse and drain morning and evening is all jar sprouts need. Prop them at an angle so every drop runs out.
A simple routine:
- Monday: soak mung beans
- Tuesday: soak peas or sunflower seeds for a tray
- Thursday: start another jar
- Weekend: sow the next tray and compost any finished ones
The same windowsill can grow plenty more over winter. The guide to growing vegetables on a windowsill has ideas once you’re ready to go further.
Common problems with sprouts and shoots
| Problem | Likely cause | Fix |
|---|---|---|
| Mould or a bad smell in the jar | Poor drainage, not enough rinsing | Rinse twice a day, drain fully, prop at an angle. Bin smelly batches |
| Slimy sprouts | Sitting in water | Drain more thoroughly. Use a mesh lid |
| Seeds not sprouting | Old seed or a cold room | Use fresh seed sold for sprouting. Move to a warmer spot |
| Mould on a pea tray | Overwatering, poor airflow | Water from below and less often. Remove mouldy patches |
| Pale, leggy shoots | Not enough light | Move to your brightest window. Turn the tray often |
| Shells stuck to sunflower leaves | Not enough weight while covered | Weigh the cover down. Mist and pick off stuck shells |
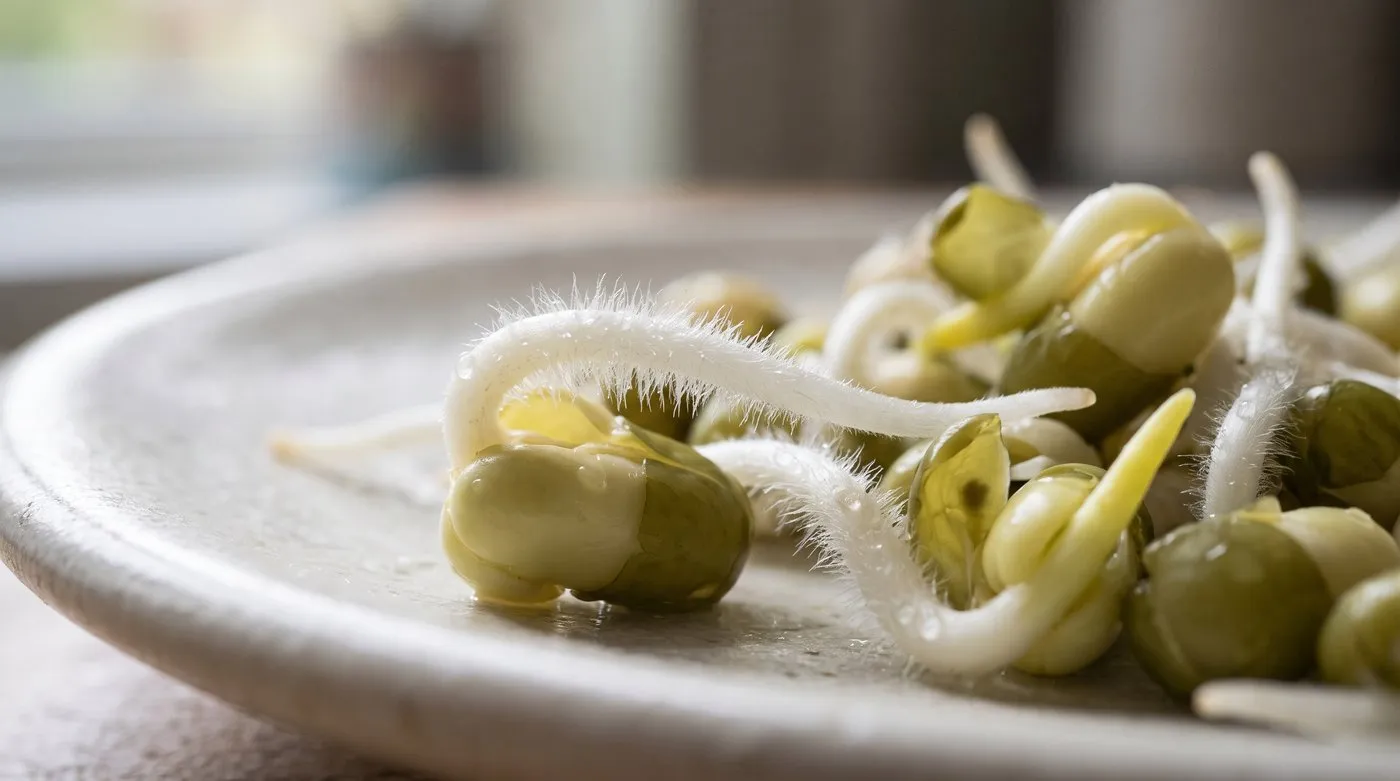
That fine white fuzz is root hairs, not mould. It’s even all over and disappears when you rinse.
Don’t confuse fine white root hairs with mould. Root hairs are fuzzy, even and vanish when you rinse. Mould is patchy, often grey, and smells musty.
Using sprouts and shoots in the kitchen
Pea and sunflower shoots are eaten raw. Jar sprouts should be cooked until steaming hot.
Mung bean sprouts:
- Stir-fry with garlic and soy sauce until piping hot
- Add to noodle soups and simmer until steaming
- Cook into omelettes, curries or fried rice
Pea and sunflower shoots:
- Use as a salad base instead of lettuce
- Pile into sandwiches for crunch
- Scatter over pasta, risotto or soup just before serving
Storage: keep mung sprouts in the fridge and use them within a couple of days, cooking them first. Pea and sunflower shoots keep for a few days in the fridge, loosely wrapped in damp kitchen paper in a box.

Cut shoots and microgreens with clean scissors just above the compost, and eat them while they’re fresh.
Common mistakes
- Leaving sprouts in water: they rot fast. Always drain and prop the jar.
- Eating jar sprouts raw: cook them until steaming hot unless they’re labelled ready to eat.
- Using bird seed: buy seed sold for sprouting or microgreens.
- Keeping shoots in a dim room: they go pale and floppy. Give them the brightest windowsill you have.
- Sowing everything at once: you get a glut, then nothing. Start small batches every few days.
Frequently asked questions
How long do mung bean sprouts take to grow?
Mung bean sprouts are usually ready in three to five days. Soak the beans overnight, then rinse and drain them twice a day. They are ready when the tails are about 2-3cm long. Keep the jar out of direct sun.
Do sprouts need sunlight to grow?
Jar sprouts don’t need sunlight. Mung beans grow happily in indirect light or a dark cupboard. Pea and sunflower shoots are different. Once they are up, they need a bright windowsill to grow sturdy and green.
Why are my sprouts going mouldy?
Usually because they are not draining properly. Rinse at least twice a day, drain completely and prop the jar at an angle so water runs out. Never leave sprouts sitting in water. Throw away any batch that smells bad or looks slimy.
Are home-grown sprouts safe to eat?
They are safe when cooked until steaming hot. The warm, damp conditions sprouts need also suit bacteria that cause food poisoning. NHS advice is to cook sprouted seeds unless they are labelled ready to eat. Use seed sold for sprouting and clean equipment.
Can you grow pea shoots from dried peas?
Yes, dried marrowfat peas from the supermarket work well. Soak them overnight, then sow thickly on damp compost in a tray. Keep them on a bright windowsill. They’re usually ready to cut in about two weeks, at 10-15cm tall.
What is the difference between sprouts and shoots?
Sprouts are eaten whole, root and all; shoots are cut above the compost. Sprouts grow in a jar of rinsed seeds and are ready in days. Shoots grow in compost and are cut once they have leaves, usually at 8-15cm tall.
Do pea shoots grow back after cutting?
Often, yes, if you leave a leaf or two on each stem. Cut just above the lowest pair of leaves and keep the compost damp. A second, smaller crop usually follows in a week or two. After that, compost the tray and sow again.
Ready for more indoor crops? Read our guide to windowsill sprouts and microgreens, try growing cress, or browse more veg growing guides.
Our team produces practical UK gardening guidance from source research, contributor records and established horticultural practice. Editorial standards are overseen by Matt W.


