Key takeaways
- A level base stops the frame twisting, doors sticking and panes cracking
- Paving slabs on compacted hardcore suit most hobby greenhouses
- Concrete is best for big greenhouses and windy, exposed spots
- A steel base kit made for your greenhouse is the quickest option
- Check the base is level to within 5mm and measure both diagonals before building
A greenhouse is only as good as the base under it. A wonky base leads to twisted frames, cracked panes and doors that won’t shut. Get the base right and everything else is easier.
Here’s how to build the three main types of base used in the UK: paving slabs, concrete and steel base kits. There are also ground anchors for softer ground and windy spots.
Why does a greenhouse need a solid base?
A greenhouse frame is made to sit on a flat, firm surface. Even a small dip puts a twist through every bar, bolt and pane.
A good base does four jobs. It keeps the frame level, holds it down in the wind, lifts it clear of puddles and gives you a clean, firm floor.
Skip it and you’ll spend years battling stiff doors, draughty gaps and panes that pop out in a gale.
Where is the best place to put a greenhouse base?
Choose the sunniest open spot you have, sheltered from cold north and east winds. The RHS advice on choosing a greenhouse suggests a spot that gets sun for most of the day.
Which way it faces matters too. A ridge running east to west gives a little more light in winter, which helps early sowings and overwintering plants. North to south suits summer crops like tomatoes, as both sides get sun. Keep clear of overhanging trees, which cast shade and drip on the glass. Avoid frost pockets at the bottom of a slope. Leave room all round to clean and fix every pane, and plan a path to the door.
Paving slab bases: the most popular option
Paving slabs are the favourite choice for hobby greenhouses up to about 8x10ft. They’re affordable, forgiving of small mistakes and let rain drain through the joints.
How to lay a paving slab greenhouse base
- Mark out the area. The base must match the outside size of your greenhouse. Check the maker’s base measurements, as they often differ from the name (a “6x8ft” greenhouse may need a base of 1930mm x 2540mm). Add 25-50mm all round.
- Dig down 125-150mm. Take off all turf, topsoil and roots until you reach firm ground. On heavy clay, dig an extra 50mm and add more hardcore to help drainage.
- Compact the hardcore. Spread 75mm of MOT Type 1 hardcore and compact it with a plate compactor or heavy hand tamper. This stops slabs rocking or sinking.
- Lay a sand and cement bed. Spread 25-30mm of a dry mix of 6 parts sharp sand to 1 part cement. Screed it flat with a straight edge run along two timber rails.
- Lay the slabs. Start in one corner and work outwards, tapping each slab down with a rubber mallet. Check the level across each slab and between neighbours. The whole base must be level to within 5mm both ways.
- Fill the joints. Brush kiln-dried sand or a dry mortar mix into the gaps. This locks the slabs in place but still lets water drain.
Gardener’s tip: Choose a slab size that fits your greenhouse with as little cutting as possible. 450mm x 450mm slabs suit most hobby greenhouse sizes.
A slab base looks smart with raised beds around the greenhouse, giving you a neat growing area right by the door.

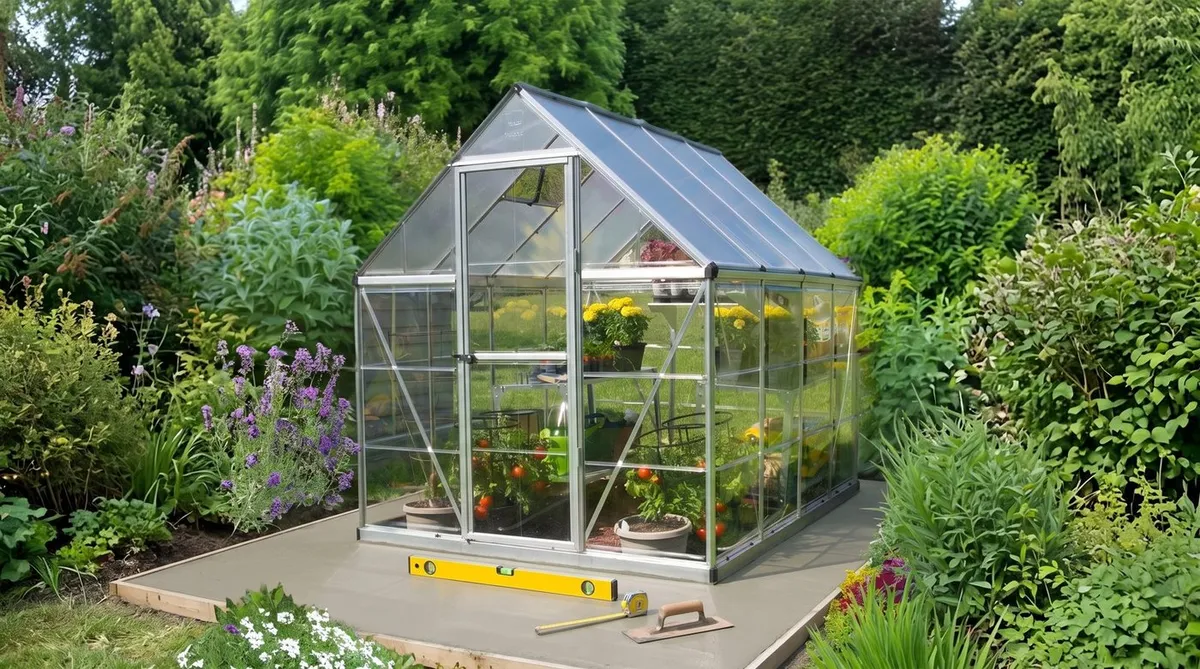
A Palram Hybrid 6x8 sitting snugly on a level paving slab base.
You can shop the Palram Hybrid 6x8 at Greenhouse Stores if you like the look of this one.
Concrete slab bases: the strongest option
A poured concrete slab is the strongest base there is. It suits bigger greenhouses (8x10ft and up), exposed spots and anyone who wants a permanent, solid floor.
How to pour a concrete greenhouse base
- Dig down 175-200mm to leave room for hardcore and concrete.
- Build a frame of timber boards around the edge, often called formwork. Make sure it’s perfectly level, as it sets the height of the finished base.
- Lay and compact 75-100mm of MOT Type 1 hardcore inside the frame.
- Add steel mesh for greenhouses bigger than 8x10ft. Sit it on spacers so it ends up in the lower part of the concrete.
- Pour the concrete 75-100mm deep, using a C20 or C25 mix. Tamp it level with a straight edge and finish with a wooden float.
- Let it cure for at least 48 hours before building on it. In cold weather (below 5C), give it 72 hours and cover it to protect it from frost.
Hiring a cement mixer for the day makes the job much easier.

A freshly poured concrete base inside its timber frame, checked with a spirit level before it sets.
Where drainage is already a problem, add a 50mm strip of gravel around the base to carry rainwater away from the walls.
Steel base kits: the matched solution
Most greenhouse makers sell galvanised steel base kits made for each of their models. They bolt together and sit on level ground, lifting the greenhouse a little above the surface.
Why choose a steel base kit?
A steel base kit is made to fit your greenhouse exactly. No measuring, no cutting and no worrying whether it’ll line up. It also gives you a solid rail to bolt the greenhouse down to.
Vitavia greenhouse bases come flat-packed with all the fixings and cover a wide range of sizes.
How to install a steel base kit
- Prepare the ground. The kit still needs a flat surface. Strip turf and topsoil, then lay 50-75mm of compacted gravel or some paving slabs.
- Put the frame together following the maker’s instructions. Most bolt together at the corners and along the middle rails.
- Check every rail is level and measure both diagonals. Any twist in the base goes straight into the greenhouse. Add or take away gravel under the rails to adjust.
- Peg or bolt it down. Most kits come with ground pegs. On hard ground, anchor bolts through paving slabs hold better.
Steel bases work well with a gravel floor or with soil testing and ground preparation inside, if you want to grow straight into the ground.
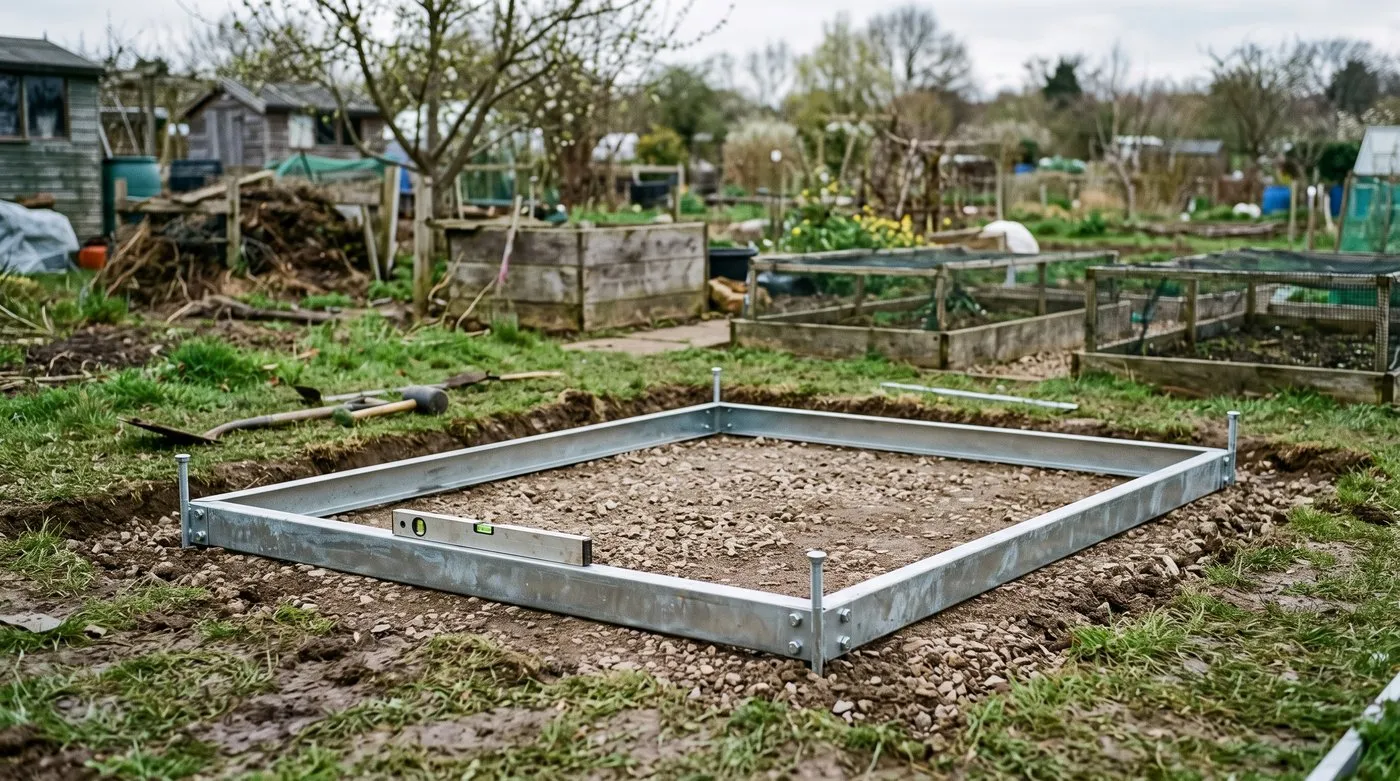
Even a steel base kit needs a flat, firm bed underneath. Check every rail is level before you peg it down, as any twist goes straight into the greenhouse.
Can you use a timber or sleeper base?
Yes. A frame of treated timber or new sleepers is a quick, cheap base for small and medium greenhouses. It’s handy if you want to grow straight into soil borders inside.
Use timber treated for ground contact (Use Class 4), as ordinary treated timber soon rots in damp soil. Sit the frame on a strip of compacted gravel so it drains, not straight on the soil. Join the corners with coach screws or steel brackets, then level and square it just as you would slabs. Bolt the greenhouse to the timber, and fix the timber down with anchor stakes or small concrete pads at each corner. A timber base won’t last as long as slabs or concrete.
Ground anchors for soft ground
Ground anchors hold a greenhouse down where a permanent base isn’t possible. They suit polycarbonate greenhouses and smaller aluminium models on firm earth or gravel.
The Palram Canopia Greenhouse Anchor Kit has four steel anchors with screw tips that wind into the soil, plus brackets to bolt to the greenhouse base. It’s ideal for allotments where permanent bases aren’t allowed.
Anchors hold best in firm soil. In very loose or sandy ground they may not cope with a big storm. On a windy allotment, growing some vegetables in containers alongside the greenhouse keeps your most delicate crops safe.

An anchor kit holding a greenhouse down on soft ground, no concrete needed.
You can shop the Palram Anchor Kit at Greenhouse Stores.
Levelling: getting it right
Whatever base you choose, get it level to within 5mm both ways and square at every corner.
| Check | How | Aim for |
|---|---|---|
| Level across the width | Spirit level on front and back | Within 5mm |
| Level along the length | Spirit level on both sides | Within 5mm |
| Diagonals | Measure corner to corner both ways, they should match | Within 5mm |
| Square corners | 3-4-5 triangle at each corner | Within 3mm |
A base that isn’t level twists the frame. Roof vents stick, and gaps open round the door that let in wind, rain and pests.
Gardener’s tip: If your ground slopes more than about 75mm across the greenhouse, build up the low side with compacted hardcore instead of digging out the high side. That keeps the greenhouse floor above the ground around it, so it stays drier.
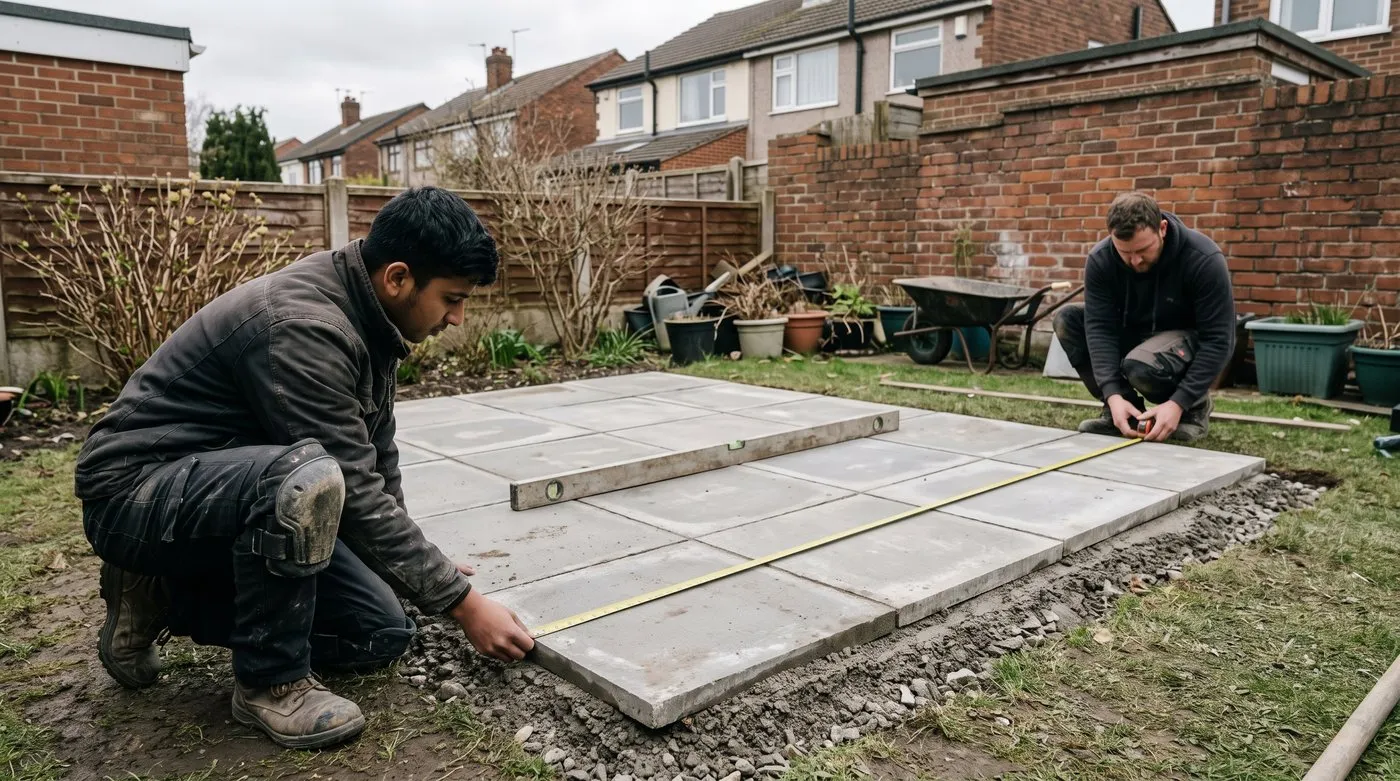
If both diagonals match within about 5mm, your base is square. It’s a quick check that saves a lot of fiddling with stiff doors later.
Floor options inside the greenhouse
The three main greenhouse floors are gravel, paving slabs and soil borders. Pick the one that suits how you like to grow.
Gravel (pea shingle) is the most popular floor. It drains well, adds moisture to the air when you damp it down and is cheap to top up. Lay it over weed membrane.
Paving slabs give a clean, flat floor that’s great for staging, potting benches and wheelchairs. The Fastfit 6x8 Greenhouse Floor Kit has interlocking panels made for greenhouse floors.
Soil borders suit you if you’d like to grow tomatoes or other crops straight in the ground. Keep a row or two of slabs as a path and fill the rest with improved soil or raised beds.
Lots of growers mix and match: a paved path down the middle, with gravel under the staging for moisture.
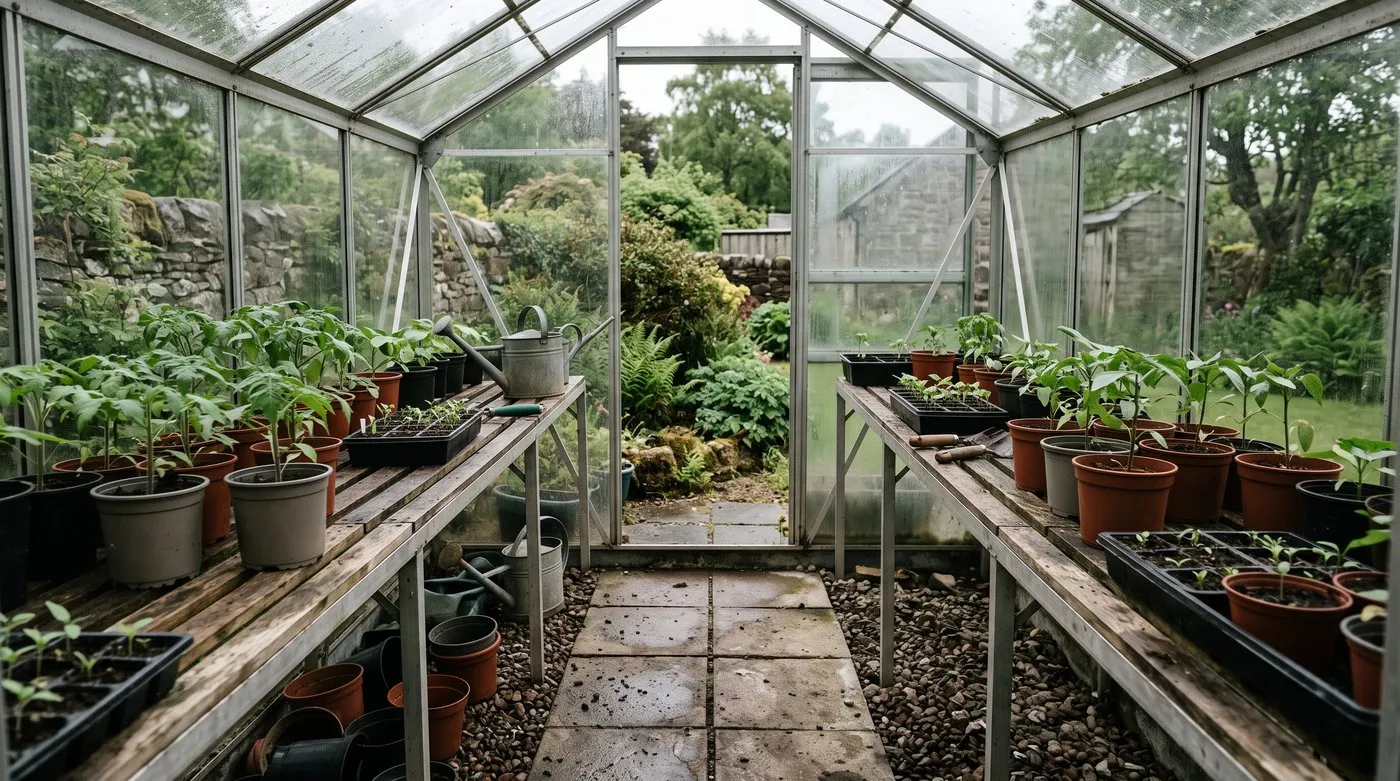
A paved path with gravel under the staging gives you the best of both. The slabs stay clean underfoot and the gravel adds moisture to the air when you damp it down.
Base type comparison
| Paving slabs | Concrete slab | Steel base kit | Ground anchors | |
|---|---|---|---|---|
| Difficulty | Medium | Medium to hard | Easy | Easy |
| Time | Half a day | A day, plus curing | About an hour | Very quick |
| Permanent? | Fairly | Yes | Removable | Removable |
| Drainage | Good, through the joints | Poor, add a gravel edge | Good | Not needed |
| Best for | Most hobby greenhouses | Big greenhouses, windy sites | A matching greenhouse | Allotments, soft ground |
Most greenhouses sold in the UK, including the brands at Greenhouse Stores, have a steel base kit made to match. Ordering it with your greenhouse saves measuring and means a perfect fit.
Do you need planning permission for a greenhouse?
Usually not. In England, most garden greenhouses count as permitted development, as long as they keep to the same limits as other outbuildings.
The Planning Portal guide to outbuildings has the details. In short, a greenhouse can’t go in front of the house. Within 2m of a boundary, it must be no taller than 2.5m. Elsewhere it can be up to 4m with a double-pitched roof or 3m with any other roof, with eaves no higher than 2.5m. Outbuildings and extensions together mustn’t cover more than half the garden around the original house. Listed buildings, National Parks and other protected areas have tighter rules. Wales, Scotland and Northern Ireland have their own systems, so check locally.
Common mistakes to avoid
Skipping the hardcore. Slabs laid straight on soil soon sink. Always compact a layer of MOT Type 1 hardcore underneath.
Building the wrong size. A greenhouse’s base size isn’t always the same as its name. A “6x8” may need a 1930mm x 2540mm base. Check the maker’s measurements before you cut a single slab.
Forgetting drainage. A greenhouse roof sheds a lot of rain. Fit gutters and a water butt. Otherwise water pools round the base and softens the soil underneath.
Not bolting it down. Every greenhouse needs bolting to its base, as its own weight won’t hold it in a gale. Our guide on how to secure a greenhouse in wind covers anchoring and storm prep.
Now your base is sorted, read our guide to the best greenhouse for UK gardens to choose what goes on top.
Frequently asked questions
Do I need a base for a greenhouse?
Yes, every greenhouse needs a level base. Without one, the frame twists, doors and vents stick, and panes can crack. A good base also lifts the greenhouse clear of puddles and gives you something solid to anchor it to.
What is the best base for a greenhouse UK?
Paving slabs on compacted hardcore suit most hobby greenhouses. They’re affordable, easy to level and let rain drain away through the joints. Concrete is stronger but costs more and seals the ground completely.
How thick should a concrete greenhouse base be?
Aim for 75-100mm of concrete on 75-100mm of hardcore. For greenhouses bigger than 8x10ft, go for the full 100mm and add steel mesh. That means digging out about 175-200mm in total.
Do I need planning permission for a greenhouse base?
Usually not, for a garden greenhouse in England. Within 2m of a boundary it must be no taller than 2.5m, and it can’t go in front of the house. Listed buildings and protected areas have stricter rules, so check with your council.
Can I put a greenhouse on soil or grass?
It’s best not to. The frame sinks unevenly, leaving gaps that let in wind and pests. If you can’t build a proper base, use a steel base kit pegged into the ground or a ground anchor kit to hold the frame in place.
How do I level a greenhouse base on sloping ground?
Build up the low side with extra hardcore and compact it well. On a steeper slope, with more than about 150mm of drop, you may need a low retaining wall on the downhill side. Work to a level line set from the highest corner, then check every side and both diagonals.
Our team produces practical UK gardening guidance from source research, contributor records and established horticultural practice. Editorial standards are overseen by Matt W.