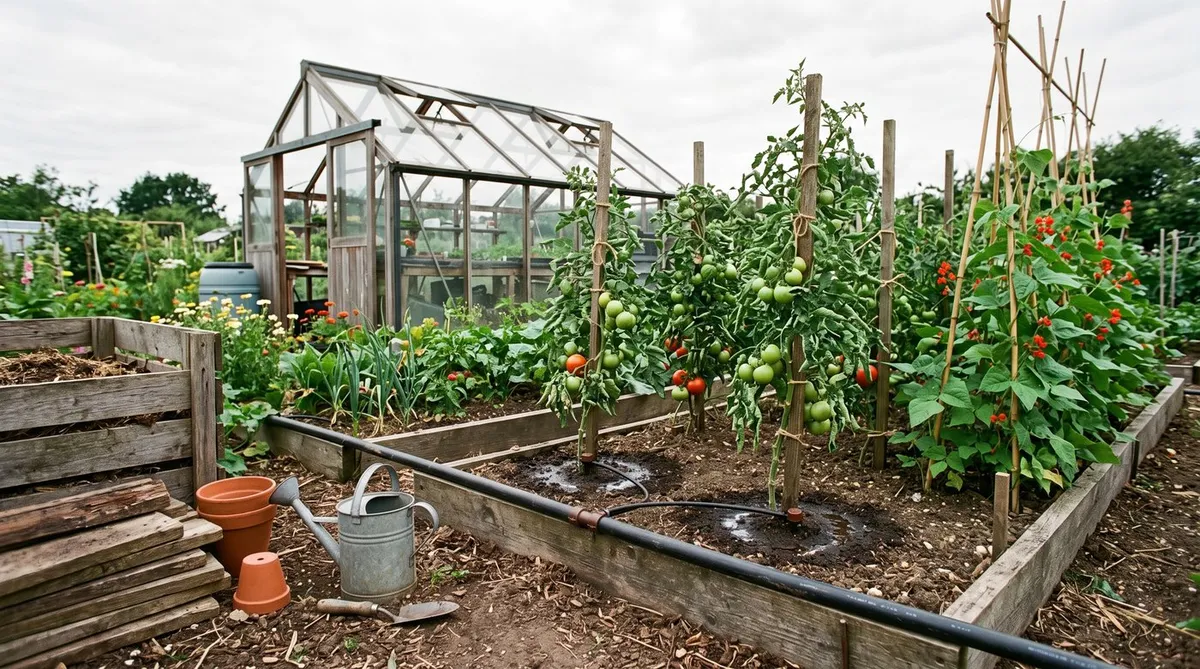
Key takeaways
- Match the kit to the job, micro-drip for pots, dripline for rows, gravity kits where there is no tap
- Always fit a filter at the tap, or grit and limescale block the tiny drippers
- Fit a pressure reducer on mains water so drippers don't pop off
- Water deeply every two or three days rather than a little every day
- A battery timer keeps pots and beds watered while you are away
- Drain the kit and bring timers indoors before the first frost
The best drip irrigation kit is the one that matches what you grow. Micro-drip kits suit pots, dripline suits rows and hedges, and gravity kits suit allotments without a tap. All of them water slowly at the roots, use far less water than a sprinkler and keep leaves dry. They also save you from the watering can in a heatwave or while you’re on holiday.
This guide helps you pick a kit and set it up so it lasts. For watering by hand and the basics of when and how much, see the guide on how to water your garden properly.
How does a drip irrigation kit work?
A drip irrigation kit is a network of pipes with small outlets that drip water onto the soil at each plant. Water leaves the tap or a water butt, passes through a filter and pressure reducer, then runs along a supply pipe. At each plant, a dripper (also called an emitter) or a thin tube releases a slow, steady trickle.
Kits range from small starter sets for a few pots to big systems for a whole allotment. The parts are fairly standard, so you can add to a system as your garden grows.
Which type of drip kit do you need?
Choose the type to suit your layout first. There are five main types.
- Micro-drip and spaghetti line. Thin 4mm tubes run off a main supply pipe, one to each pot. You can adjust each dripper. Best for a patio of mixed pots and troughs.
- Pressure-compensating dripline. A 16mm pipe with drippers built in at fixed spacings, often around 30cm. Every dripper gives the same flow along the run, even on a slope. Best for veg rows, beds and hedges.
- Soaker or porous hose. Water weeps out along the whole length. Cheap and simple for one straight bed, but flow is uneven on long runs and it clogs in hard water.
- Gravity kits and self-watering cones. These run from a raised water butt with no mains or power. Best for allotments and greenhouses with no tap.
- Automatic timer kits. A timer, filter and drippers in one box, ready to fit to a tap. Best for beginners and holiday cover.
| Kit type | Good for | Timer | Watch out for |
|---|---|---|---|
| Micro-drip | Mixed patio pots | Optional | Thin tubes kink and get knocked out |
| Pressure-compensating dripline | Rows, beds, hedges | Optional | Dripper spacing is fixed |
| Soaker hose | One short straight bed | Optional | Uneven flow, clogs in hard water |
| Gravity kit or cones | No tap, allotments | Not needed | Gentle flow, short runs only |
| All-in-one timer kit | Beginners, holidays | Included | Smaller kits only cover a few pots |
For most gardens with a tap, pressure-compensating dripline is the simplest way to water rows, beds and hedges evenly. For a patio of pots in different sizes, micro-drip wins because you can tune each one. You can browse timers, dripline and fittings in the Greenhouse Stores irrigation range.
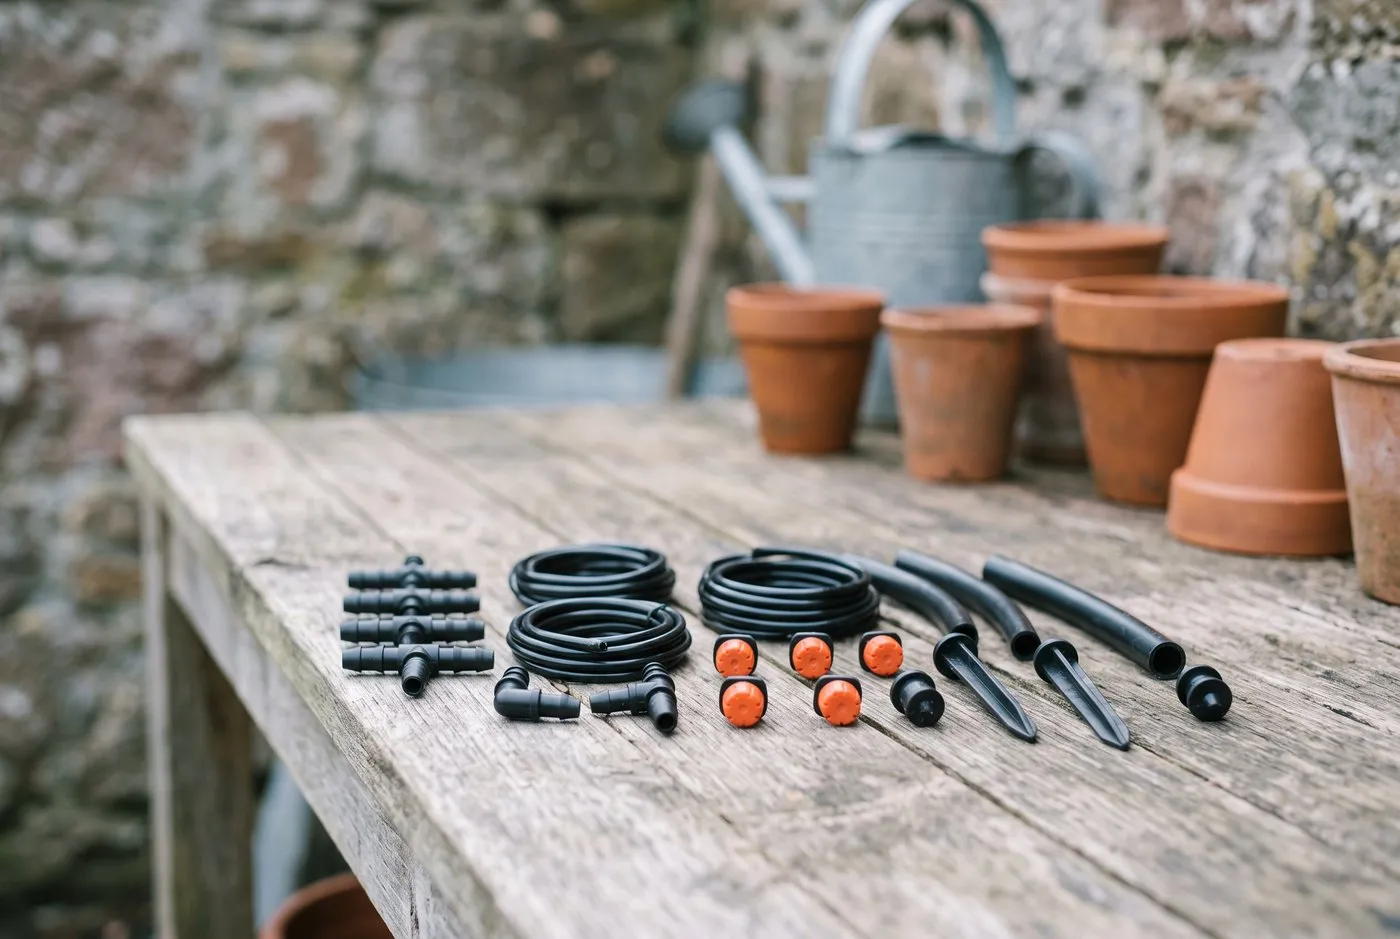
Micro-drip parts push together without tools. Adjustable drippers let you give a thirsty tomato more water than a pot of herbs.
How to size a drip kit for pots, beds and rows
Size the kit to your plants, not to the tap. Count what needs watering, then work out the parts.
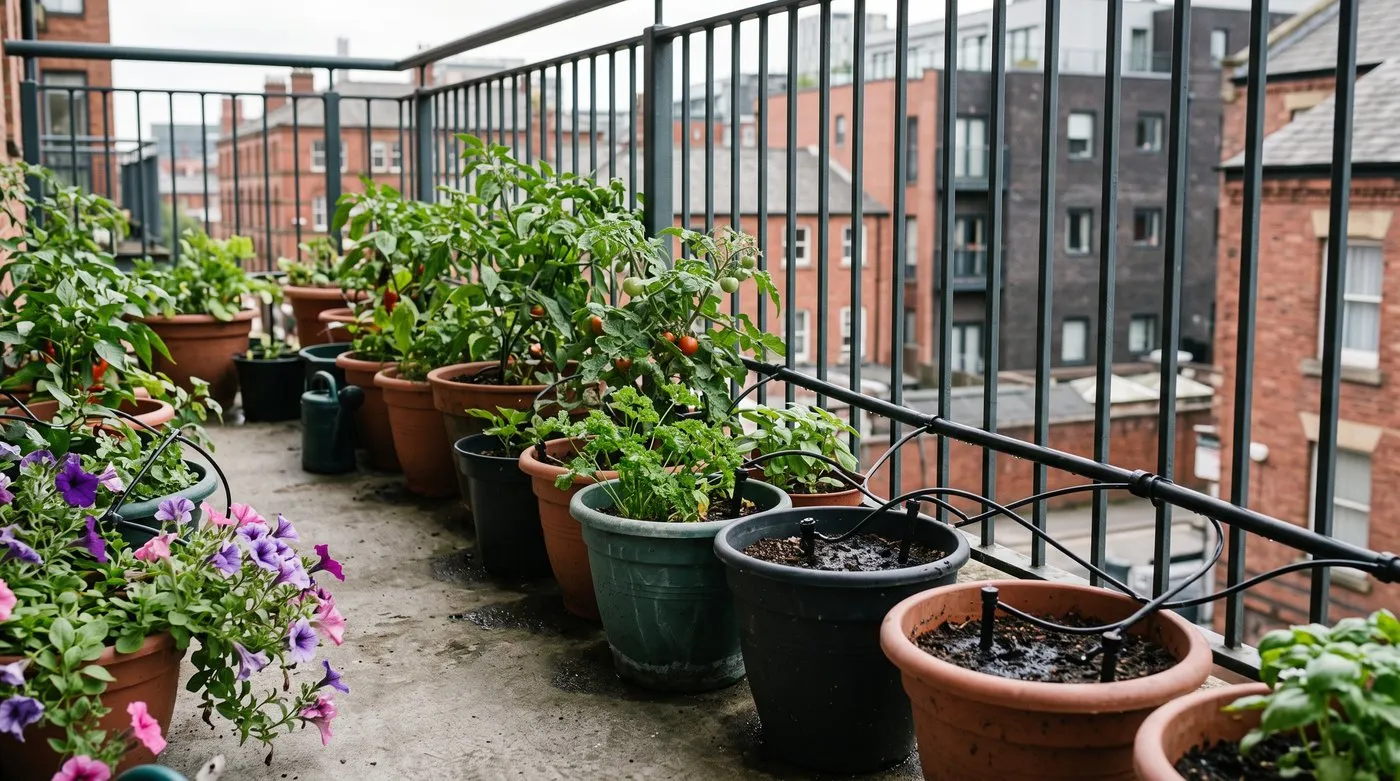
One dripper per pot keeps a balcony of tomatoes and herbs watered evenly. Give the biggest, thirstiest pots a stronger dripper.
- Patio pots. One dripper per pot. Give small pots a low-flow dripper and big tubs a higher one, or two drippers.
- Raised beds and veg rows. Use dripline with drippers about 30cm apart. A narrow bed needs one line down the middle, and a wider bed two lines.
- Hedges and shrubs. Run one line along the base, with a dripper at each plant.
Long runs can starve the far end. If a line is long, use pressure-compensating dripline, or split it into two shorter loops from a T-connector. The guide to vegetables that thrive in pots lists crops that love steady drip watering.
Why you need a filter and pressure reducer on mains water
These two small fittings decide whether your kit lasts. Mains water is often too forceful for drip kits. Connect a kit straight to the tap and drippers can pop off and joints blow apart. A pressure reducer on the tap steadies the flow, and many starter kits include one.
The filter matters just as much. Mains water carries fine grit, and hard-water areas add limescale. Dripper holes are tiny, so they block easily. Fit a filter at the tap and rinse it out every few weeks in summer. It takes two minutes and makes all the difference.
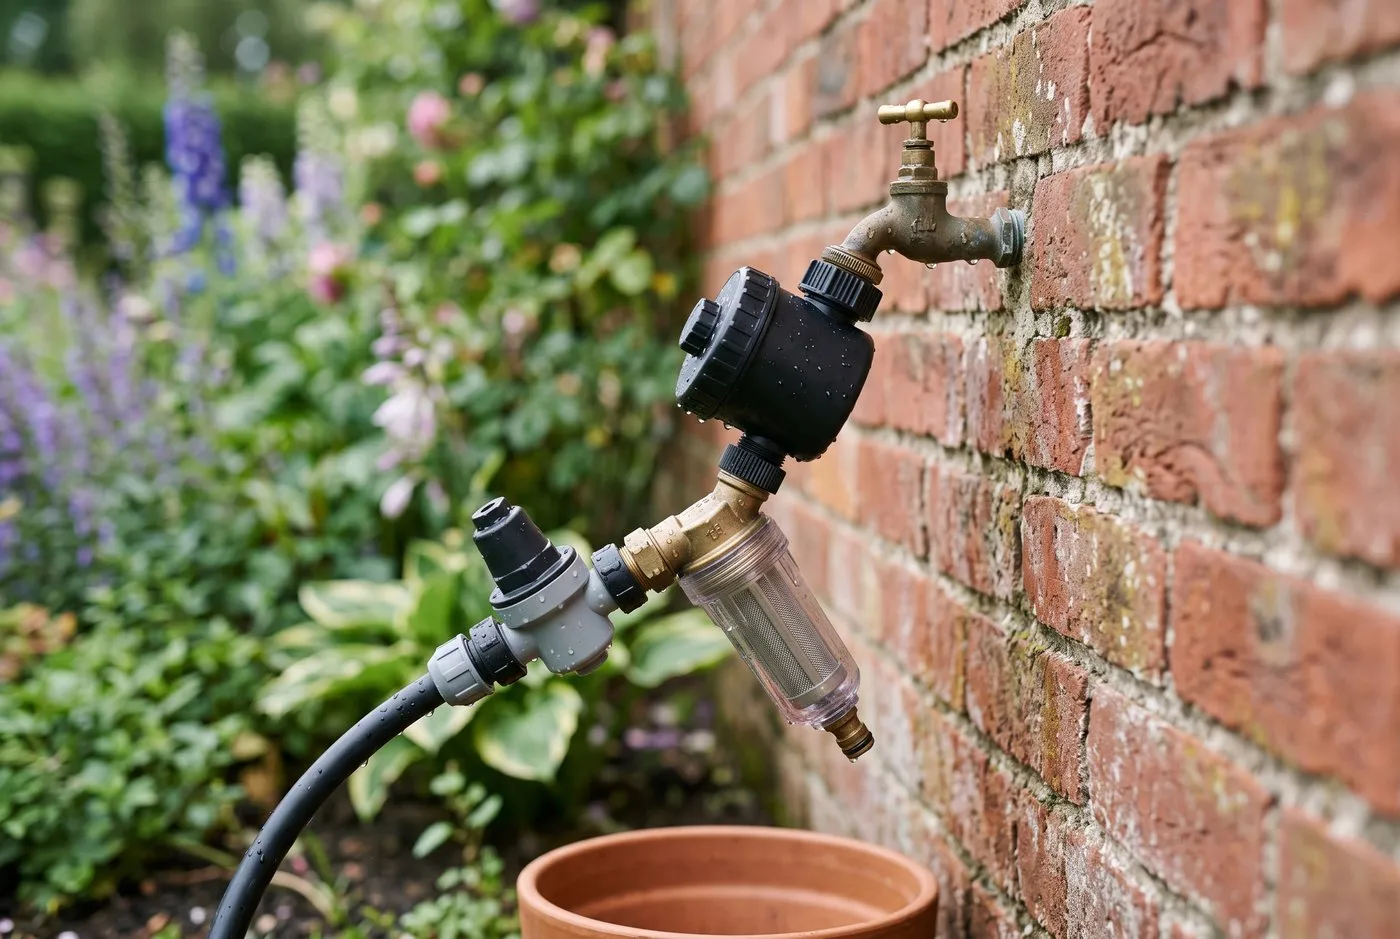
The tap end of a drip kit: a timer, then a filter and a pressure reducer. The filter catches grit before it can block the drippers.
How long and how often should drip irrigation run?
Water deeply every two or three days rather than a little every day. A drip kit soaks water down and outwards from each dripper. Short daily bursts only wet the top few centimetres, so roots stay shallow and dry out fast. Longer, less frequent runs push water deeper and roots follow.
As a starting point, run the kit for 30 to 45 minutes early in the morning. After a week, dig down beside a plant to see how far the water has reached. On sandy soil, water goes down fast, so space drippers closer and run them for shorter, more frequent spells. On clay, water spreads wider and slower, so longer, gentler runs work best. Mulch over the pipe to hold the moisture in. The guide on what mulch is and how to use it explains the options.
Adding a timer for holidays and hands-free watering
A battery tap timer turns a drip kit into an automatic system. It fits between the tap and the filter and turns the water on and off to a schedule.
Set it to run early in the morning, before the heat builds. Evening watering can draw slugs out onto damp soil. A drip kit on a timer can look after a patio of pots for a week or two while you’re away. Change the batteries every spring and check it works before you leave. For more ideas, see the guide to holiday watering solutions.
If your water company brings in a hosepipe ban, check its rules before running a mains-fed kit. Kits fed from a water butt are a good fallback. The guide to gardening in a hosepipe ban explains what’s usually allowed.
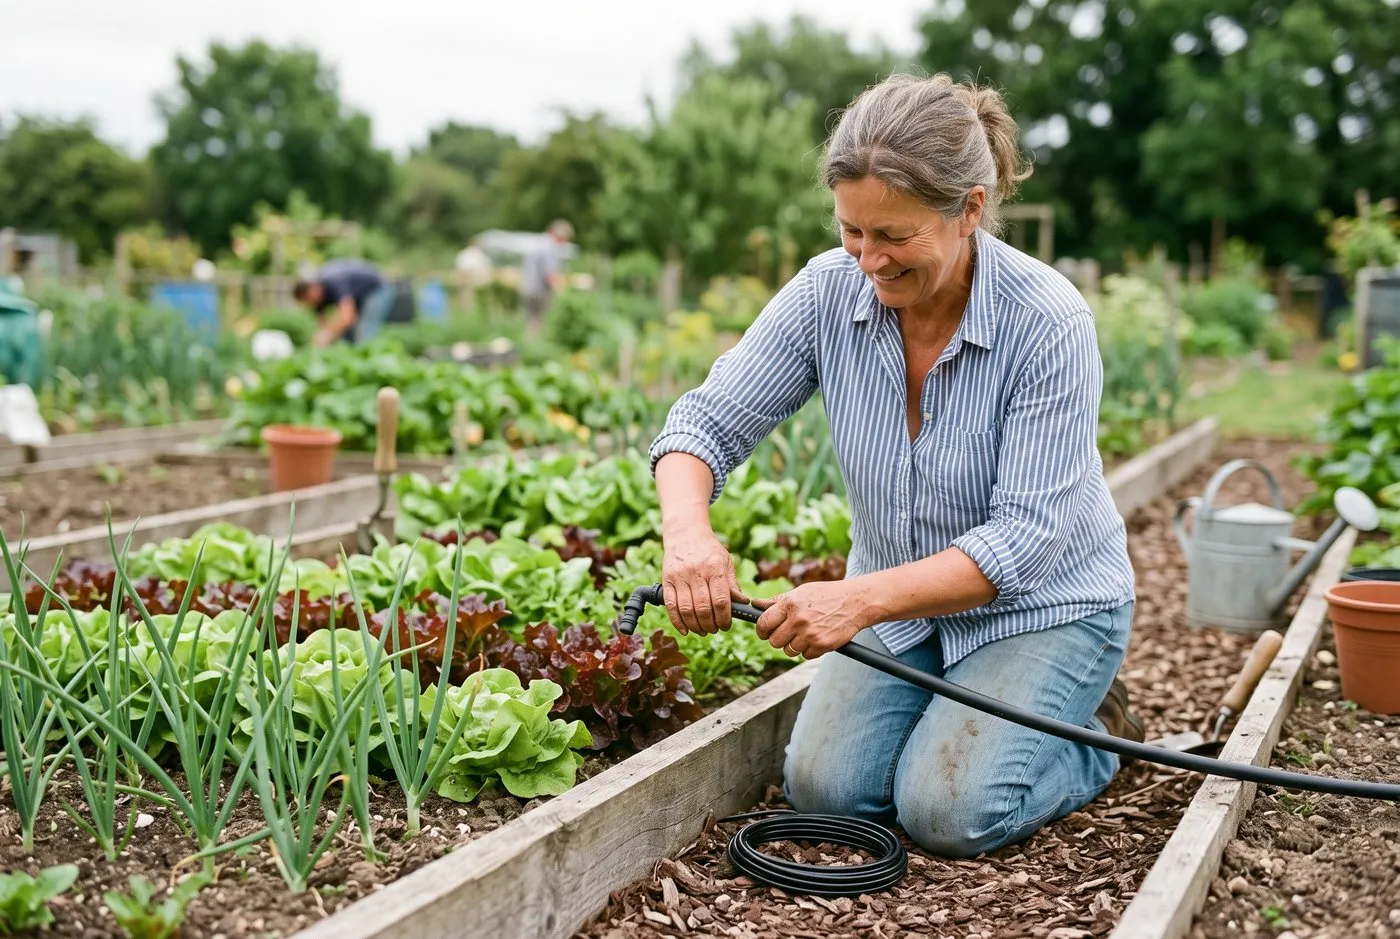
Push the pipe right over the barb of each fitting. A half-fitted joint is the first one to blow apart.
Gravity drip kits for allotments with no tap
Plenty of plots have no tap nearby, and a gravity kit solves that. Stand a water butt about a metre off the ground on blocks or a sturdy stand, and run a low-flow dripline from its outlet. Gravity gives only a gentle push, so keep runs short and water for longer.
Self-watering cones are another neat off-grid option. Each terracotta cone sits in the soil and opens a small valve when the soil dries, drawing water from a raised reservoir. They need no timer and no power. The guide to allotment water supply solutions has more ways to collect and store water on a plot.
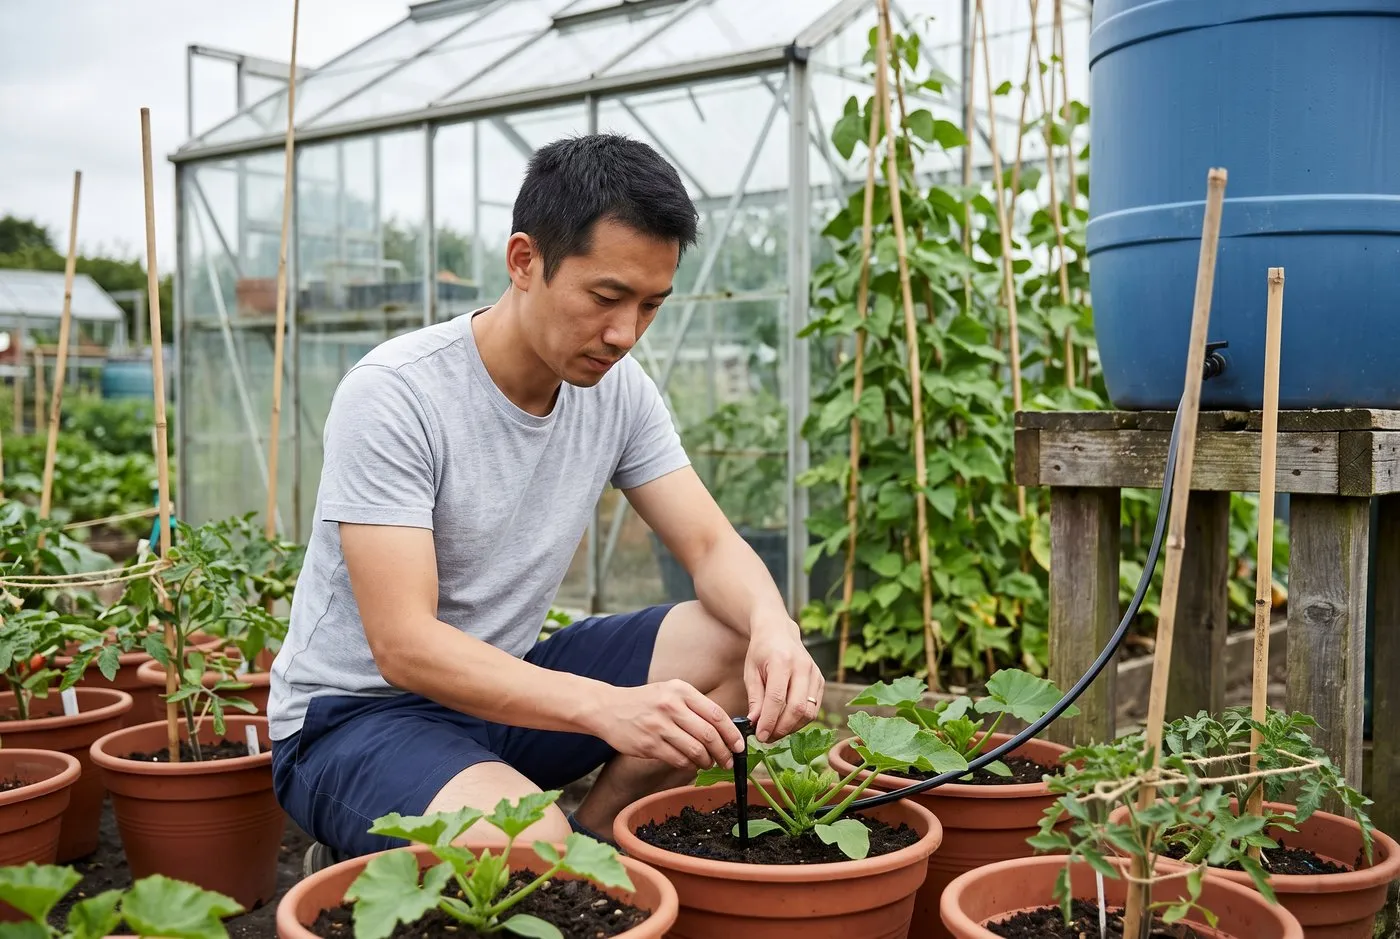
A water butt raised on a stand gives just enough pressure for a short gravity line to a row of pots.
Month-by-month drip irrigation calendar
| Month | Task |
|---|---|
| January to February | Kit stored. Plan the layout and order any new parts |
| March | Reassemble on a mild day. Check for split pipe and perished washers |
| April | Fit the filter and pressure reducer. Flush and test before planting |
| May | Connect the timer with a light schedule as growth starts |
| June | Increase run times as it warms up. Rinse the filter. Check every dripper |
| July | Peak demand. Water deeply every two to three days. Top up butts for gravity kits |
| August | Check the far ends of long runs. Clear blocked drippers. Set up holiday cover |
| September | Ease back as nights cool and rain returns. Rinse the filter |
| October | Water only in dry spells |
| November | Disconnect, drain fully and bring timers and fittings indoors before frost |
| December | Store pipe loosely coiled under cover |
Why drip kits block, starve and split
Most drip kit problems have one of three causes, and all three are avoidable.
- Blocked drippers come from grit and limescale. Fit a filter, rinse it regularly and flush the whole line once a year. Pressure-compensating drippers cope better in hard water than open micro-tube.
- Weak flow at the far end means a run is too long. Use pressure-compensating dripline, or split it into two shorter loops.
- Split or kinked pipe comes from frost and tight bends. Drain the kit before winter and use elbow connectors at corners rather than forcing a bend.
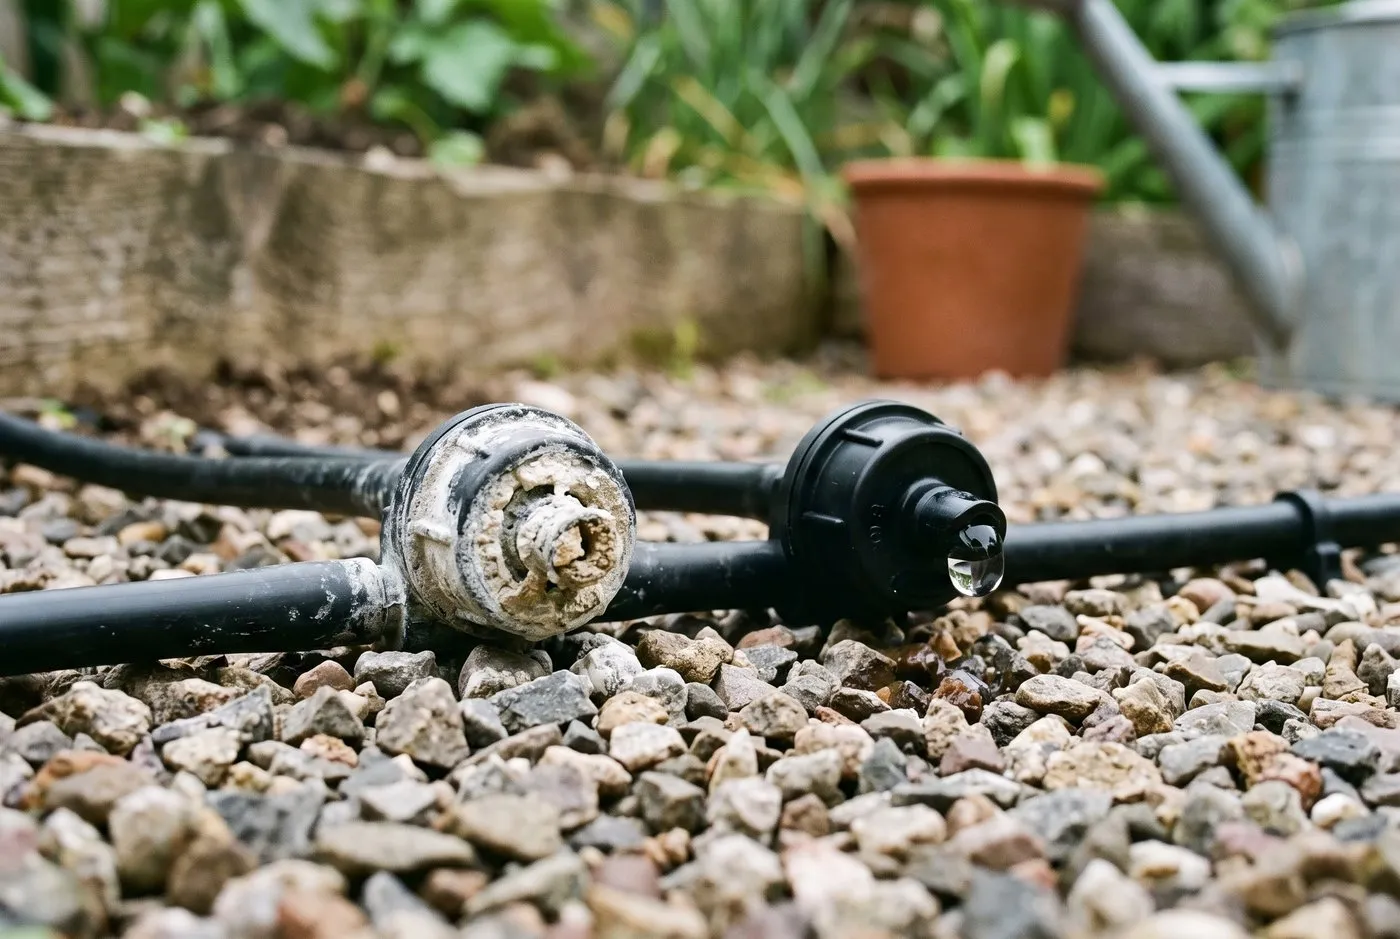
Limescale has blocked the dripper on the left. A filter at the tap and a yearly flush keep the rest flowing like the one on the right.
How to store a drip kit over winter
Frost is the biggest killer of drip kits. Water trapped in the pipe freezes, expands and splits pipes and drippers.
Before the first hard frost, usually in November, disconnect the kit at the tap. Bring the timer, filter and reducer indoors, as water inside them can freeze and crack them. Take the end cap off each line and let it drain, lifting one end if the run is level. Coil the pipe loosely and store it in a shed or garage. Tight coils leave kinks that set over winter.
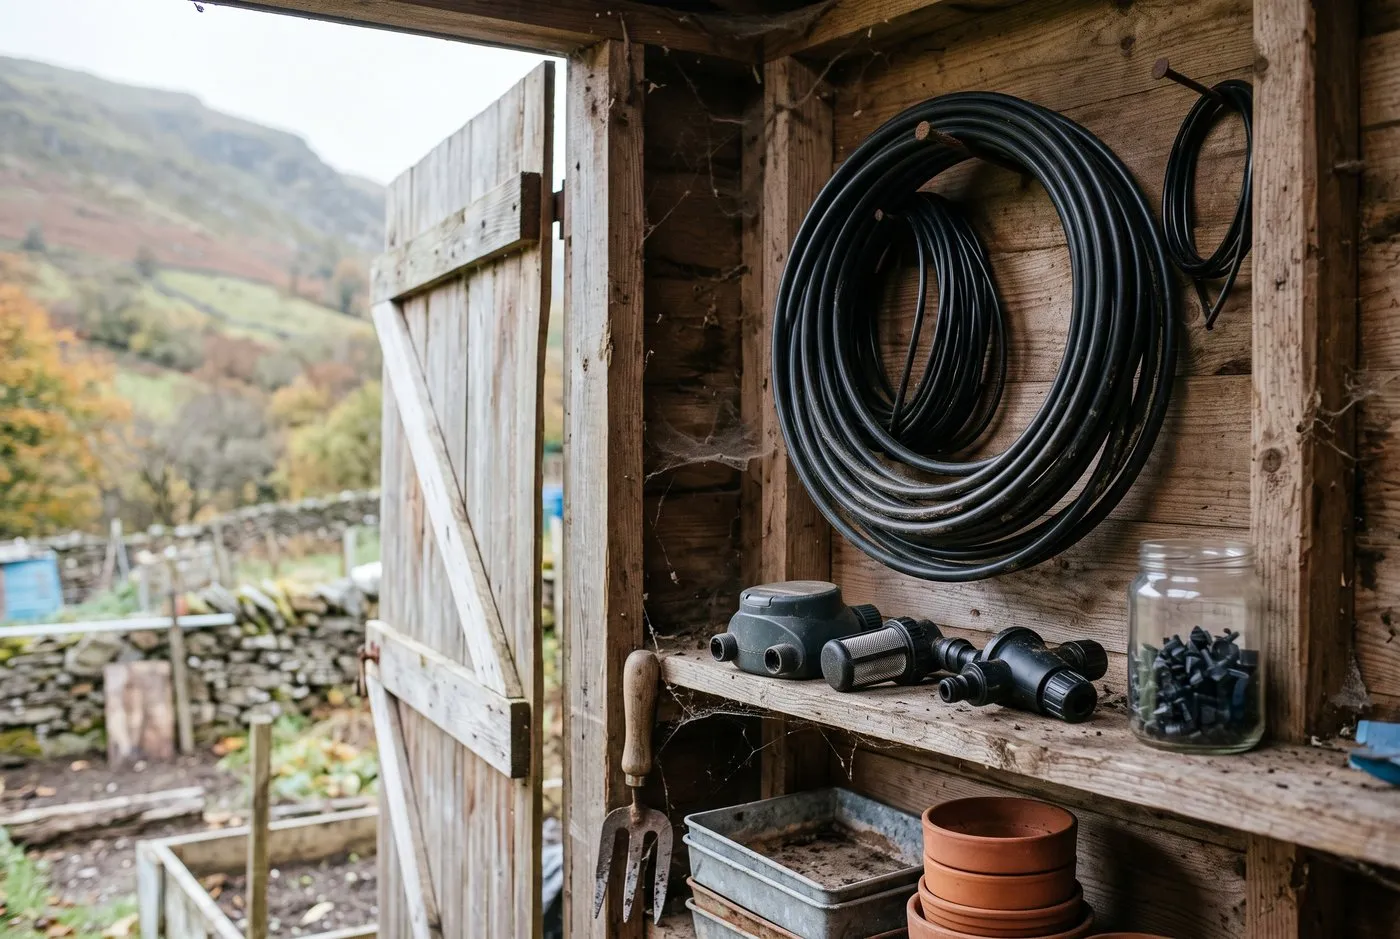
Drained, loosely coiled and under cover for winter. The timer and fittings stay dry and frost-free indoors.
Common drip irrigation mistakes
- Skipping the filter. Unfiltered water blocks drippers within weeks, especially in hard-water areas.
- Connecting straight to the mains. Without a pressure reducer, drippers pop off and joints split.
- Short daily watering. A few minutes a day keeps roots shallow. Water deeply every two or three days.
- Running lines too long. The far end gets starved. Use pressure-compensating dripline or shorter loops.
- Leaving it out over winter. Frost splits pipes and cracks timers. Drain and store before the first hard frost.
Frequently asked questions
What is the best drip irrigation kit for a UK garden?
Pressure-compensating dripline is the best all-rounder for beds, rows and hedges. It waters evenly along long runs and on slopes. For a patio full of mixed pots, a micro-drip kit is easier, because you can set each dripper separately.
Do drip irrigation kits work on UK mains water pressure?
Yes, as long as you fit a pressure reducer at the tap. Most drip kits are designed for a gentler flow than mains water gives. Without a reducer, drippers can pop off and joints can blow apart. Many starter kits include one.
How much water does a drip irrigation kit save?
A drip kit uses much less water than a sprinkler. It puts water right at the roots, so little is lost to evaporation, runoff or watering paths and leaves. Dry leaves also mean less disease.
Do I need a filter on a drip irrigation system?
Yes, a filter is essential, especially in hard-water areas. Dripper holes are tiny and block easily with grit and limescale. Fit a filter at the tap and rinse it out every few weeks in summer.
Can you use a drip kit on an allotment with no tap?
Yes, a gravity kit runs from a raised water butt with no mains or power. Stand the butt about a metre off the ground and run a low-flow dripline from it. Flow is gentle, so use short runs and longer watering times.
How long should a drip irrigation system run?
Most kits need 30 to 45 minutes, every two or three days. Run them early in the morning. After a week, dig down beside a plant to see how deep the water reaches. Sandy soil needs shorter, more frequent runs than clay.
Should I turn off my drip kit in winter?
Yes, drain and store the kit before the first hard frost. Water left inside freezes, expands and splits pipes and drippers. Disconnect it, let it drain, and bring the timer, filter and reducer indoors.
Got your kit sorted? Read the guide to watering in a heatwave to keep plants going through the hottest weeks, and find more practical jobs on the how-to hub.
Our team produces practical UK gardening guidance from source research, contributor records and established horticultural practice. Editorial standards are overseen by Matt W.


