Key takeaways
- Use tiger worms or dendrobaena, as garden earthworms won't survive in a wormery
- A stacking tray wormery is the easiest kind for beginners
- Feed little and often, as overfeeding causes most smells and flies
- Skip citrus, onion, garlic, meat, dairy and cooked food
- Dilute the liquid feed 1 part to 10 parts water before using it
- Keep the wormery out of hot sun and protect it from frost in winter
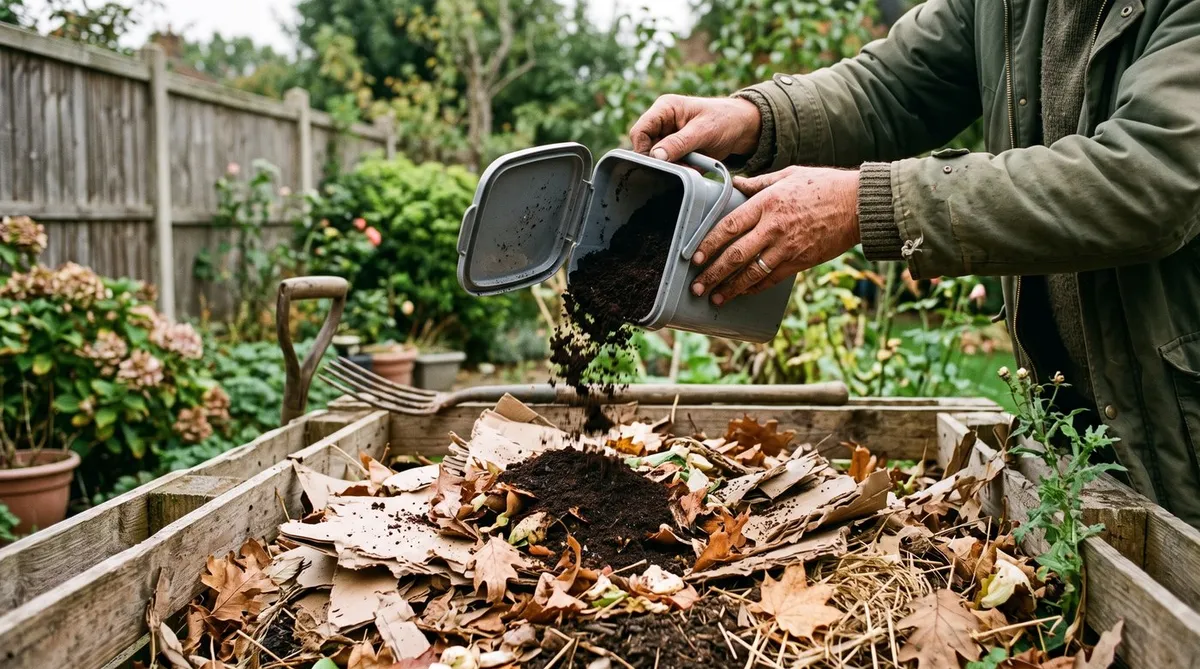
A wormery is a brilliant way to turn kitchen scraps into something your garden will love. Unlike a normal compost heap, it gives you two things: rich, crumbly compost and a liquid that feeds garden plants. It fits where a compost bin won’t, from a small patio to a balcony or garage.
What is a wormery and how does it work?
A wormery is a box of composting worms that eat your kitchen scraps and turn them into compost and liquid feed. The worms eat the scraps and leave behind castings, a dark, crumbly compost that’s full of goodness for plants.
These aren’t ordinary garden earthworms. Composting worms live near the surface in rotting plant matter rather than in soil, and they get through a surprising amount of food.
You get two things out of it. The castings make a lovely addition to potting mixes or a top dressing for plants. The liquid, sometimes called worm tea, drains to the bottom and can be watered down to use as plant feed.
Which worms should I use in a wormery?
Use tiger worms or dendrobaena, never garden earthworms. Garden earthworms are deep burrowers that need soil, and they soon die in a wormery.
| Tiger worm | Dendrobaena | Garden earthworm | |
|---|---|---|---|
| Also called | Brandling worm | European nightcrawler | Lob worm |
| Size | Small | Medium | Large |
| Lives in | Rotting plant matter | Rotting matter and topsoil | Deep soil |
| Good for a wormery? | Excellent | Good | No |
Tiger worms are the best pick for beginners. They breed quickly, cope with a range of temperatures and are easy to buy. Packs are sold by UK suppliers such as Wiggly Wigglers and Worms Direct. In good conditions the colony keeps growing on its own.
Dendrobaena are bigger and a bit hardier in cold weather, so they’re handy if your wormery lives outside all year in the north. Some people keep a mix of both.

Tiger worms in fresh bedding. Their red and yellow stripes make them easy to spot.
What type of wormery should I choose?
There are three main types. Each one trades off cost, ease and space.
Stacking tray wormeries
The most popular choice in UK homes. Trays with mesh bottoms stack on top of each other. The worms start in the bottom tray. When it fills up, you add a new tray of bedding and food on top. The worms move up through the mesh, leaving finished compost behind for easy harvesting.
Brands: Worm City, Urbalive, Maze and Can-O-Worms. Most kits come with worms, bedding and a tap for draining liquid.
Best for: beginners, small gardens, patios and balconies. It takes up about as much floor space as a recycling box.
Continuous flow wormeries
One big container with a grate near the bottom. You add food at the top and take finished compost out of the base. The Hungry Bin is a well-known example. It handles more waste than a tray system.
Best for: bigger households with lots of scraps.
DIY wormeries
Two or three plastic storage boxes nested inside each other, with holes drilled for drainage and air. A pair of stacked boxes fits easily on a balcony garden or small patio.
Best for: anyone on a budget, or who wants to try worm composting before buying a kit.
| Type | Cost | How much it handles | Harvesting | Best for |
|---|---|---|---|---|
| Stacking tray | Medium | A household’s scraps | Easy (lift the bottom tray) | Beginners, small spaces |
| Continuous flow | Higher | Lots of scraps | Medium (scoop from the base) | Bigger households |
| DIY boxes | Low | Smaller amounts | Fiddly (sort by hand) | Budgets, trying it out |
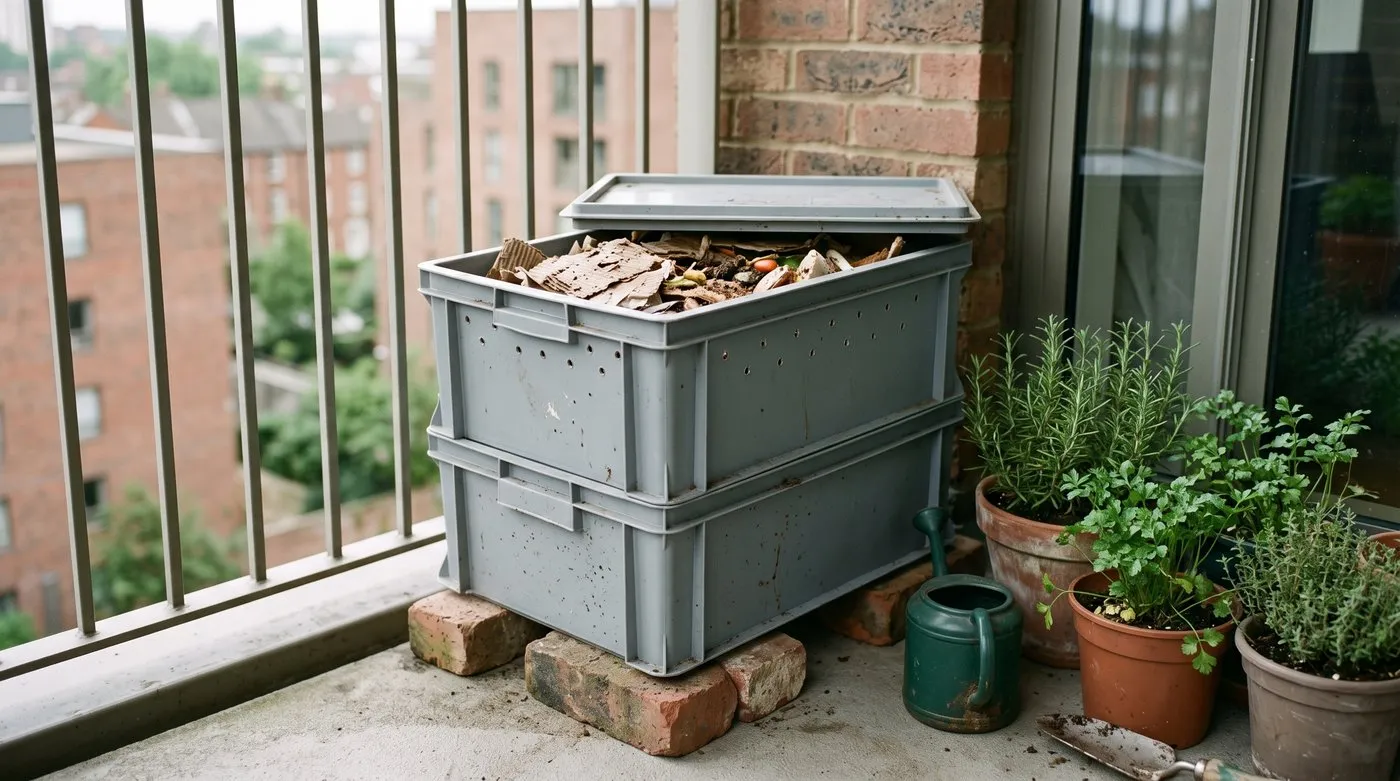
Two nested storage boxes with drainage and air holes make a cheap wormery. It’s a handy way to try worm composting before buying a kit.
How to set up a wormery step by step
Setting up takes under an hour. Get the bedding right and the worms will soon settle in.
Step 1: Choose a spot
Pick a sheltered place out of direct sun and heavy rain. Worms like it mild. Too hot and they try to escape. Too cold and they stop eating.
A shady patio corner, garage, shed, utility room or porch are all good. If it lives outside all year, keep it in the shade in summer and wrap it up in winter.
Step 2: Make the bedding
Fill the first tray about two-thirds full with damp bedding. This gives the worms a cosy home while they settle in. Good bedding includes:
- A coir block (most kits include one): soak it until it swells, then squeeze out the extra water. It should feel like a wrung-out sponge.
- Shredded newspaper or cardboard: tear into strips, soak and squeeze out.
- Old compost or leaf mould: making leaf mould gives you perfect wormery bedding.
Mix two or three of these together. The bedding should be moist but not dripping. Squeeze a handful and only a drop or two of water should come out. Too wet and the worms drown. Too dry and they dry out.
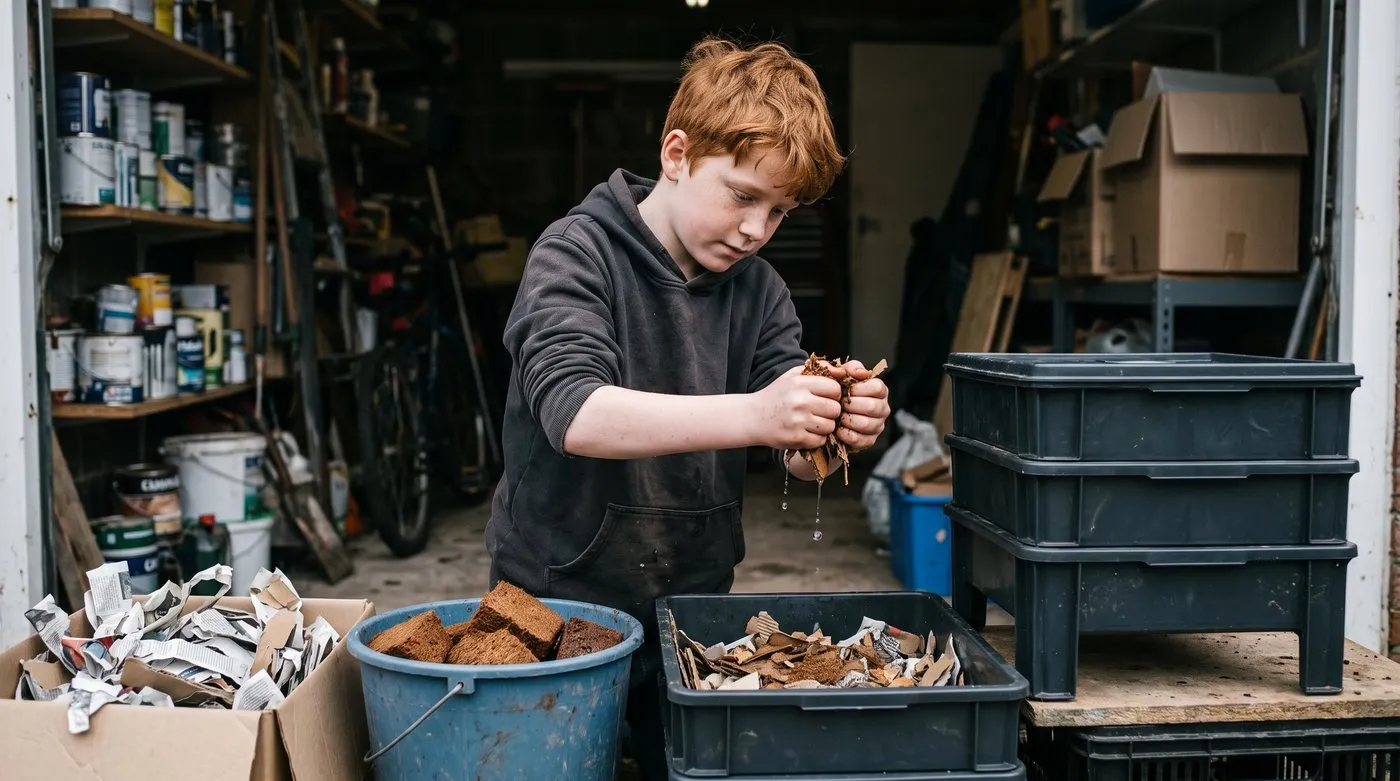
Bedding should feel like a wrung-out sponge. Squeeze a handful and only a drop or two of water should come out.
Step 3: Add the worms
Tip the worms onto the bedding. They’ll burrow down quickly to get away from the light. Leave the lid off with a lamp shining over them for the first hour to stop any escape attempts.
Step 4: First feed
Wait a few days before the first feed so the worms can settle. Then add a small handful of veg scraps, tucked just under the bedding.
Step 5: Build up slowly
Increase the food bit by bit over the first month or so, as the worms multiply. The classic beginner’s mistake is tipping in a whole kitchen caddy in week one. The food rots before the worms can eat it, and you get smells and flies.

A stacking tray wormery on a sheltered patio, out of direct sun and heavy rain.
What can I feed worms in a wormery?
Worms love raw veg scraps, fruit peelings, tea bags, coffee grounds, crushed eggshells and shredded plain cardboard. Chop bigger bits small and always bury food under the bedding.
Leave out citrus, onion, garlic, meat, fish, dairy and cooked food. Go easy on bread, and skip glossy paper and pet poo.
How much: feed little and often. Only add more once the last lot has mostly gone. Underfeeding is always safer than overfeeding.
How to harvest worm compost and liquid feed
You get two lovely things from a wormery, and both are richer than ordinary garden compost.
Collecting the liquid feed
Liquid collects in the sump at the bottom. Drain it from the tap every two to four weeks, and check weekly in summer, when juicy scraps make more liquid.
Dilute it: mix 1 part liquid with 10 parts water. Neat, it’s too strong for plants. Water it onto the soil around container vegetables, hanging baskets and raised beds. It’s a gentle feed rather than a strong one. For other homemade liquid feeds, see our guide to making compost tea.
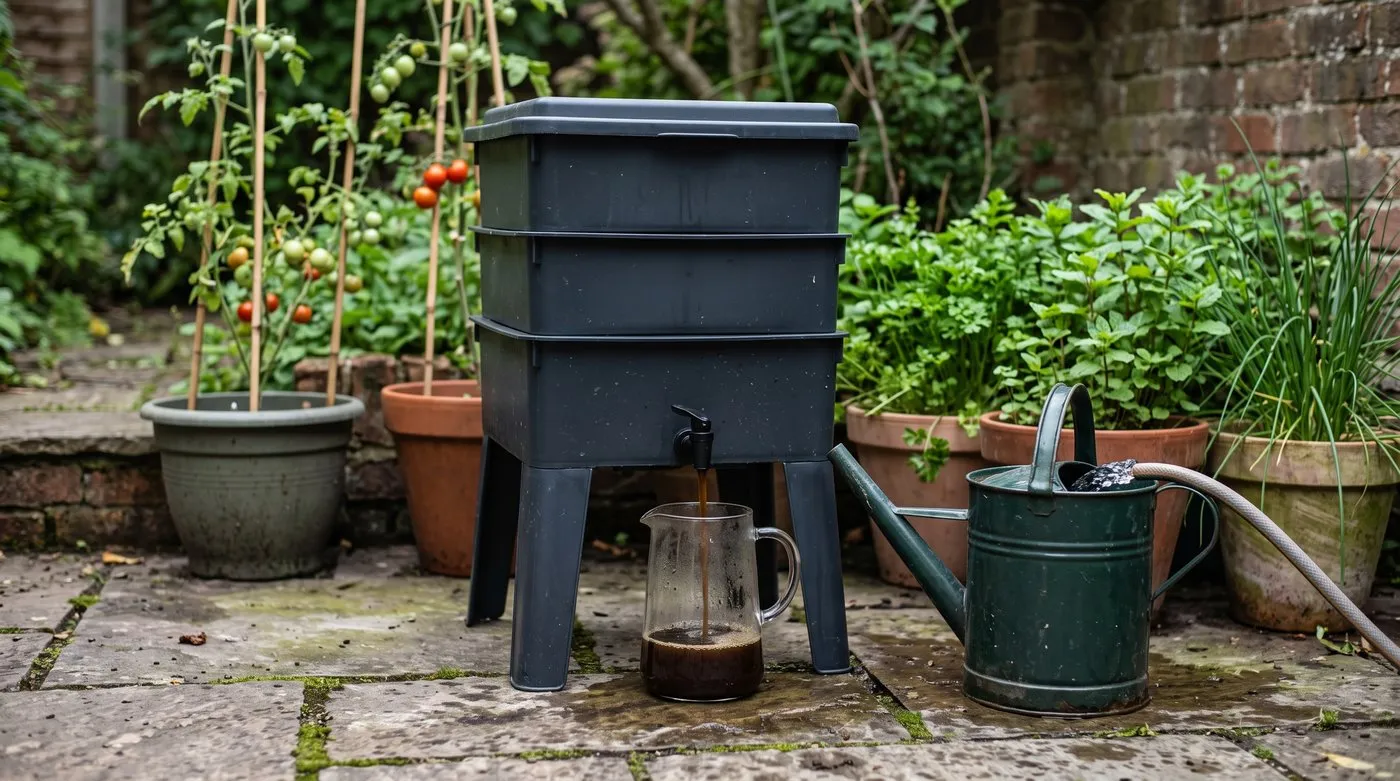
Drain the tap every two to four weeks. Always dilute the liquid 1 part to 10 parts water before using it on plants.
Harvesting the compost
The compost is usually ready every three to six months, depending on how many worms you have and how much you feed them. In a stacking system, lift out the bottom tray. Most of the worms will have moved up already. Pick out any stragglers and pop them back in the top tray.
How to use it:
- In potting mixes: mix a little into peat-free compost for sowing and potting on
- As a top dressing: spread a thin layer around plants in spring
- In planting holes: add a handful for tomatoes, courgettes and other hungry crops
- On the lawn: scatter thinly in April and water in

Finished worm compost from the bottom tray. Dark, crumbly and ready for the garden.
Wormery troubleshooting
Most problems come from too much food, too much water or the wrong temperature. Here’s how to put them right.
It smells bad
Why: too much food or too much water. The food is rotting faster than the worms can eat it.
Fix: take out uneaten food. Add a thick layer of shredded cardboard or newspaper to soak up the wet. Drain the sump. Stop feeding for a week or so, then start again with less.
Fruit flies
Why: food left on the surface, especially fruit.
Fix: always bury food under the bedding. Lay a sheet of damp newspaper or cardboard over the top. In summer, freeze fruit scraps for a day before adding them, which kills any fly eggs.
Worms trying to escape
Why: the bedding is too acidic, too wet or too hot, or the wormery is new and the worms haven’t settled.
Fix: add crushed eggshells or a light dusting of garden lime to make it less acidic. Add dry cardboard to soak up the wet. Leave a light on over the wormery at night for the first week, as worms stay away from light.
Worms dying
Why: too hot or freezing, chemicals, or a lot of overfeeding.
Fix: move the wormery somewhere cooler or warmer. Don’t add scraps that might have been sprayed with chemicals. If overfeeding was the problem, take all the food out, refresh the bedding and start again gently.
Tiny white mites or springtails
Why: the wormery is a little too wet and acidic. These tiny creatures are harmless and don’t hurt the worms, though they share the food.
Fix: add cardboard to dry it out and crushed eggshells to balance it. Cut back on fruit, which is more acidic than veg peelings.
| Problem | Likely cause | Quick fix |
|---|---|---|
| Bad smell | Too much food or water | Remove food, add cardboard, drain the sump |
| Fruit flies | Food left on top | Bury food, cover with damp newspaper |
| Worms escaping | Acidic, wet or hot bedding | Add eggshells and dry cardboard, find a cooler spot |
| Worms dying | Too hot, too cold or chemicals | Move it, refresh the bedding |
| White mites | Too wet and acidic | Add eggshells, cut back on fruit |
How to keep a wormery going through a UK winter
Worms slow right down in the cold and can die if the bedding freezes. So in winter they need a bit of protection, especially in the north.
If it stays outside:
- Wrap it in bubble wrap or old carpet, leaving the air holes clear.
- Stand it on a wooden pallet or a sheet of polystyrene, off the cold ground.
- Feed much less from November to February, as the worms eat less.
- Hold back on very watery scraps like melon and cucumber.
- Tuck extra shredded cardboard into the bedding for warmth.
Bringing it in:
Move it into a garage, shed, utility room or porch that stays frost-free. A well-kept wormery doesn’t smell and takes up less room than a recycling bin. This is the surest way to keep the worms working all winter.
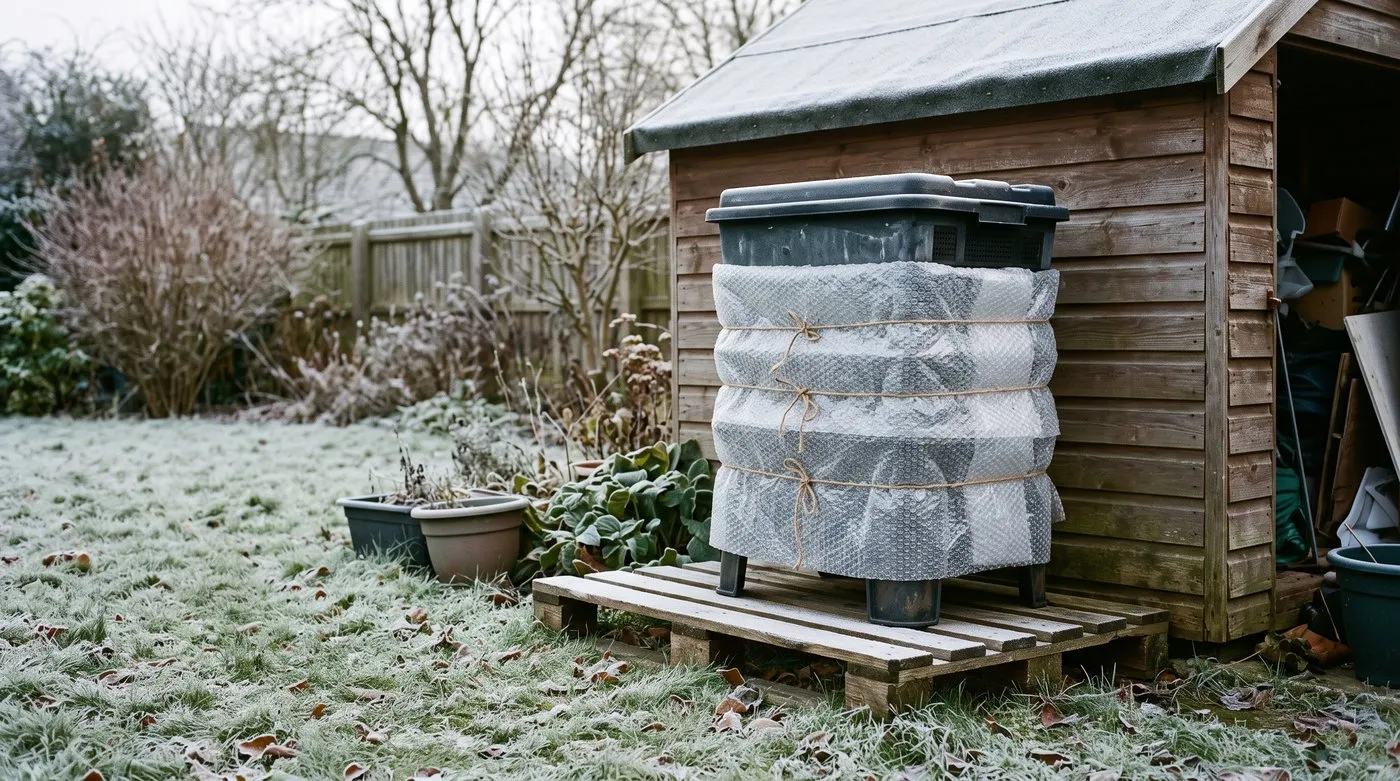
Wrap an outdoor wormery and lift it off the cold ground in winter. Feed much less from November to February, as the worms slow right down.
Bought or homemade?
A ready-made stacking wormery costs more up front, but usually comes with worms, bedding and a tap. A homemade one from plastic storage boxes costs very little, though you’ll need to buy worms and bedding separately and drill some holes. Either way, the worms look after themselves once they’re going, so there’s little to spend after that.
The RHS guide to worm composting is a good read if you want to know more. If you already have a compost bin for garden waste, a wormery is a handy partner for your kitchen scraps, such as veg peelings, tea bags and coffee grounds. See our guide to composting for the bigger heap.
Where to put a wormery
A wormery needs a small patch of floor out of direct sun and heavy rain. That means it can go in gardens, on patios and balconies, or in garages, sheds and utility rooms.
Good spots:
- Shed or garage: great all year. Steady temperature, no rain and easy to get to.
- Shady patio corner: fine from spring to autumn. Wrap it up or move it in winter.
- Balcony: a compact stacking wormery works well, and with balcony gardening the liquid feed goes straight onto your pots.
- Utility room: no smell if it’s well kept, and handy for daily scraps.
- Allotment: great if you’ve got a shed for shelter. Allotment growers can use the compost and liquid feed right there.
Avoid full sun, hot south-facing walls in summer and anywhere rain can flood it.
Using worm compost and liquid feed in the garden
Worm compost and liquid feed are great for the soil and your plants. They fit nicely with no-dig gardening, where you feed the soil from the top.
When to use the liquid feed:
| Month | What to do |
|---|---|
| March to April | Water onto beds before planting |
| May to August | Feed tomatoes, courgettes, beans and pots every week or two while they’re growing fast |
| September | A last feed for shrubs, fruit and perennials |
| October to February | No need, plants are resting |
Always dilute it 1 part to 10 parts water.
Wormery or compost bin: which is better?
Both turn waste into something wonderful. Which suits you depends on your space and your waste, and lots of gardeners have both.
| Wormery | Compost bin | |
|---|---|---|
| Space | Small | Larger |
| Takes | Kitchen scraps, paper, cardboard | Kitchen and garden waste |
| Liquid feed | Yes | No (unless you brew compost tea) |
| Indoors? | Yes | No |
| Upkeep | Feed a few times a week, drain the sump | Turn now and then |
| Wildlife | Not much | Great for garden wildlife |
The ideal setup is a compost bin for garden waste and a wormery for kitchen scraps. The bin handles the bulk, the wormery makes the rich stuff, and between them they take care of almost all your green waste.
Frequently asked questions
How many worms do I need to start a wormery?
A starter pack of 250-500 worms is plenty. Tiger worms are the usual choice, and UK suppliers sell them in packs. In good conditions the colony grows on its own, so you won’t need to buy more. More worms at the start just means they’ll get through scraps faster.
Can I keep a wormery indoors?
Yes, and a well-kept wormery shouldn’t smell. A utility room, garage, porch or under the stairs all work, as long as it isn’t too hot or cold. Indoors the worms stay active all winter. Pop it near where you cook, so adding scraps becomes a habit.
What is the best type of wormery for beginners?
A stacking tray wormery is the easiest to start with. Brands like Worm City, Urbalive and Can-O-Worms come with instructions, and many include worms and bedding. The worms move up into fresh trays as they go, leaving finished compost below for easy harvesting.
Why does my wormery smell bad?
It’s usually been overfed or is too wet. Take out uneaten food, add a few handfuls of shredded cardboard and drain the sump. Stop feeding for a week or so, then start again with smaller amounts. A healthy wormery smells like damp earth. If it smells of rotten eggs, gently fork it over to let air in.
How often do you harvest worm castings?
Every three to six months. In a stacking tray system, the bottom tray fills with dark, crumbly compost while the worms work in the trays above. Lift out the bottom tray, use the compost and put the empty tray back on top. Drain liquid from the sump every two to four weeks.
Can I use garden earthworms in a wormery?
No, garden earthworms won’t survive in one. They’re deep burrowers that need soil. A wormery needs composting worms that live in rotting plant matter, such as tiger worms or dendrobaena. These are happy in the warm, crowded conditions inside a wormery.
What should you not put in a wormery?
Skip citrus, onion, garlic, meat, fish, dairy and cooked food. Worms don’t like citrus and onions, and meat and dairy attract rats and flies and start to smell. Go easy on bread, and leave out glossy paper and pet poo. Stick to raw veg scraps, fruit peelings, tea bags, coffee grounds, crushed eggshells and shredded plain cardboard.
Our team produces practical UK gardening guidance from source research, contributor records and established horticultural practice. Editorial standards are overseen by Matt W.