
Key takeaways
- Bokashi takes all kitchen scraps, including meat, fish, dairy and cooked food
- Use two bins: fill one while the other sits sealed for 2 weeks
- Press each layer down firmly and keep the lid shut, as air is the enemy
- Bury the pickled scraps 25-30cm deep and they break down in about 4-6 weeks
- Drain the liquid every 2-3 days and dilute it at least 100 to 1 to feed plants
- The bins fit under a kitchen sink, so it works in a flat too
Bokashi is the easy way to compost every kitchen scrap, including the meat, fish, dairy and leftovers an ordinary compost bin can’t take. It comes from Japan. You sprinkle a special bran over your scraps in a sealed bin, and they pickle rather than rot. The name roughly means “fading away”, which is what the scraps do once you bury them.
Here’s the whole process, from setting up your bin to burying the results. It works on an allotment or a balcony in a flat. For the traditional heap, see our guide to making compost at home.
What is bokashi composting and how does it work?
Bokashi pickles your food scraps instead of rotting them. An ordinary compost heap needs air. A bokashi bin is sealed tight, with no air at all.
The bran is coated in friendly microbes. Sprinkle it over each layer of scraps and close the lid, and the microbes turn everything sour, a bit like making sauerkraut. That sourness stops the scraps going rotten and keeps the goodness in.
What comes out isn’t finished compost yet. It’s pickled scraps that need burying in soil, or adding to a compost heap, to finish off. Worms and soil life break it down in about 4-6 weeks in warm weather.

Sprinkle 1-2 tablespoons of bran over each layer of scraps, then press it down firmly.
How does bokashi differ from traditional composting?
They work very differently, and plenty of gardeners use both. Here’s a quick comparison.
| Bokashi | Compost heap | |
|---|---|---|
| How it works | Sealed, pickles the scraps | Open to air, scraps rot down |
| Time | 2 weeks in the bin, then 4-6 weeks in soil | 6-12 months |
| Meat and dairy? | Yes, all food scraps | No, they attract rats |
| Smell | Sour, like pickles | Earthy |
| Space | Under the kitchen sink | Needs outdoor space |
| Ready to use? | Needs burying first | Use straight away |
The big plus is that bokashi takes everything. Meat, fish, dairy, cooked food and bread would normally go in the bin.
The catch is that bokashi on its own doesn’t make finished compost. You need soil or a compost heap to finish the job. If you already have a heap, bokashi is a great partner for it.
How to set up a bokashi bin step by step
Setting up takes about ten minutes. You need bins, bran and a routine.
What you need
A bokashi bin is an airtight bucket with a tap at the bottom for draining liquid. You need two so you can swap between them. A cheaper option is any airtight bucket with a lid, though you’ll need to fit a small tap.
Your kit:
- 2 bokashi bins with taps and airtight lids
- Bokashi bran, 1kg to start
- A plate or disc that fits inside the bin, for pressing scraps flat
- A cup or jug to catch the liquid
Rough costs:
| Item | Rough cost | Lasts |
|---|---|---|
| Two-bin kit | 25-50 pounds | Years |
| Bran, 1kg | 8-15 pounds | 4-8 weeks |
| Bran, 5kg bag | 25-35 pounds | Several months |
| Home-made bucket bin | 5-10 pounds | Years |
Step-by-step setup
- Sprinkle a spoonful of bran over the bottom of the empty bin.
- Add a layer of scraps 3-5cm deep. Chop big bits up so they pickle faster.
- Press down firmly with a plate, a masher or your hands. Squeezing out the air is the most important step, as air makes it rot and smell.
- Sprinkle 1-2 tablespoons of bran over the top.
- Close the lid tightly every time. Keep it open as briefly as you can.
- Repeat each day: scraps, press, bran, lid.
- Drain the liquid from the tap every 2-3 days.
- When it’s full, leave it sealed for 2 weeks and start filling the second bin.
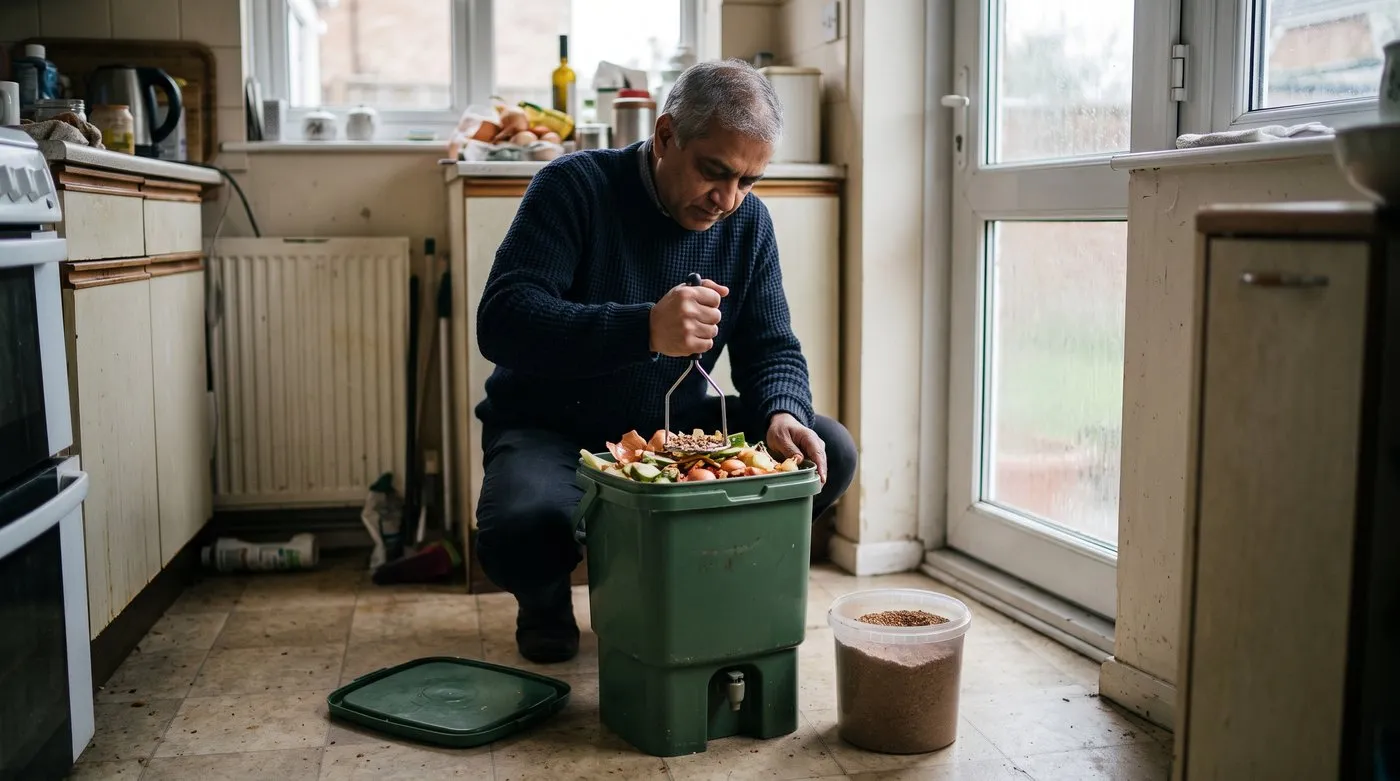
Squeezing the air out of each layer is the step that matters most. Press down firmly, add bran, and get the lid back on quickly.
How to run a two-bin rotation system
Two bins make bokashi easy. One is always being filled while the other sits quietly pickling.
Weeks 1-2: Fill Bin A with your daily scraps. Drain the liquid every 2-3 days.
Weeks 2-4: Bin A is full. Seal it and leave it for 14 days. Start filling Bin B.
Week 4: Bin A is ready. Bury the contents in the garden, wash the bin, and it’s ready to go again when Bin B fills.
Weeks 4-6: Keep filling Bin B. When it’s full, seal it and swap back to Bin A.
You’ll bury a bin roughly every 2-4 weeks, depending on how much food waste you make.
The pickled scraps will look much the same as when they went in, but smell sour. White mould on top is a good sign. If it smells rotten, air got in or there wasn’t enough bran.

Two bins: one being filled, one sealed and pickling for 14 days.
What can you put in a bokashi bin?
Far more than an ordinary compost heap. The sealed, sour bin keeps smells and pests away, so meat and dairy are fine.
What goes in
- All fruit and veg scraps, raw or cooked
- Meat and fish, raw or cooked, including small bones
- Dairy, like cheese, yoghurt and butter
- Leftovers, like rice, pasta, bread and sauces
- Eggs and eggshells
- Tea bags and coffee grounds
- Old flowers and small plant trimmings
- Cakes and pastry
What stays out
- Liquids like soup, milk and oil, which flood the bin. Drain food first.
- Big bones, which won’t break down. Chop them smaller or bin them.
- Very mouldy food, which fights the good microbes. A little surface mould is fine.
- Paper and cardboard, which won’t pickle. Put them on the compost heap.
- Garden waste, which is better on the heap or in a leaf mould bin.
- Pet poo, for hygiene reasons.
How to bury bokashi pre-compost in soil
The pickled scraps need soil life and worms to finish them off. There are three ways to do it.
Trench method
Dig a trench 25-30cm deep in a veg bed or border. Tip the scraps in, chop them into the soil with a spade and cover with at least 15cm of soil. Mark the spot. It breaks down in about 4-6 weeks in spring and summer, or 6-8 weeks in winter.
Move to a new spot each time. After 4-6 weeks you can plant straight into the area. It’s especially good for heavy clay soil, where the extra organic matter helps a lot.
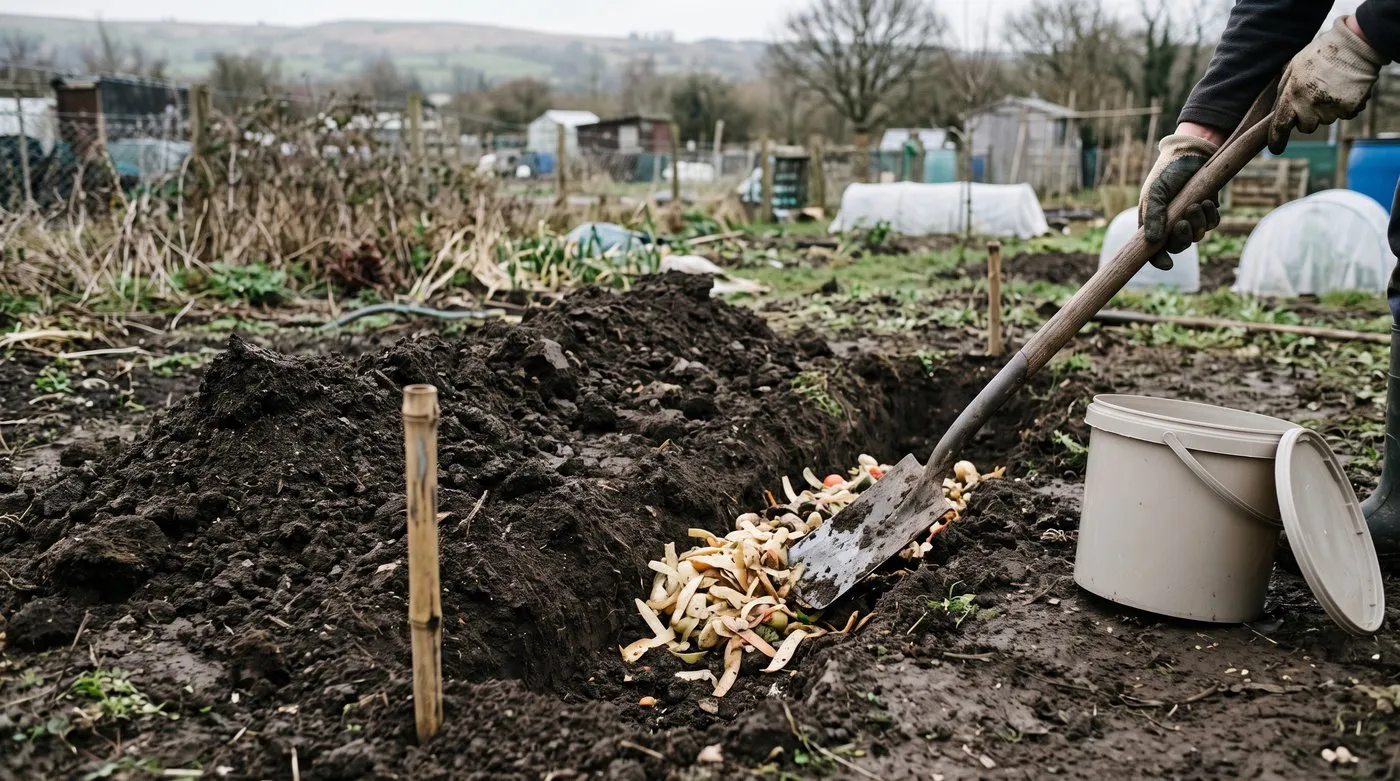
Chop the scraps into the bottom of a deep trench and cover with at least 15cm of soil. Mark the spot so you know where to plant later.
Add to a compost heap
Mix the pickled scraps into the middle of a working compost heap, where they break down quickly. Cover with a thick layer of cardboard or dry leaves to stop any smell.
Add to a wormery
Worms will eat bokashi scraps, but go easy as they’re very sour. Spread a thin layer, no more than 2-3cm, over the top and cover with damp newspaper. Wait until the worms have worked through it before adding more. Our compost tea guide covers another way to use what a wormery makes.
How long it takes to break down:
| Season | In a trench | In a compost heap | In a wormery |
|---|---|---|---|
| Spring | 4-5 weeks | 3-4 weeks | 2-3 weeks |
| Summer | 3-4 weeks | 2-3 weeks | 2-3 weeks |
| Autumn | 5-6 weeks | 4-5 weeks | 3-4 weeks |
| Winter | 6-8 weeks | 5-7 weeks | 4-6 weeks |
How to use bokashi liquid as plant feed
The liquid you drain from the tap is a handy free extra. Drain it every 2-3 days so it doesn’t sit in the bottom of the bin.
As a plant feed
Mix 10ml of liquid into 1 litre of water, which is 100 to 1. Pour it on the soil around plants, not on the leaves. Use it within a day of draining.
It’s great for pots and container veg. Use it weekly from April to September alongside your usual plant feeding.
Down the drain
Many suppliers suggest pouring leftover liquid neat down the kitchen sink to keep drains fresh. If you have more than you can use on plants, it’s an easy way to use it up.

Drain the liquid every 2-3 days and dilute it at least 100 to 1 before feeding plants.
How much does bokashi composting cost in the UK?
It costs more to start than a compost heap, but running costs are modest.
First year
A two-bin kit with some bran costs about 25-50 pounds. Add a bigger bag of bran and you’re looking at roughly 75-130 pounds for the first year.
After that
Most households spend about 50-80 pounds a year on bran. Smaller households use less. The bins last for years.
How to cut bran costs
Buy bran in bigger bags, which works out cheaper. You can also make your own. Mix 1kg of wheat bran with 60ml of EM-1 liquid (from specialist suppliers) and 20ml of molasses dissolved in 300ml of warm water. Seal it in a bag for 2 weeks. Once it smells sweet and sour, dry it and store it in an airtight tub.
Is bokashi composting suitable for flats and small spaces?
Yes, it’s the most space-saving way to compost. The bin fits under a sink, in a cupboard or on a balcony. When it’s sealed properly it doesn’t smell or draw in flies.
Without a garden, the burying stage needs a bit of thought. Some options:
- Big planters - dig the scraps into the bottom third and cover with soil.
- Community gardens or allotments - many are happy to take bokashi.
- Friends or neighbours with gardens - a sealed bag of bokashi is easy to carry and doesn’t smell.
- Council food waste bins - check with your council, but many accept it if you can’t bury it.
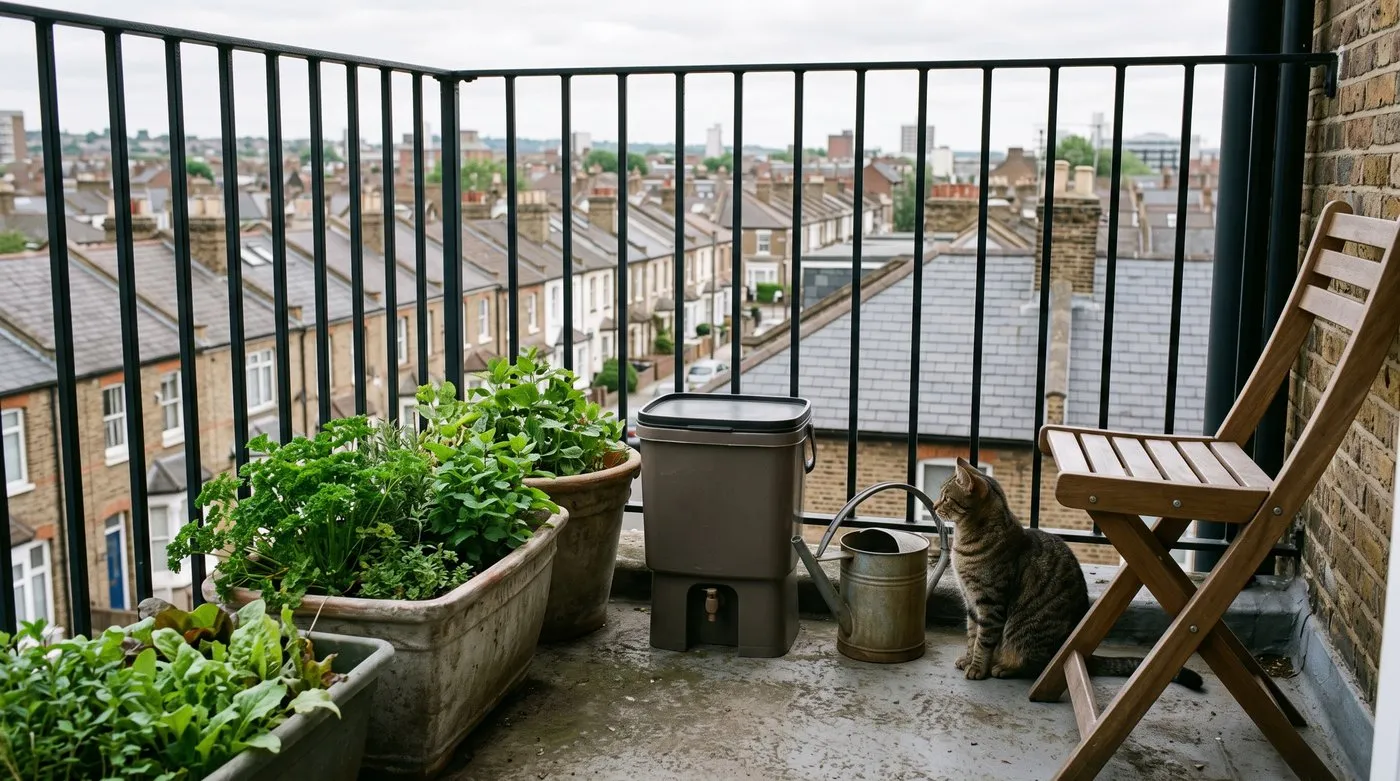
A sealed bokashi bin doesn’t smell, so it sits happily on a balcony. Dig the pickled scraps into the bottom third of a big planter.
Is bokashi good for the environment?
It helps keep more food waste out of landfill, because it takes the meat, dairy and cooked food an ordinary heap can’t. Food rotting in landfill gives off methane, a strong greenhouse gas. Buried bokashi feeds your soil instead.
Run bokashi alongside a compost heap and almost all your kitchen and garden waste can go back into the soil. Add a leaf mould bin for autumn leaves and you’ve got the full set.
The RHS composting guide has more on making compost at home.
Troubleshooting common bokashi problems
Most problems come from air getting in, too little bran or forgetting to drain the liquid. Here are the fixes.
| Problem | Why | Fix |
|---|---|---|
| Rotten smell | Air getting in | Press scraps firmly, check the lid, add extra bran |
| Green or black mould | Air getting in | Remove the mouldy layer, add lots of bran, reseal |
| No liquid | Dry scraps or blocked tap | Add wetter scraps, clear the tap with warm water |
| Too much liquid | Very wet scraps | Drain food before adding, drain the tap daily |
| Maggots or flies | Lid not sealed | Fix the lid, seal gaps, keep the bin indoors |
| Slow to pickle | Too cold | Move the bin somewhere warmer, add extra bran |
| Not breaking down in soil | Buried too shallow or soil too cold | Bury at least 25cm deep, wait longer in winter |
A happy bin smells mildly of pickles when you open it. If problems keep happening, use more bran and press every layer down firmly. Flies only turn up when the lid isn’t sealed, and if they reach the kitchen, our guide to getting rid of fruit flies will help.
Bokashi composting month-by-month UK calendar
Bokashi works all year indoors, but burying depends on the weather and what’s growing.
| Month | Indoor bin | Burying |
|---|---|---|
| January | Carry on as normal | Slow to break down. Bury in empty beds. |
| February | Carry on as normal | Ground may be frozen. Keep sealed bins until it thaws. |
| March | Carry on as normal | Soil warming up. Bury in beds before planting. |
| April | Carry on as normal | Bury between rows in veg plots. |
| May | Carry on as normal | Quick to break down. Trench in borders and beds. |
| June | Drain more often, as warmth makes more liquid | Use the liquid feed on growing crops. |
| July | Drain more often | Fastest breakdown of the year. |
| August | Drain more often | Get autumn trenches ready. |
| September | Back to normal draining | Bury in beds you’ve cleared. |
| October | Carry on as normal | Bury before the soil cools. Good for no-dig beds. |
| November | Carry on as normal | Slowing down. Bury a little deeper, about 30cm. |
| December | Carry on as normal | Slow. Bury in empty beds or keep sealed bins. |
Frequently asked questions
Does bokashi composting smell bad?
No, a healthy bin smells like pickles or cider vinegar. That mild, sour smell means it’s working. If it smells rotten, air has got in. White mould on top is a good sign, while green or black mould means the seal failed or you used too little bran.
Can you put meat and dairy in a bokashi bin?
Yes, bokashi takes all food scraps, raw or cooked. That includes meat, fish, cheese, rice, pasta and bread. An ordinary compost heap can’t take these, as they draw in rats. The sealed, sour bokashi bin keeps them safely pickled.
How long does bokashi composting take from start to finish?
About 6-8 weeks from first scrap to soil. Filling a bin takes 1-2 weeks, then it sits sealed for 2 weeks. Once buried, it breaks down in 4-6 weeks in warm weather, or 6-8 weeks in winter.
Is bokashi composting worth the cost?
For many households, yes. A starter kit costs about 25-50 pounds, then bran runs to roughly 50-80 pounds a year. In return, all your food scraps go back into the soil instead of the bin.
Can you bokashi compost in a flat without a garden?
Yes, the sealed bin fits under a kitchen sink. For the burying stage, use a big planter of soil. Dig the scraps into the bottom third of a 40-litre planter and cover with 15cm of soil. Or take it to a community garden or allotment.
What is the white mould in my bokashi bin?
It’s a good sign that the bin is working. It appears on top of the food after a few days, so leave it be. Green, blue or black mould means air has got in. Add extra bran, press everything down firmly and close the lid.
Can you add bokashi pre-compost to a wormery?
Yes, but only a little at a time. The pickled scraps are very sour and too much at once can upset the worms. Add a thin layer mixed with shredded newspaper, and wait until the worms have worked through it before adding more.
Our team produces practical UK gardening guidance from source research, contributor records and established horticultural practice. Editorial standards are overseen by Matt W.


