Key takeaways
- RHS trials confirm crocks do not aid drainage; they can block holes and worsen waterlogging
- One broken 30cm terracotta pot yields 8 to 12 shards and 6 to 10 plant labels
- Crushed terracotta at 6 to 10mm makes free top-dressing and seed-tray grit, saving £4 to £6 a bag
- A 40cm by 40cm mosaic stepping stone needs 200 to 300 crockery pieces and 5kg of mortar
- Layered broken-pot succulent gardens need a pot cracked vertically, not shattered
- Glazed shards must never be used as mulch; the glaze does not break down and sheds sharp flakes
The crock drainage myth, settled honestly
The most repeated piece of broken-pot advice is wrong. Putting crocks over the drainage hole does not improve drainage. It often makes waterlogging worse. The RHS tested this and found no drainage benefit from gravel or crock layers in containers. The water does not drain faster through a coarse layer. It sits at the boundary between fine compost and coarse material, creating a perched water table.
The fix is simple. Leave drainage holes clear. Use one consistent compost from top to bottom. If you fear compost washing out of a wide hole, lay a 50mm square of old window mesh or weed membrane over it. That drains and holds compost. A solid curved shard does the opposite.
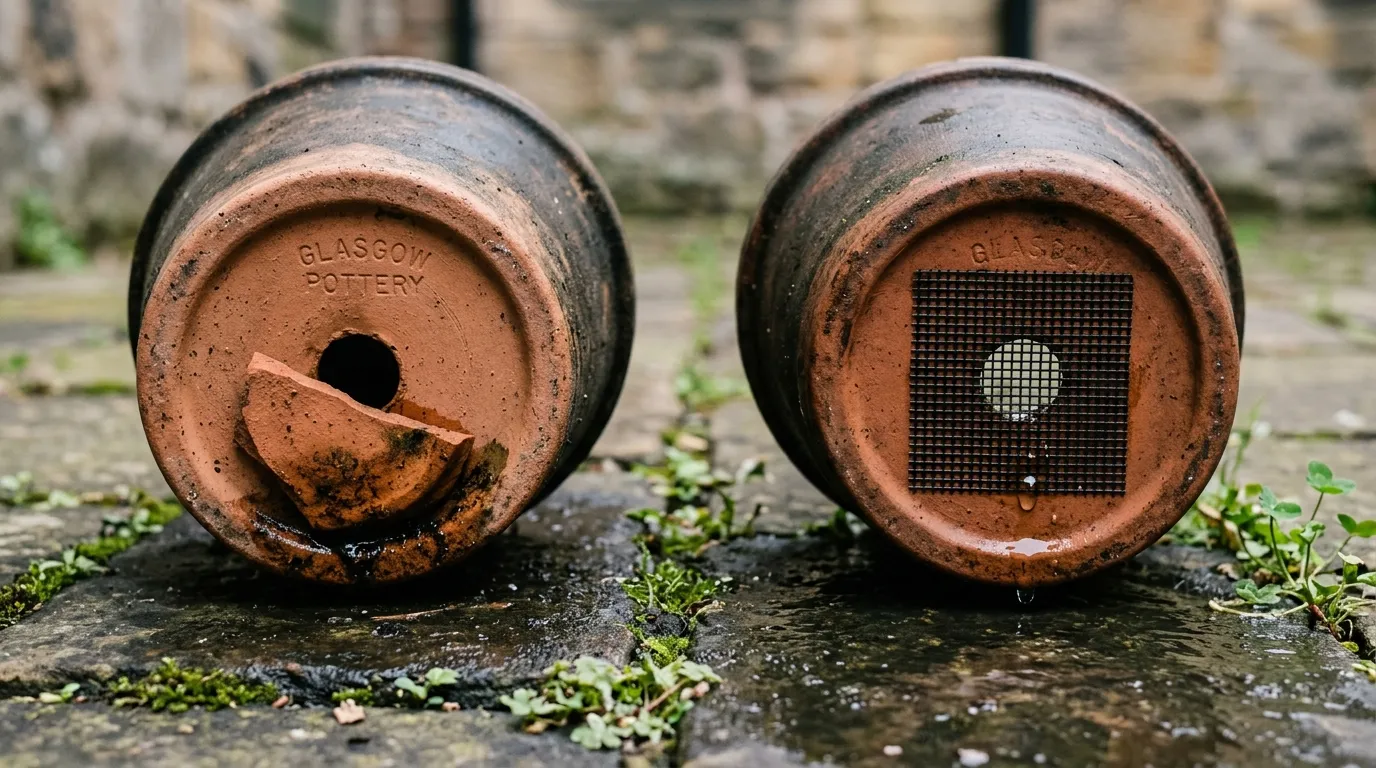 Left: a crock laid over the hole traps water and holds 180 to 240g more after 48 hours. Right: a 50mm mesh square drains freely while holding compost in.
Sorting shards before you start any project
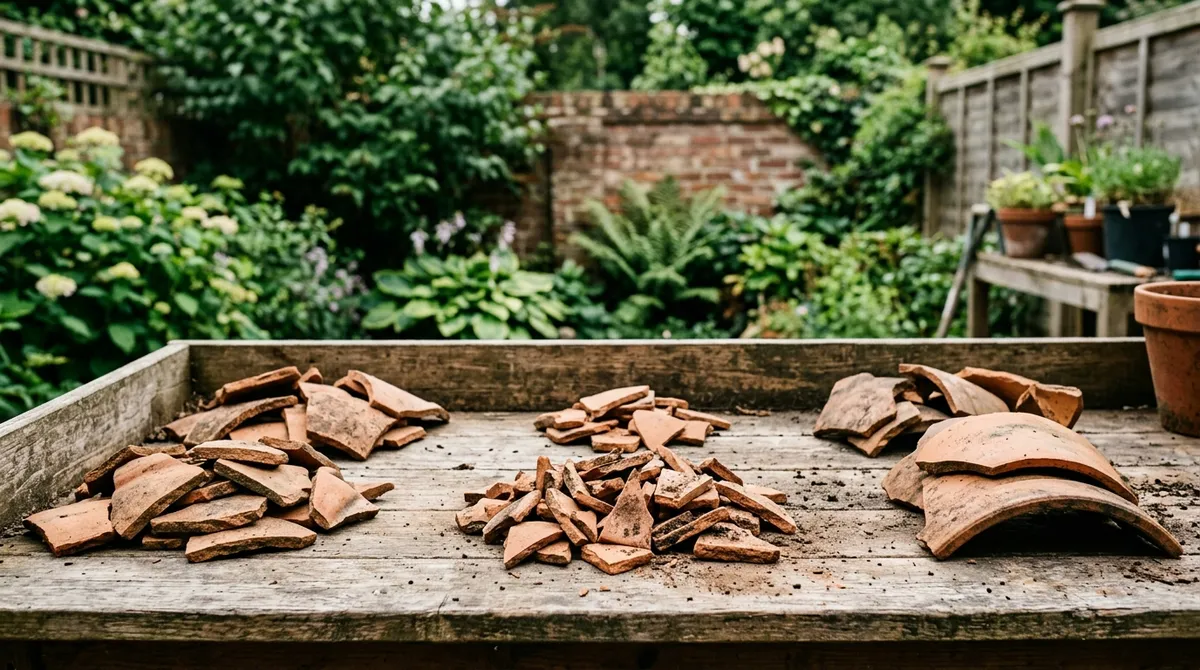
Before any upcycling, sort the pieces. A 30cm terracotta pot breaks into 8 to 12 usable shards plus a handful of crumbs. Each shard suits a different job, so sorting first saves time and waste.
Lay the pieces on a bench and split them into four piles:
- Large curved rim sections (over 100mm): bed edging, pot feet, fairy-garden terraces.
- Flat body shards (50 to 100mm): plant labels and mosaic tiles.
- Small angular pieces (15 to 40mm): mosaic detail and grout-line fillers.
- Crumbs and dust (under 15mm): crush further for top-dressing and grit.
Plant labels that outlast plastic
Flat terracotta shards make the best free plant labels in the garden. They do not snap, fade to white, or blow away like cheap plastic. The unglazed clay takes pencil and paint pen cleanly.
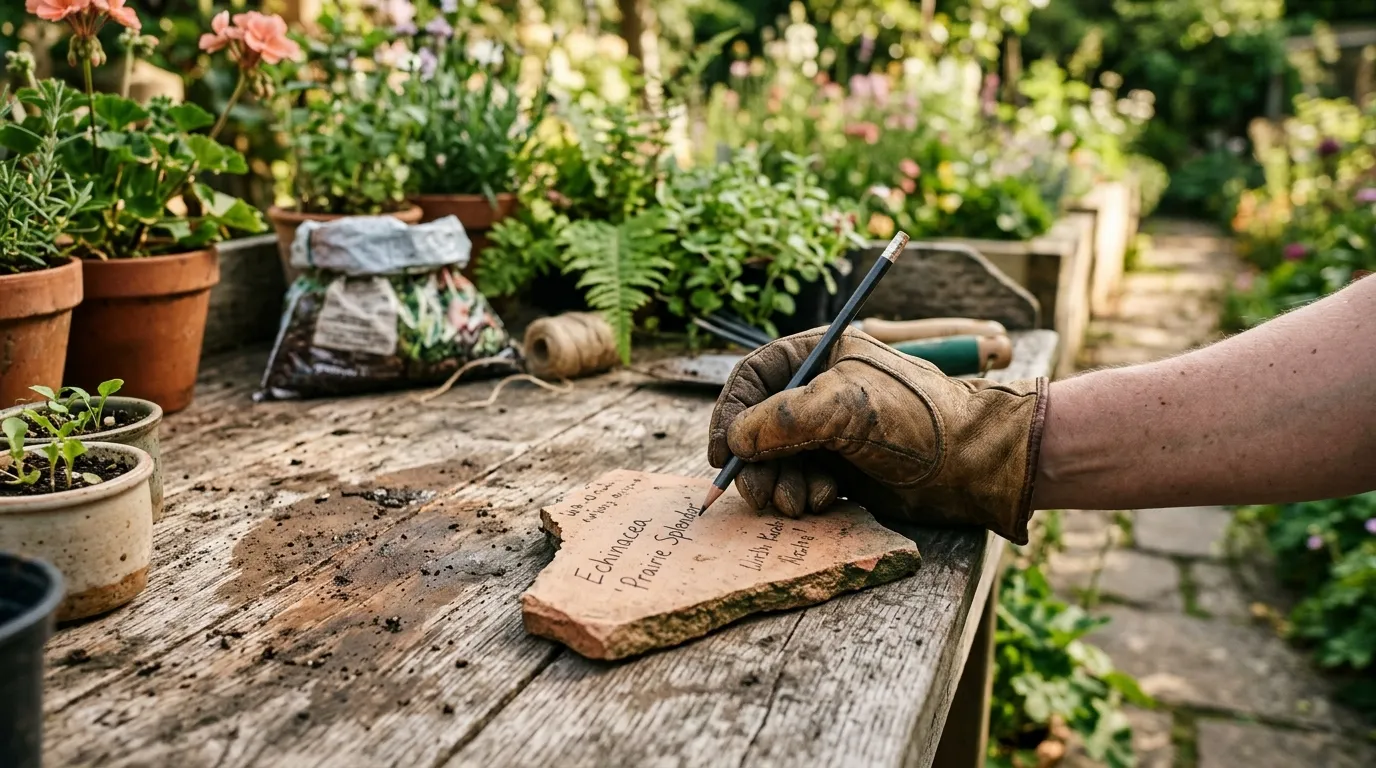 A 2B pencil writes cleanly on unglazed terracotta. This label leans back so rain sheets off the writing rather than pooling on it.
Layered broken pot fairy and succulent gardens
A single broken pot makes the well-known layered fairy garden or succulent display. This is the most popular broken-pot project and the look is deliberate, not accidental. It needs one clean vertical break, not a shattered pot.
Crack a pot down one side so a curved spill of clay falls away. You want the rim intact on three sides and an open front. Keep the broken-off pieces. Inside the pot you build descending terraces, each held by a curved shard set on edge into gritty compost. Three to four terraces fit a 30cm pot. Backfill each level with a 50:50 mix of multipurpose compost and 6mm grit.
Plant small, slow species so the scale holds. For a sunny succulent version use Sempervivum (houseleeks), Sedum and a trailing Crassula. For a shadier fairy version use mind-your-own-business (Soleirolia), baby ferns and small mosses. Add a winding path of crushed shard pieces between levels. The whole thing reuses one pot, costs a few small plants, and lasts years if kept frost-free or planted with hardy alpines.
Gardener’s tip: Crack the pot by tapping a cold chisel along one vertical line, not by dropping it. A dropped pot shatters randomly. A scored and tapped pot breaks where you want, giving the clean curved spill the layered look needs.
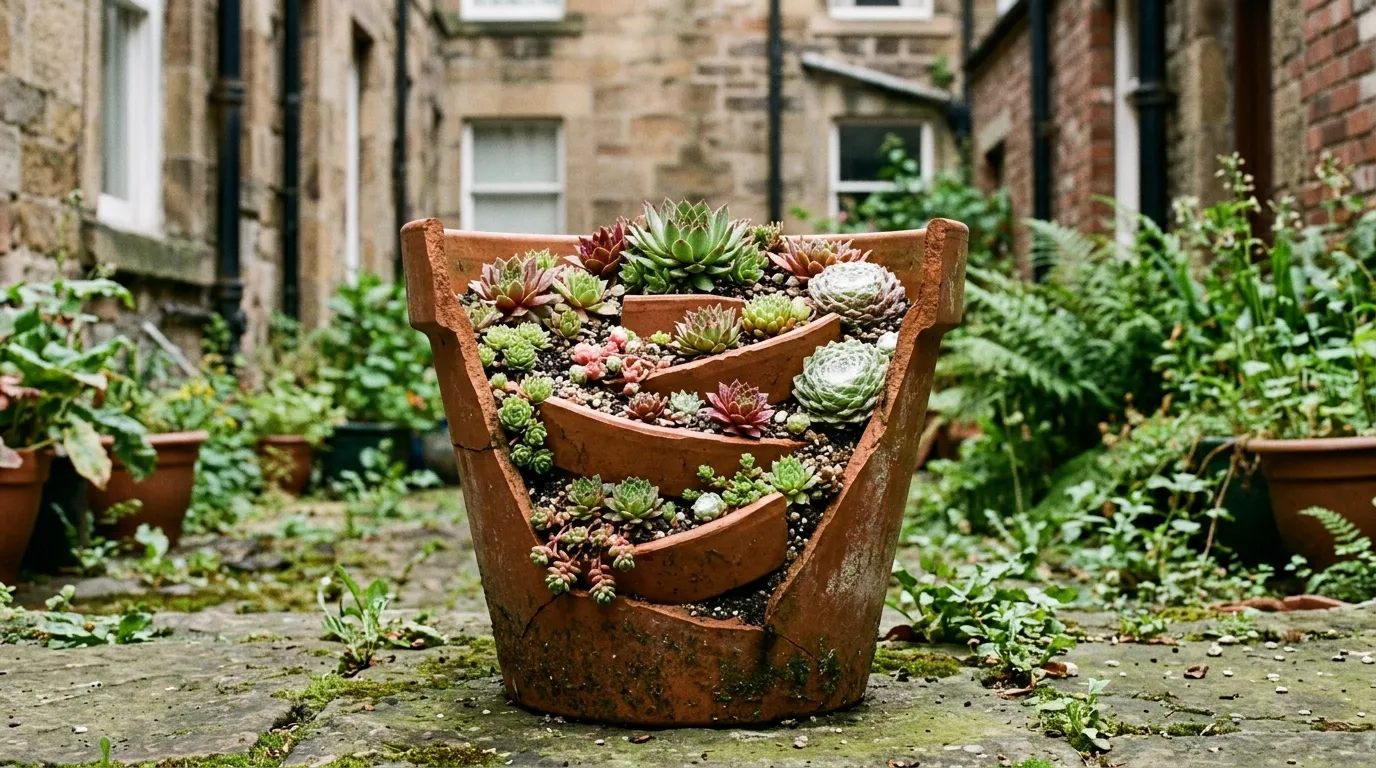 Curved shards set on edge form four planting terraces inside one broken 30cm pot. Houseleeks and sedum suit the free-draining gritty layers.
Mosaic stepping stones and table tops
Broken crockery comes into its own in mosaic. Plates, mugs and glazed china that cannot be mulched make durable, weatherproof mosaic stepping stones, table tops and pot rims. This is the best home for the glazed pieces you must keep out of the soil.
For a stepping stone, use a 400mm by 400mm paving slab or a cast concrete blank as the base. Lay broken china face up in a pattern, leaving 3 to 5mm grout gaps. A stone this size takes 200 to 300 crockery pieces, depending on size. Fix them with exterior tile adhesive, leave 24 hours, then grout with frost-proof exterior grout. One 400mm stone uses about 5kg of mortar and grout combined.
| Project | Crockery suited | Difficulty | Time | Result |
|---|---|---|---|---|
| Plant labels | Unglazed terracotta shards | Easy | 5 min each | 1 to 3 year markers |
| Crushed mulch | Plain terracotta only | Easy | 30 min per bucket | Free slug-resistant top-dressing |
| Pot feet | Thick rim sections | Easy | 2 min per set | Raises pots 15 to 25mm |
| Bed edging | Large curved sections | Easy | 1 hour per metre | Rustic terracotta edge |
| Fairy garden | One vertically cracked pot | Moderate | 1 to 2 hours | Layered planted display |
| Mosaic stepping stone | Glazed china and tile | Moderate | 3 to 4 hours | Permanent weatherproof path |
| Mosaic table top | Glazed china and tile | Hard | 6 to 10 hours | Feature furniture piece |
Wear safety glasses when nipping china with tile nippers. Glazed shards throw sharp splinters. Seal a finished table top with a clear exterior grout sealer so winter frost cannot lift the pieces.
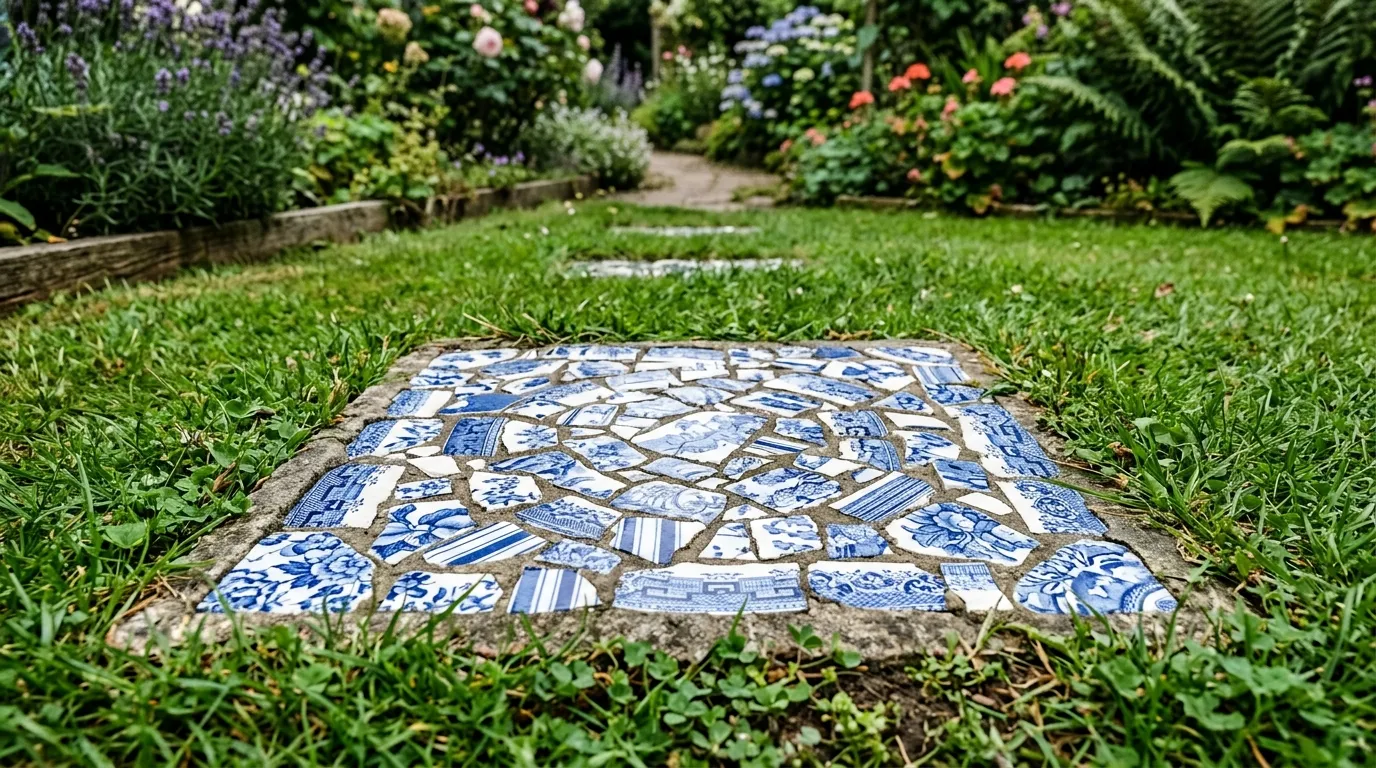 A 400mm mosaic stepping stone made from 240 pieces of broken blue-and-white china, grouted with frost-proof exterior grout and bedded into the lawn.
Crushed terracotta as top-dressing, grit and seed-tray drainage
Plain terracotta crushes into one of the most useful free materials in the garden. Crumbs and small shards crushed to 6 to 10mm make an excellent top-dressing for pots, a grit substitute, and a seed-tray drainage layer.
Crush pieces inside an old feed sack with a lump hammer or a paving slab. Sieve through a 10mm garden riddle. The 6 to 10mm grade tops pot surfaces to suppress liverwort, deter slugs, and slow water loss. The under-6mm grade mixes into seed compost at 1 part grit to 3 parts compost for free-draining cuttings and alpines.
Warning: Never crush glazed china, painted pots, or old crockery into mulch. Glaze does not break down. It sheds sharp flakes into the soil and older glazes can leach lead. Crush plain unglazed terracotta only for anything that touches growing compost.
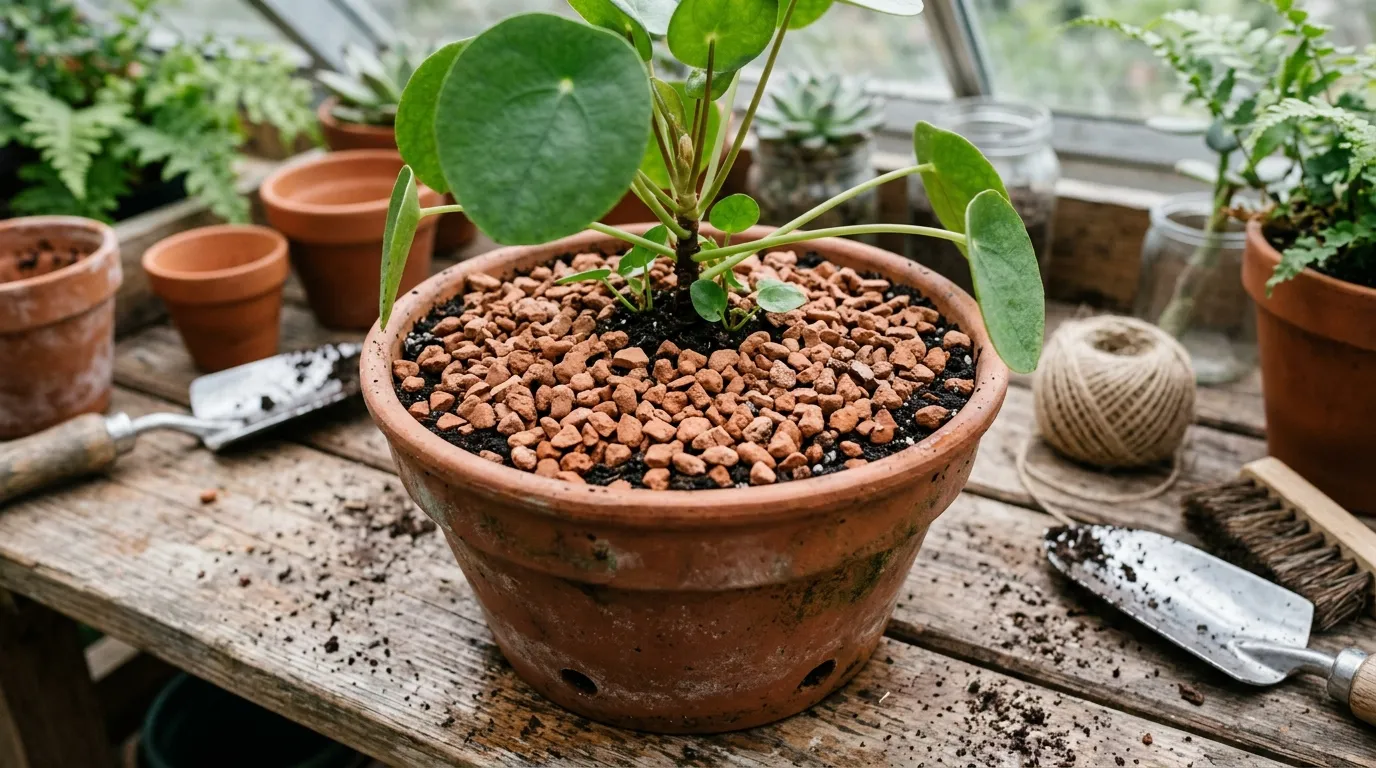 Plain terracotta crushed and riddled to 6 to 10mm. Spread 15mm deep, it suppresses liverwort, deters slugs, and saves £4 to £6 against a bag of bought grit.
Pot feet, levellers and frost-pot repair
Thick rim sections make free pot feet. Three shards under a pot raise it 15 to 25mm off the paving. That gap lets winter water drain away from the hole, the single best thing you can do to stop terracotta cracking in frost. Bought ceramic pot feet cost £3 to £6 a set of three. A broken rim gives you several sets free.
Smaller wedge shards work as levellers under wobbling pots and slabs. Tap a thin shard into the gap until the pot sits flat. Terracotta does not rot or compress like a wooden wedge.
Gardener’s tip: Wire the pot when empty and dry. Tighten the band until the crack line closes to a hairline, then seal the outside of the crack with a smear of exterior frame sealant to keep frost water out of the fracture.
Bed edging, slug barriers and row marking
Large curved sections push into soil on edge to make rustic bed edging. Overlap them like fish scales along a border front. Each piece sinks 60 to 80mm into the ground, leaving a 40 to 60mm terracotta lip. A metre of edging uses 6 to 9 large shards. It looks deliberate and costs nothing.
For the allotment, large flat shards make permanent row markers. Score a deep line with a nail and the variety name stays readable for years, unlike a pencil label. Set one shard at each end of a row. This pairs well with the smaller pencil labels and means you can read the row from standing height.
Building a proper drainage layer in raised beds
There is one place a coarse layer of broken material does belong: the base of a deep raised bed over free-draining subsoil. This is different from a pot. The myth applies to containers, not to large beds with an open bottom.
In a raised bed 400mm deep or more sitting on permeable ground, a 50 to 80mm layer of broken pot pieces, rubble and coarse shard at the very base helps water move into the subsoil below. The bed is open at the bottom, so there is no perched water table to trap water. Lay the coarsest shards first, then a layer of upturned turf or membrane, then topsoil and compost above.
This does not work in a sealed planter, a pot, or a bed on concrete or clay hardpan. In those, water has nowhere to go and the coarse layer just stores it. Match the technique to the situation: open-bottomed beds get a base layer, closed containers get clear holes and consistent compost. Confusing the two is the root of the whole crock myth.
Common mistakes when reusing broken pots
Putting crocks over drainage holes. This is the big one. Crocks do not aid drainage and can block the hole, holding 180 to 240g more water in a 30cm pot. Leave holes clear or cover them with mesh, not a curved shard.
Using glazed shards as mulch. Glaze never breaks down. It sheds sharp flakes and older glazes can leach lead into soil. Keep glazed china for mosaic only, never for anything touching compost or food crops.
Skipping the edge-blunting step. Fresh terracotta and china breaks leave cutting edges. Two passes across a paving slab removes the risk in ten seconds. Skipping it leads to cut hands every time you handle the pieces.
Smashing a pot at random for a fairy garden. The layered look needs one clean vertical break, not a shattered pot. Score and tap with a chisel along a single line so a curved spill falls away. A dropped pot gives useless random fragments.
Crushing mulch too fine. Terracotta crushed under 4mm packs into a crust that sheds water sideways and grows liverwort. Riddle to 6 to 10mm for top-dressing so water still penetrates to the compost below.
Cost and saving breakdown per broken pot
| Reused item | Shop-bought cost | Made from one broken 30cm pot |
|---|---|---|
| Plant labels (pack equivalent) | £3 to £4 | 6 to 10 labels |
| Pot feet (set of three) | £3 to £6 | 2 to 3 sets |
| Horticultural grit (top-dressing share) | £4 to £6 | Part of one bucket |
| Bark mulch (top-dressing share) | £5 to £8 | Part of one bucket |
| Total saved per pot | £4 to £9 | Several reuses combined |
Frequently asked questions
Do broken pots and crocks really improve drainage in containers?
No. RHS trials show crocks do not aid drainage and can worsen it. They block holes and create a perched water table above the gravel layer. Fill the pot with one consistent compost instead and leave the drainage holes clear.
How do you make plant labels from broken pots?
Snap terracotta into flat 60 by 30mm shards. Write on the unglazed clay with a soft 2B pencil or a paint pen. Pencil lasts one to two seasons outdoors. Push the shard 40mm into the compost beside the plant.
Can you use broken crockery as mulch?
Only unglazed terracotta, crushed to 6 to 10mm. Never use glazed china. Glaze does not break down, sheds sharp flakes, and can leach lead in older pieces. Crushed plain terracotta works as a clean, slug-resistant top-dressing for pots.
What can I make from broken terracotta pots?
Plant labels, pot feet, bed edging, mosaic stepping stones, layered fairy gardens, and crushed top-dressing. A single 30cm pot gives 8 to 12 shards. Sort pieces by size first, then match each to a project before you start.
How do you build a broken pot fairy garden?
Crack one pot vertically into a curved spill, not random shards. Stack the broken pieces inside as terraces, backfill with gritty compost, and plant small succulents or alpines. The look needs one clean break, kept to layer the levels.
More ways to reuse and recycle in the garden
Next step
Now you can turn broken pots into labels, mulch and mosaic, browse the rest of our practical how-to gardening guides for the next weekend project.
Our team produces practical UK gardening guidance from source research, contributor records and established horticultural practice. Editorial standards are overseen by Matt W.