Key takeaways
- Garlic chives are hardy and come back every year all over the UK
- The flat leaves taste of mild garlic and are ready to cut from March to November
- The white flowers in August and September are edible too
- Sow indoors from March or outdoors from late April; seedlings take 2-3 weeks
- Divide clumps every 3-4 years in spring or autumn
- Deadhead the flowers before they set seed, or they'll pop up all over the garden
Garlic chives are one of the most underrated herbs you can grow. They give you flat, garlicky leaves from spring to late autumn, and bees and butterflies love their white flowers in August.
They’re also called Chinese chives, and they’re part of the onion family along with leeks and ordinary chives. The botanical name is Allium tuberosum. They come from East Asia, but they’re perfectly hardy here and grow in almost any soil. Here’s how to grow them.
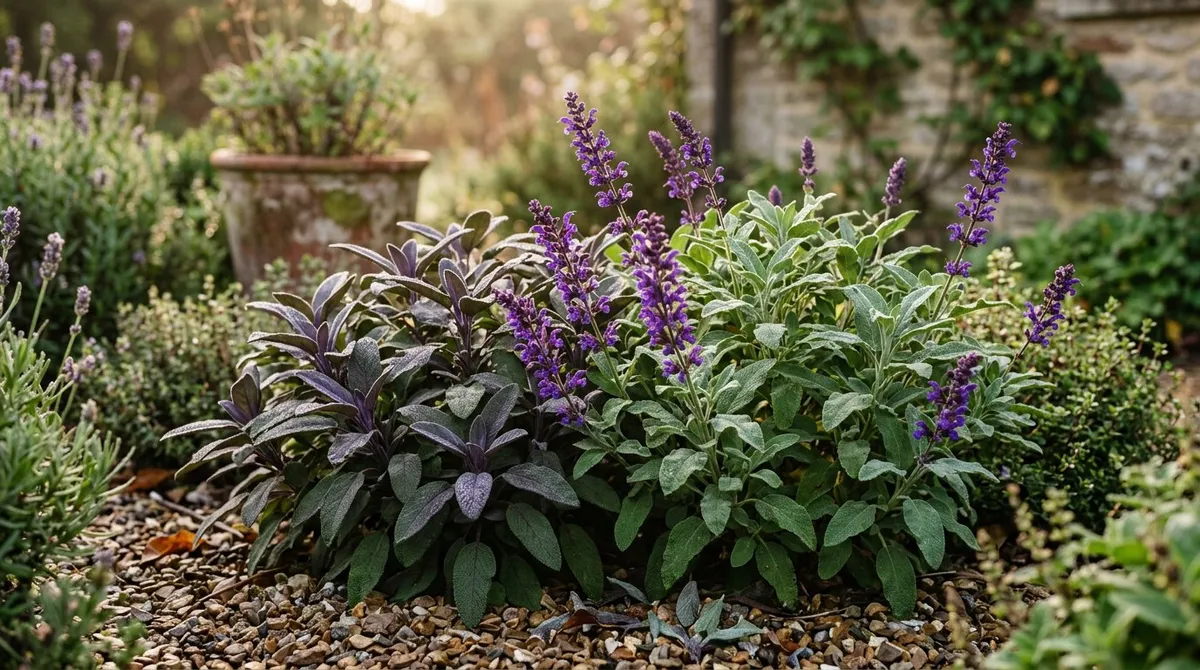
 Garlic chives (left) have flat leaves, while regular chives (right) have hollow, tube-shaped ones.
What are garlic chives?
Garlic chives are a hardy perennial herb with flat leaves that taste of mild garlic rather than onion. They grow 30-45cm tall and make clumps that get bigger each year. The leaves look like tiny, flat leek leaves.
The flavour sits somewhere between garlic and spring onions, but gentler than both. The leaves are the main crop, raw or cooked. The white flowers are edible too.
They’re a staple in Chinese, Korean and Japanese cooking, in dumplings, stir-fries, pancakes and egg dishes. In a UK garden they give you fresh garlic flavour for most of the year without having to plant garlic bulbs every autumn.
Key characteristics
| Feature | What to expect |
|---|---|
| Other names | Chinese chives, Oriental chives |
| Height | 30-45cm |
| Spread | About 30cm, slowly getting wider |
| Leaves | Flat and strappy |
| Flowers | White stars, August to September |
| Hardiness | Hardy outdoors all year |
| Soil | Most soils, as long as they don’t stay waterlogged |
| Position | Sun or part shade |
| Lifespan | Many years, with dividing |
Garlic chives vs regular chives vs wild garlic
These three get mixed up a lot, but they’re quite different plants.
Garlic chives have flat, garlicky leaves and grow in clumps in sunny spots. You can pick them from March to November, and they flower white in late summer. They’re happy in most soils.
Regular chives have hollow, tube-shaped leaves that taste of onion. They flower earlier, with purple pompoms in May and June.
Wild garlic, also called ramsons, is a woodland plant with broad, soft leaves and a strong garlic taste. It likes damp shade and dies down completely by early summer, so it’s a spring-only treat.
| Garlic chives | Regular chives | Wild garlic | |
|---|---|---|---|
| Leaves | Flat | Hollow tubes | Broad and soft |
| Flavour | Mild garlic | Mild onion | Strong garlic |
| Height | 30-45cm | 25-30cm | 15-25cm |
| Flowers | White, Aug-Sep | Purple-pink, May-Jun | White, Apr-May |
| Best spot | Sun to part shade | Sun to part shade | Damp shade |
| Picking season | Mar-Nov | Mar-Nov | Mar-May |
| Self-seeds | A lot | Some | Some |
| Great in | Stir-fries, dumplings, eggs | Salads, potatoes, soups | Pesto, soups, risotto |
So if you want garlicky leaves from March to November, garlic chives are the ones. Wild garlic gives you a big burst in spring and then vanishes.
How to grow garlic chives from seed
Seed is the cheapest way to start. One packet gives you lots of plants, though they take a little longer to get going than divisions.
When to sow
Sow indoors from March, or outdoors from late April to May once the soil has warmed up. Sowing indoors gives you a few weeks’ head start.
Sowing method
Fill 9cm pots with multipurpose compost and water well. Scatter 10-12 seeds on top of each pot and cover with a thin layer of compost or vermiculite. Put them on a warm windowsill or in a propagator. Seedlings usually appear in 2-3 weeks, sometimes a bit longer with older seed.
Grow them on until they’re 10-15cm tall. Harden off outdoor plants for a week or so in late May. Plant the whole potful as one clump, without splitting the seedlings up, 25-30cm apart. Like ordinary chives, they grow best as a cluster.
Plants from seed give you leaves to pick in their first summer, but won’t flower until their second year. Pick lightly in the first year, taking no more than a third of the leaves at a time.
Saving and storing seed
Seed keeps for a couple of years somewhere cool and dry, though fresh seed comes up best. To save your own, collect it in October when the heads have dried and the black seeds rattle inside.
Dividing established garlic chive clumps
Dividing is quicker than seed and gives you full-sized plants straight away. It also keeps old clumps healthy.
When to divide
Divide clumps every 3-4 years. The best time is early spring, March to April, as new shoots appear, or early autumn while the soil is still warm. Spring is best, as the plants have the whole season to settle.
How to divide
Lift the clump with a garden fork and shake off the soil. Pull or cut it into pieces of 6-8 shoots each. Throw away the old, woody middle.
Replant the pieces 25-30cm apart in soil with a bit of fresh compost. Water well and keep them moist for the first couple of weeks. In spring, new growth appears within days.
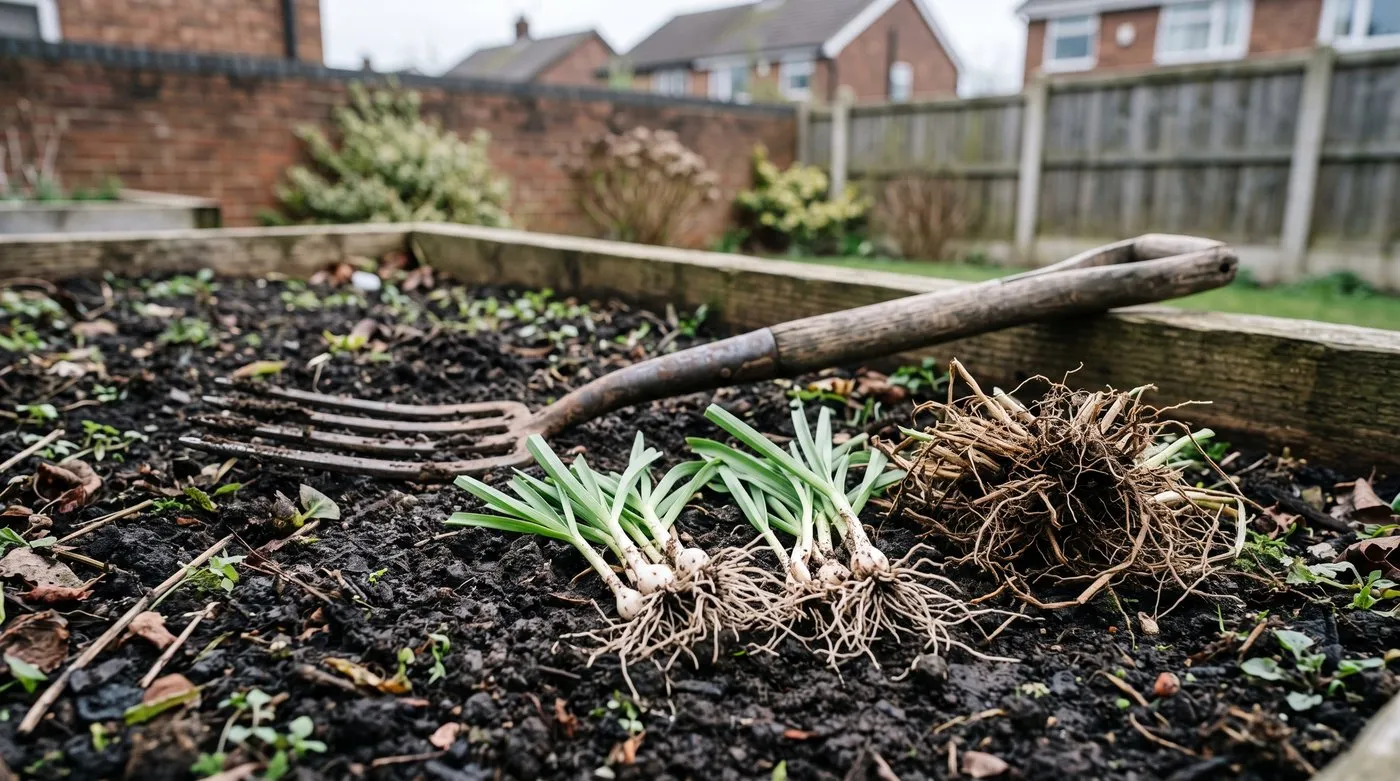
Split old clumps into pieces of six to eight shoots and throw away the woody middle. Spring divisions settle in within days.
Where to plant garlic chives
Garlic chives are easy-going, but the right spot gives you the best flavour and the most flowers.
Light
Full sun gives the strongest flavour and the most flowers. They’ll grow in part shade, but get taller and floppier with fewer flowers. Avoid deep shade, and aim for at least four to six hours of sun.
Soil
Almost any soil will do, from clay to chalk, as long as it drains. On heavy clay, dig in some compost. Soil that stays waterlogged in winter can rot the roots.
If you’re creating a herb garden, put garlic chives with herbs that like a bit of moisture, such as mint and parsley, rather than with rosemary and thyme, which like it drier.
Spacing and position
Plant 25-30cm apart. The clumps spread and fill the gaps over time. Put them at the front or middle of a sunny border so you can reach them easily for picking. A row along a path works well.
They make a neat edging, too. The flat leaves look like a tidy row of grass for most of the year, and the white flowers are a lovely late summer bonus.
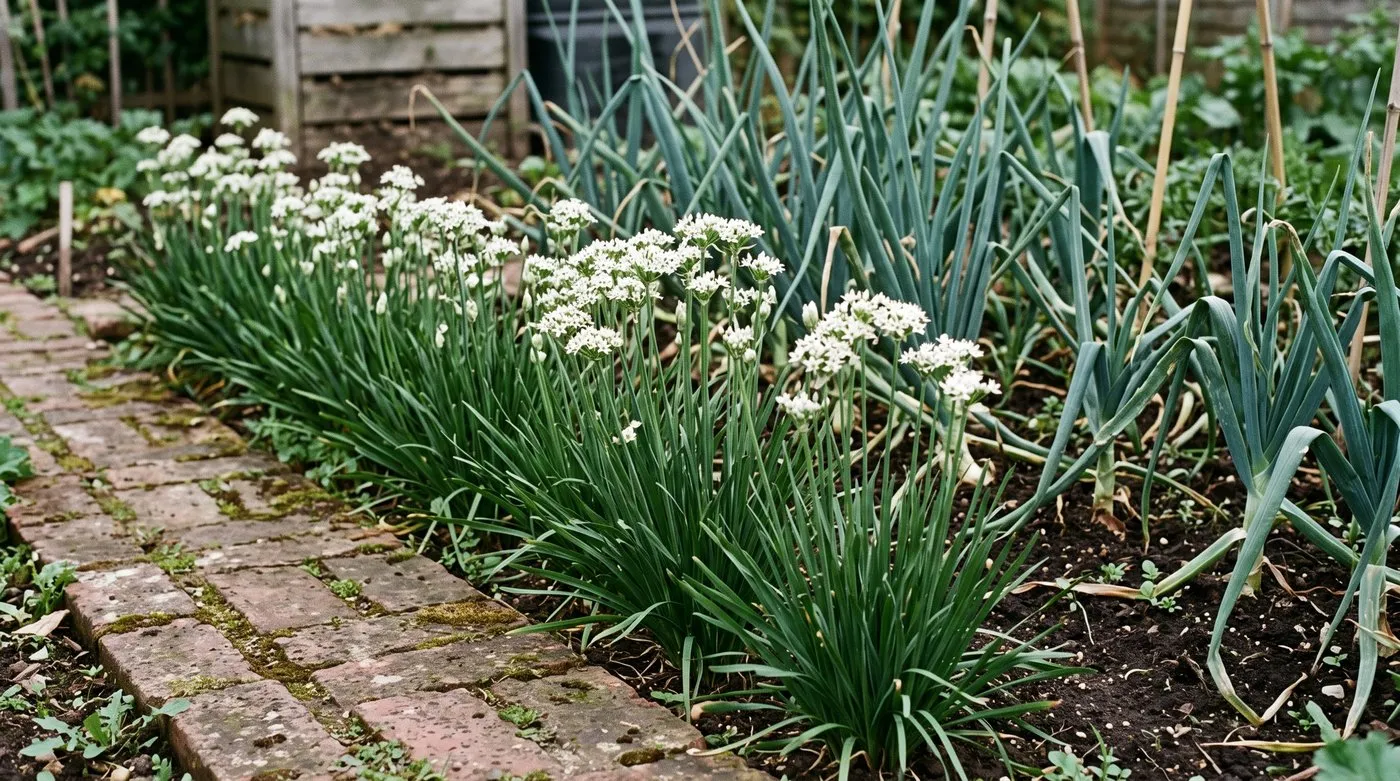
A row of garlic chives along a path is handy for picking and looks tidy all year. The white flowers in August are a bonus.
Growing garlic chives in containers
 A pot of garlic chives on the kitchen windowsill keeps fresh leaves close at hand.
Garlic chives love pots. A pot keeps them handy for picking and makes self-seeding much easier to control.
Choosing the right pot
Use a pot at least 20cm wide and 20cm deep. Garlic chives have chunkier roots than ordinary chives, so give them a bit more room. Terracotta or glazed pots both work. Make sure there are drainage holes.
Compost and feeding
Ordinary multipurpose compost is fine. Feed once a month with a half-strength general liquid feed from April to September.
Watering
Keep the compost moist but not soggy. In warm weather that’s every 2-3 days, less when it’s cool. They like more water than Mediterranean herbs but hate sitting in a puddle. Our container vegetable gardening guide has more watering tips.
On a bright windowsill indoors, they’ll keep giving leaves in winter. Winter leaves are thinner and paler but still taste good. Turn the pot every week so it doesn’t lean towards the light.
Harvesting garlic chive leaves
Picking often keeps garlic chives tender and productive. Left alone, the leaves get tough.
How to harvest
Snip leaves with scissors about 3cm above the soil. Don’t pull them, as that can damage the roots. Cut from the outside of the clump first and let the middle keep growing. They regrow in a few weeks.
Start picking when the leaves are 15-20cm tall, from late March in mild areas. Keep going until they die down in November. A healthy clump can be cut several times a season.
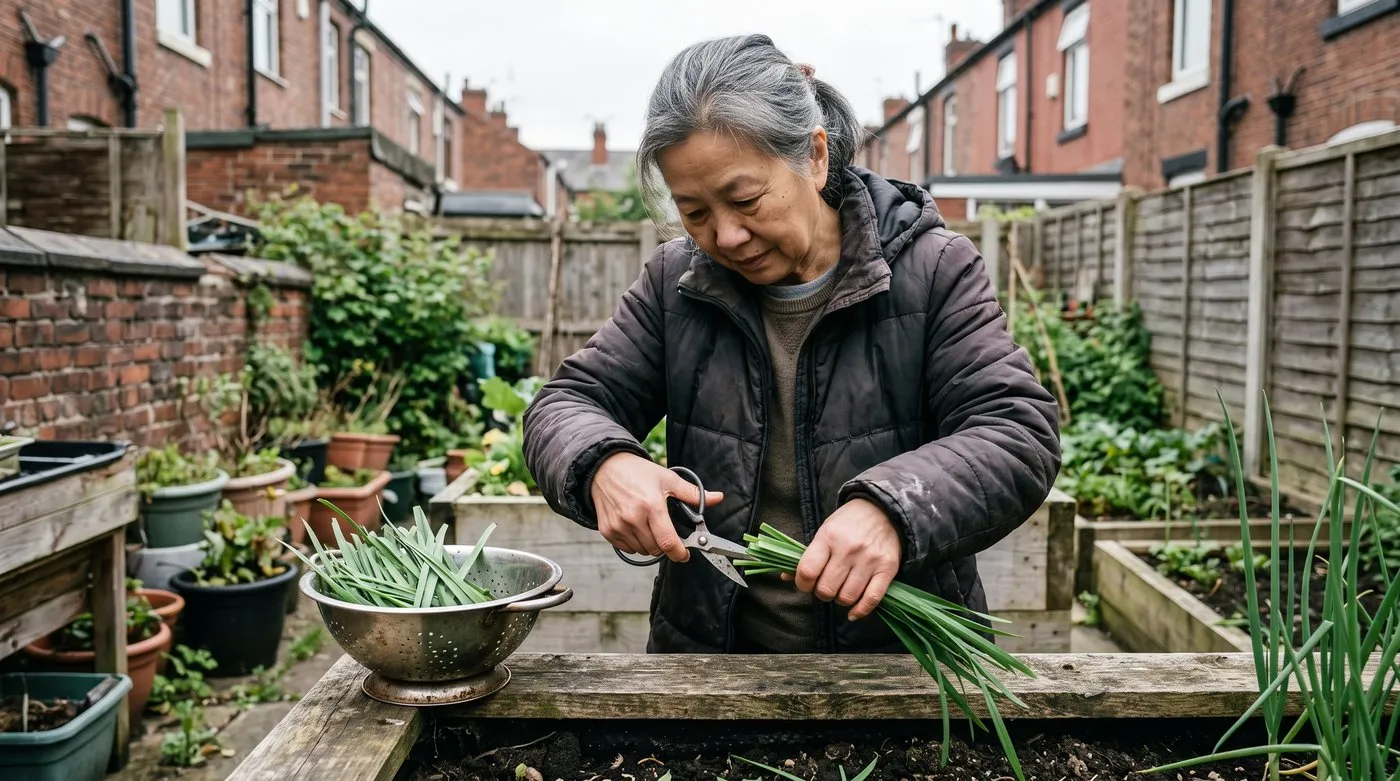
Snip from the outside of the clump and leave the middle to keep growing. Pick often and the leaves stay tender.
Storing fresh leaves
Fresh leaves keep for about a week wrapped in damp kitchen paper in a box in the fridge. For longer, freeze them. Chop them finely, pack into ice cube trays, top up with a little water and freeze. Each cube is a ready-made portion for cooking.
Drying isn’t worth it, as they lose most of their flavour. Freezing is much better.
Blanching for yellow chives
In Chinese cooking, blanched garlic chives are a real treat, sweeter and milder than the green leaves. To make them, cover a clump with a big upturned pot or bucket in early spring so no light gets in. After 2-3 weeks the leaves grow pale yellow and tender. Take the cover off after you’ve cut them so the plant can recover.
It’s the same idea as forcing rhubarb, and it gives you something you can’t buy in most UK shops.
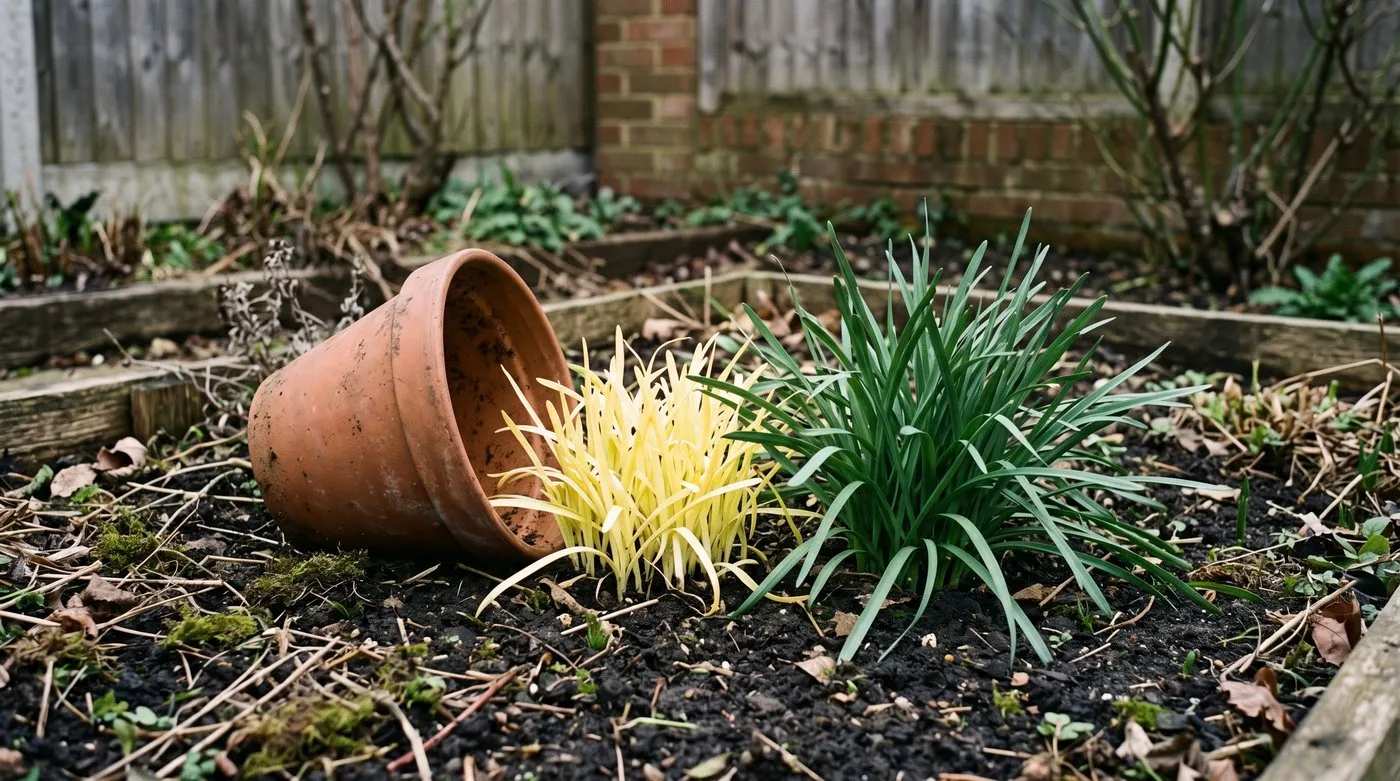
Two or three weeks under an upturned pot gives pale, sweet yellow chives. Take the cover off after cutting so the clump can recover.
Edible garlic chive flowers
 Garlic chive flowers make a pretty, tasty garnish.
The white starry flowers in August and September are pretty and edible, with a lovely garlicky taste.
Harvesting flowers
Pick the heads just as they open fully. Cut the stalk about 10cm below the flower. The stalks are tough, so use just the flower heads, and pull them apart into little florets to scatter over food.
Using garlic chive flowers in cooking
Scatter the florets over salads, soups, stir-fries and egg dishes. They add colour and a gentle garlic kick. They’re also nice stirred into cream cheese or butter.
For a flavoured vinegar, loosely fill a jar with flower heads and cover with white wine vinegar. Seal and leave somewhere cool and dark for two weeks, then strain. It’s lovely in salad dressings.
Balancing flowers and self-seeding
Here’s the catch. The flowers are pretty, the bees love them and they taste good, but each one makes lots of seeds that come up easily. Let them all set seed and you’ll find garlic chives all over the garden next spring.
An easy middle way: let half the flowers bloom for the bees and the kitchen, and cut the rest off before they set seed. Or grow them in pots, where stray seed lands on paving and is easy to sweep up.
Garlic chives in Asian and UK cooking
Garlic chives are one of the most used herbs in East Asian cooking. In a UK kitchen they fill a handy gap, giving a gentle garlic flavour without the punch of raw cloves.
Traditional Asian uses
In Chinese cooking they go into pork and prawn dumplings, egg stir-fries and savoury pancakes. In Korea they’re used in kimchi, glass noodle stir-fries and chive pancakes. In Japan they turn up in gyoza and on ramen.
The unopened flower buds are cooked as a vegetable across much of Asia. Stir-fried with oyster sauce, they’re a Cantonese classic.
UK kitchen ideas
Snip the leaves into scrambled eggs, omelettes or quiche. Stir them into mash, cream cheese or butter for a quick garlic herb butter. Scatter them over soups, especially potato and leek. Or fold them into bread dough before baking.
The leaves wilt fast in the heat, so add them at the very end of cooking.
For more kitchen herbs, see our guide to how to grow herbs in the UK.
Managing self-seeding
Self-seeding is the main thing to keep on top of. Left alone, garlic chives can pop up in borders, paths and paving cracks within a couple of years.
Prevention
Cut off the flower stems before the seeds ripen, usually by mid-October. Cut them right down once the petals fade, before the seed pods swell. It’s fine to compost them at this stage, as the seeds aren’t ripe yet.
Containment strategies
Pots are the easiest answer. A sunken pot, buried in the border with the rim just above the soil, keeps the clump in place and still looks natural.
Raised beds with solid sides work just as well. In an open border, sink a bottomless bucket around the plant. The same trick works for mint, another plant that likes to wander.
Removing unwanted seedlings
Pull seedlings in spring while they’re small. You’ll know them by their flat leaves that smell of garlic. Hoeing in March gets rid of seeds just starting to sprout, and a layer of bark mulch helps stop them coming up.
Winter dormancy and care
Garlic chives die down to the ground in late autumn, usually November. The leaves turn yellow and flop. That’s normal. They’re just resting.
Winter protection
They don’t need any winter protection outdoors in the UK. The roots underground come through frost and snow without a problem. Pots are a little more exposed, so in a hard freeze move them against a sheltered house wall. There’s no need to bring them inside.
Spring emergence
New shoots appear from late February in mild areas and March elsewhere. They grow quickly and are ready to pick within a few weeks. Mark where your clumps are in winter so you don’t dig into them by mistake.
Common problems
Garlic chives are mostly trouble-free, and in well-drained soil diseases are rare.
Onion fly: Maggots eat into the base of the stems. Damage is usually minor, as the plants bounce back. Cover them with fleece in May and June when the flies are about.
Slugs and snails: They sometimes nibble young spring shoots, but garlic chives aren’t a favourite. Wildlife-friendly ferric phosphate pellets or beer traps sort it out.
Self-seeding: The most common complaint. See the section above.
Month-by-month care calendar
| Month | What to do |
|---|---|
| February | Look for the first shoots in mild areas |
| March | Start picking lightly once leaves are 15cm. Divide crowded clumps. Sow indoors |
| April | Sow outdoors once the soil has warmed. Plant out hardened-off seedlings |
| May | Pick regularly. Water pots every 2-3 days |
| June | Keep picking. Feed pots monthly |
| July | Flower buds form. Keep picking leaves |
| August | Flowers open. Pick some for the kitchen and deadhead others |
| September | Late flowers. Cut off faded heads before they set seed |
| October | Last pickings. Collect seed if you want it. Divide any clumps that need it |
| November | Leaves die down. Tidy them up if you like |
| December-January | Resting. Plan next year’s herb patch |
Garlic chives look great next to onions and leeks in a kitchen garden bed, and it keeps all your onion-family crops in one place for rotation.
Frequently asked questions
Are garlic chives easy to grow in the UK?
Yes, they’re one of the easiest herbs you can grow. They cope with most soils, grow in sun or part shade and come through winter without any help. The main job is deadheading the flowers so they don’t self-seed everywhere. Divide clumps every 3-4 years to keep them going strong.
What is the difference between garlic chives and regular chives?
Garlic chives have flat leaves that taste of mild garlic. Regular chives have hollow, tube-shaped leaves that taste of onion. Garlic chives flower white in late summer, while regular chives have purple flowers in early summer. Garlic chives also grow a little taller.
Can you eat garlic chive flowers?
Yes, the flowers are edible and tasty. The little white stars have a garlicky flavour and look lovely scattered over salads, stir-fries and soups. Pick them just as they open fully. The flower stalks are tough, so use just the flower heads.
Do garlic chives come back every year?
Yes, they come back every year across the UK. They die down in late autumn and pop back up in early spring. A clump will keep going for years. Dividing it every 3-4 years stops the middle dying out and keeps the leaves coming.
How do you stop garlic chives from spreading?
Cut off the flower stems before the seeds ripen. Each flower head makes lots of black seeds that come up easily. Growing them in a pot, a sunken pot or a raised bed with solid sides keeps the clump in check. Pull up any stray seedlings in spring while they’re small.
Can you grow garlic chives in pots?
Yes, they grow really well in pots at least 20cm wide and deep. Use multipurpose compost and keep it moist. Feed once a month with liquid feed from April to September. A pot also makes self-seeding easier to control. Keep it near the kitchen door for easy picking.
When should you divide garlic chives?
Divide them every 3-4 years in early spring or early autumn. Spring, in March or April, is best, as they have the whole season to settle in. Lift the clump, split it into pieces of 6-8 shoots, throw away the woody middle and replant 25-30cm apart in soil with some fresh compost.
Our team produces practical UK gardening guidance from source research, contributor records and established horticultural practice. Editorial standards are overseen by Matt W.