Key takeaways
- Cress heads are the quickest win, ready to snip in about a week
- A bean in a jar lets children watch roots and shoots grow day by day
- Carrot tops, sweet potatoes and pineapple tops turn kitchen scraps into projects
- Match the project to the child's patience, with fast ones for under-fives
- Keep one project per child at a time and set a daily watering reminder
- Lavender for a pollinator pot is not safe for pets to chew, so keep it out of reach
A windowsill makes a brilliant first garden for a child. It’s at eye level, the routine is short, and something changes almost every day. The eight windowsill projects below run from cress ready in a week to a pineapple top that becomes a houseplant.
Children can do most of the work themselves. A grown-up just helps with knives, cocktail sticks and any heavy pots. When they’re ready to move outside, the gardening projects for kids guide has plenty for the garden.
Which windowsill project suits which age?
Match the project to the child’s patience. Little ones want results in days, while older children enjoy a project that runs for weeks.
| Age | Good projects | Leave for later |
|---|---|---|
| 3-4 | Cress heads, bean in a jar | Anything over two weeks |
| 5-7 | Cress, microgreens, carrot tops, herbs | Pineapple top |
| 8-10 | Sweet potato vine, microgreens, herb pots | Nothing really |
| 11-12 | Pineapple top, a full pollinator windowsill | Nothing really |
Edible projects tend to win, because the child grows something and then gets to eat it. Pair one with a watching project, such as a sweet potato vine, and keep a simple chart of how it grows.
Project 1: Cress heads (about a week, ages 3+)
Cress heads are the classic first project and almost never fail. You need an empty eggshell or yoghurt pot, kitchen roll or cotton wool, cress seeds and a felt-tip pen.
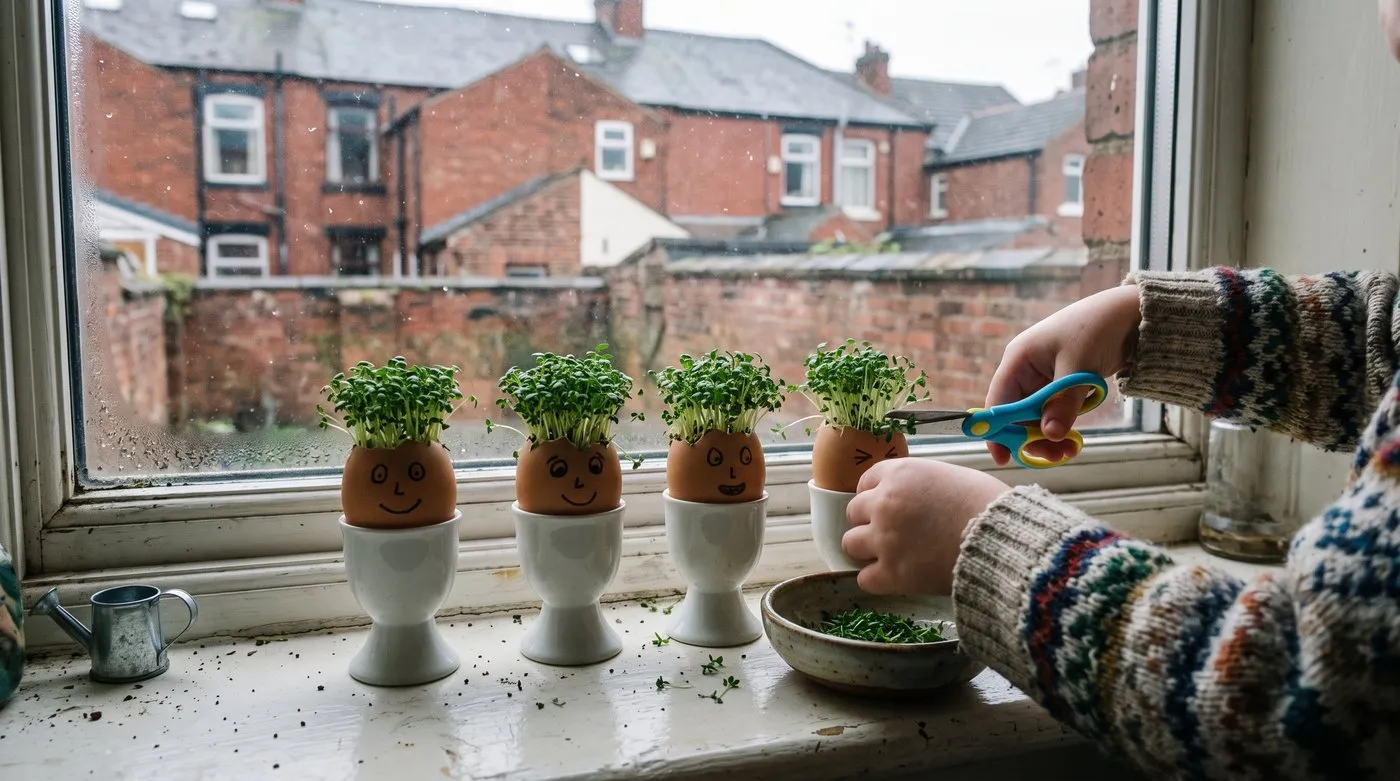
Cress heads are ready to snip in about a week. Drawing the faces is half the fun.
- Draw a face on the eggshell or pot.
- Pack in damp kitchen roll or cotton wool.
- Sprinkle cress seeds thickly over the top. Don’t cover them.
- Stand it in an egg cup on a bright windowsill.
- Keep the kitchen roll damp with a spray bottle every day.
Tiny white roots appear within a day or two, then green “hair” soon after. In about a week the cress is a few centimetres tall. Snip it with scissors and eat it in an egg sandwich. The cress and watercress guide covers growing it in bigger batches.
Project 2: Bean in a jar (1-2 weeks, ages 3+)
A bean in a jar shows children what happens underground. You need a clean jam jar, kitchen roll and a broad bean or runner bean seed.
- Line the inside of the jar with a few layers of kitchen roll.
- Push a bean seed between the paper and the glass, halfway down.
- Pour a little water into the bottom so the paper stays damp.
- Stand the jar on a bright windowsill and keep the paper moist.
A root pushes down within a few days, then a shoot heads up towards the light. Children can measure it each day and draw what they see. Once it has a few leaves, plant it in a pot of compost. Broad beans can go outside in spring, while runner beans wait until after the last frost.
Safety note: Don’t let children eat dried bean seeds. Raw runner and kidney-type beans are poisonous until properly cooked.

Growing a bean against the glass lets children see the root and shoot appear. A ruler beside the jar turns it into a daily measuring game.
Project 3: Microgreens tray (2-3 weeks, ages 5+)
Microgreens are seedlings eaten when they’re tiny, and they give a proper salad crop. You need a shallow tray with drainage holes, peat-free seed compost, microgreen seeds and a spray bottle.
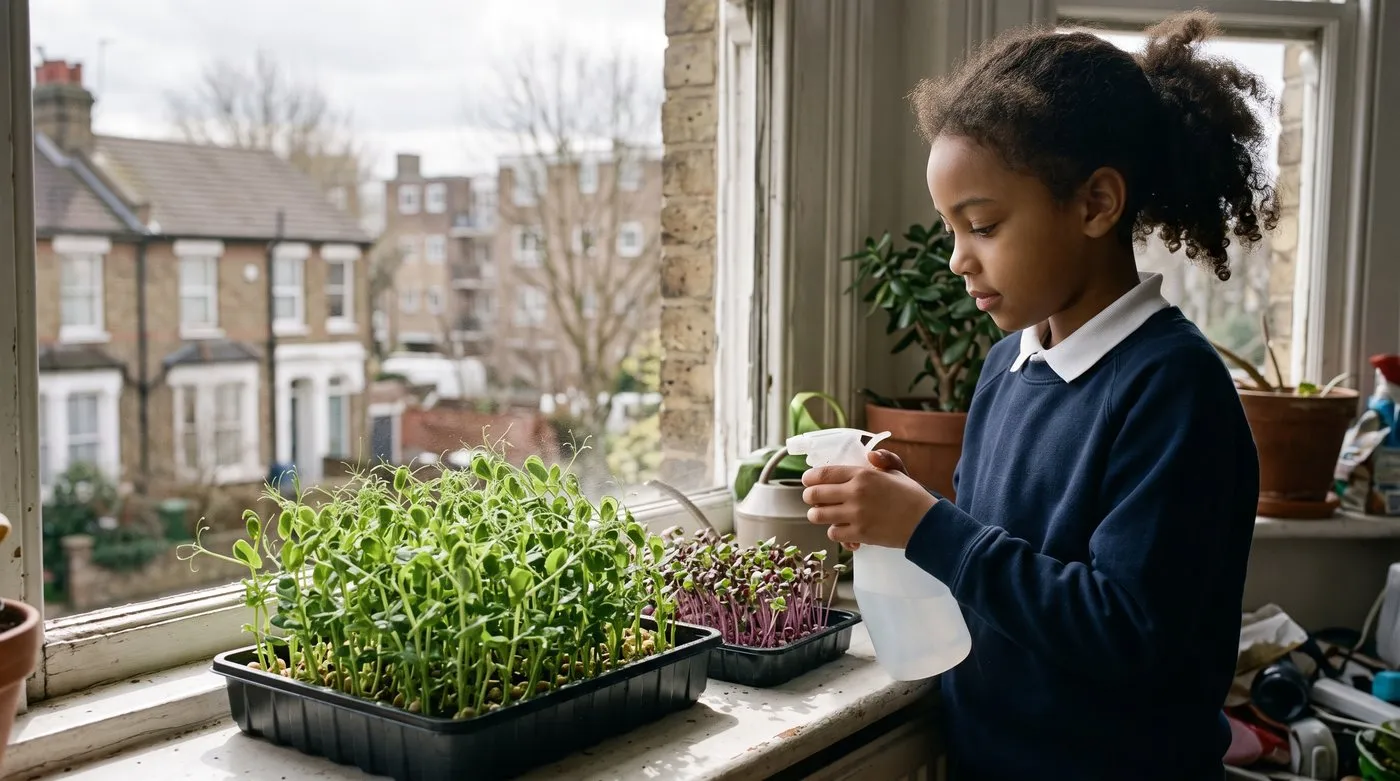
Pea shoots are the easiest microgreens for kids. A daily mist keeps the compost damp without drowning it.
- Fill the tray with 3cm of damp seed compost and smooth it flat.
- Scatter seeds thickly, almost touching.
- Press them in gently with the back of a spoon.
- Cover with damp kitchen roll for a few days until the seeds sprout.
- Remove the paper and move the tray to a bright windowsill.
- Mist daily so the compost stays damp, not soggy.
- Snip with scissors at about 5cm tall.
Pea shoots are the easiest and taste sweet. Radish and broccoli are quick, with a peppery kick. Use seed sold for microgreens or sprouting, not garden packets, which may be treated. The windowsill sprouts and microgreens guide has more crops to try.
Project 4: Carrot tops (1-2 weeks, ages 4+)
Carrot tops are free and show that roots store food for new growth. Save the top 2cm from a few carrots, with any leaf stubs still on.
- Stand the carrot tops cut side down in a saucer.
- Add just enough water to cover the bottom few millimetres.
- Place on a bright windowsill.
- Top up the water every couple of days and rinse the saucer if it gets slimy.
Feathery green leaves appear within about a week. The carrot itself won’t grow back, only the leaves. That’s a good talking point: the orange root is the plant’s food store. The kitchen scraps you can regrow guide has more ideas, from spring onions to celery.
Project 5: Sweet potato vine (about 2 months, ages 6+)
A sweet potato vine grows into a trailing jungle of heart-shaped leaves. You need one firm sweet potato, a jar a little narrower than the potato, four cocktail sticks and water.
- A grown-up pushes the cocktail sticks into the middle of the potato.
- Rest the sticks on the jar rim so the bottom half sits in water.
- Stand it on a bright, warm windowsill.
- Change the water every week.
Roots appear first, then shoots from the top after a few weeks. Over a couple of months the vine trails off the sill or climbs a string up the window. Some shop sweet potatoes are slow to sprout, so try an organic one if nothing happens.

One supermarket sweet potato can fill a window with leaves. Try a jar each and see whose vine grows longest.
Project 6: Pineapple top (months, ages 8+)
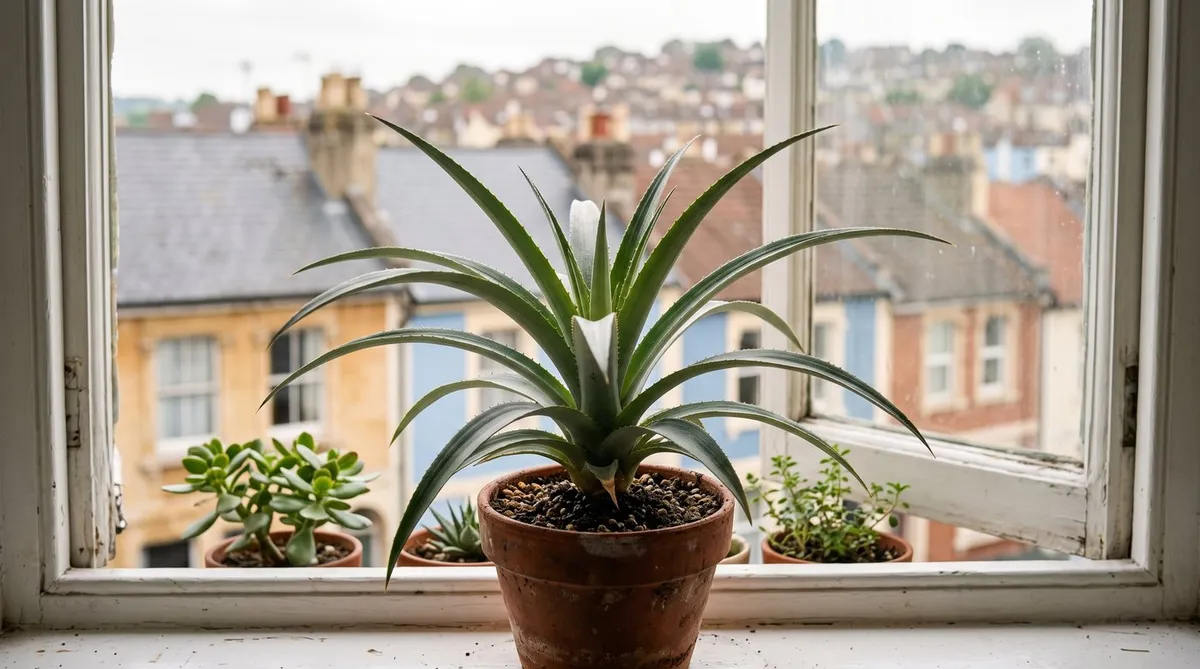
A pineapple top is the slow, rewarding one for patient children. It turns into a spiky houseplant that can live for years.
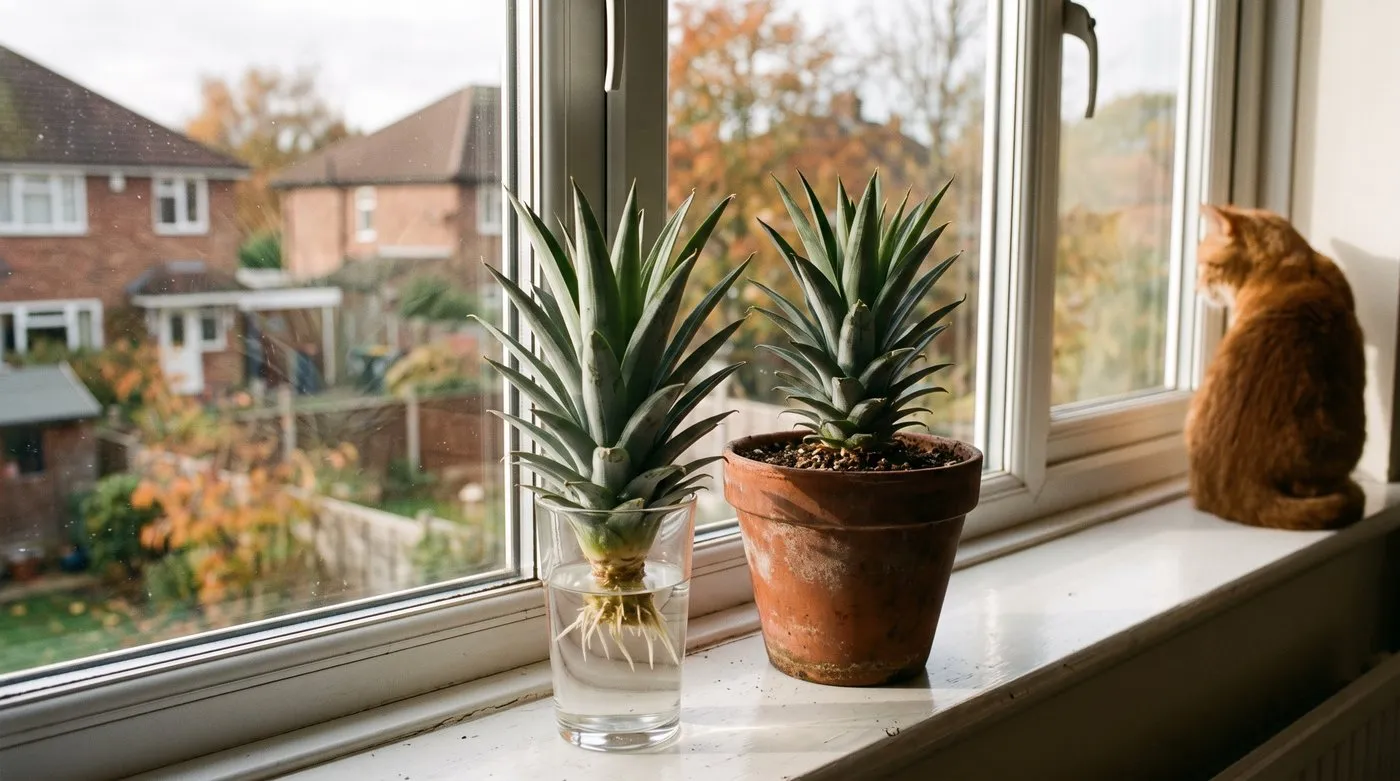
Roots appear within a few weeks. Once they’re a few centimetres long, the top is ready for a pot of compost.
- A grown-up twists or cuts the leafy top off a fresh pineapple.
- Pull off the lowest few leaves to show a short stem.
- Leave it to dry for a day or two so it doesn’t rot.
- Stand the stem in a glass of water on a warm, bright windowsill.
- When roots are a few centimetres long, pot it in peat-free compost.
Roots usually appear within a few weeks. The leaves are sharp-edged, so keep it out of the way of little faces. Fruit is rare indoors and takes years, but the plant looks striking anyway. The pineapple from a shop top guide covers long-term care.
Project 7: Windowsill herb garden (all year, ages 5+)
A herb garden gives children something to pick for dinner. Basil, chives and parsley are the easiest to start with.
- Buy pots of supermarket herbs. Each pot holds lots of crowded seedlings.
- Split each one into two or three clumps.
- Pot each clump into a 15cm pot of peat-free compost with drainage holes.
- Label each pot and stand them on a sunny windowsill.
- Water when the top of the compost feels dry.
- Pick a few leaves at a time, never more than a third of the plant.
Give each child a herb to look after and let them choose which one goes in tonight’s tea. The supermarket herbs guide explains how to keep them going for months.

Giving a child their own herb to water makes the link between growing and eating. Basil goes in the pasta, chives on the jacket potato.
Project 8: Butterfly feeder and pollinator pots (summer, ages 5+)
A butterfly feeder on an outside sill turns the window into a wildlife hide. It works best from late July to September, when butterflies feed up on soft fruit.
- Place a shallow saucer on an outside sill or hang it from a bracket.
- Fill it with chunks of overripe banana, plum or apple.
- Swap the fruit every couple of days before it goes mouldy.
- Watch quietly from inside.
Red admirals, commas and peacocks are the most likely visitors. Wasps may come too, so place the feeder away from where children eat outside.
Add a few nectar pots alongside. Pot marigold flowers from June to autumn and draws hoverflies. Chives flower in early summer and bees love them. Lavender is a bee magnet in July, but it isn’t safe for cats and dogs to chew, so keep it out of their reach. For more nectar plants, see the best plants for butterflies.

A saucer of soft fruit next to a nectar pot gives butterflies a proper café. Late summer is when red admirals visit most.
How to keep a growing diary
A simple growing diary turns any of these projects into a science lesson. Children from about five can manage one with a little help.
Each day, ask them to note:
- the date and the day of the project
- a quick drawing of what they see
- a measurement with a ruler, once there’s something to measure
- one word for how the plant looks: thirsty, happy, droopy, tall
Stick the diary on the fridge so it’s hard to forget. Comparing two pots side by side, one sunny and one shady, makes a fun experiment for older children.
Common mistakes with windowsill projects
Most windowsill projects fail for simple, fixable reasons.
- Forgetting to water. Set a daily phone reminder for the first week. After that, most children take it over.
- The wrong windowsill. A sill above a hot radiator dries everything out, and a cold, dark sill slows growth. A bright kitchen window is usually best.
- Too many projects at once. One project per child keeps the routine simple.
- Soggy compost. Microgreens and herbs need damp, not wet, compost. Tip away water left in saucers.
- Long gaps between projects. Sow fresh cress as soon as the last batch is eaten to keep the habit going.
Frequently asked questions
What is the best windowsill project for young kids?
Cress heads in eggshells or yoghurt pots. Children see shoots within a couple of days and can snip and eat the cress in about a week. It needs nothing more than damp kitchen roll, seeds and a bright windowsill.
How long does cress take to grow on a windowsill?
About a week from sowing to snipping. Seeds sprout within a day or two on damp kitchen roll. Keep them moist and in good light, then cut the cress with scissors once it is a few centimetres tall.
What can children grow from kitchen scraps?
Carrot tops, sweet potatoes, pineapple tops and spring onion bases all work. A carrot top sprouts fresh leaves in about a week. A sweet potato grows a trailing vine over a couple of months, and a pineapple top roots in a few weeks.
Are microgreens safe for kids to grow and eat?
Yes, grown in clean seed compost and rinsed before eating. Pea shoots, radish and broccoli are easy choices. Use bought microgreen or sprouting seed rather than garden seed, which may be treated with chemicals.
How can kids attract butterflies to a windowsill?
Put out a saucer of overripe fruit and a pot of nectar flowers. Red admirals and commas love soft fruit in late summer. Pot marigolds and chives bring hoverflies and bees, and lavender is a bee favourite if no pets will chew it.
What is the easiest plant for a 5 year old to grow indoors?
Cress, or a bean in a jar. Both show visible change almost every day, which keeps a five-year-old interested. Cress gives something to eat, and the bean can be planted outside once it has a few leaves.
Once the windowsill is buzzing, take the next step outdoors with our guide to easy vegetables kids can grow, or browse more how-to guides.
Our team produces practical UK gardening guidance from source research, contributor records and established horticultural practice. Editorial standards are overseen by Matt W.