
Key takeaways
- Most sunken gardens are 600mm to 1.2m deep, and 750-900mm suits most DIY builds
- Put the drainage in before anything else, or it will flood after heavy rain
- The retaining walls are the biggest job and the biggest cost
- A 4m x 4m base is about the smallest that feels comfortable
- Get a structural engineer for anything deeper than about 1m
- Trailing plants on the wall tops soften the stonework beautifully
A sunken garden is a sheltered, cosy space that feels like its own little world. The lower level keeps the wind off, and every border is on show from above. It’s an old British garden idea, and still a lovely way to add shelter and a bit of drama to a flat plot.
Here’s how to build one: digging out, drainage, walls, steps, planting and rough costs. Heavy clay or chalk, the steps are the same.
What is a sunken garden and why build one?
A sunken garden is a part of the garden dug out below the ground around it, held in by retaining walls or sloping banks. It’s sheltered from the wind, so it feels calmer and warmer to sit in.
That shelter means you can grow plants that would struggle in an open, windy spot. One thing to know: cold air sinks, so on still, frosty nights the base can be chillier than the ground above. Don’t rely on it to protect really tender plants in winter.
It works for both formal and relaxed styles. A neat rectangle with stone walls and matching borders feels classic. A curved shape with dry-stone walls and loose planting feels more relaxed. You build both the same way.
| Why build one | What you get |
|---|---|
| Shelter | A calm spot out of the wind |
| Show off plants | Every border is visible from above and at eye level |
| Privacy | Sitting below your neighbours’ line of sight |
| Quieter | The walls soften noise from outside |
 A sunken garden gives you a sheltered, enclosed feel that a flat garden can’t match.
How much does a sunken garden cost to build?
Cost comes down to how much soil you move, what the walls are made of, and whether you DIY. A small DIY build might cost a few thousand pounds in materials. A larger professional build with stone walls and steps can reach around £15,000.
| What you’re paying for | Notes |
|---|---|
| Digging out and skip hire | More soil means more skips |
| Drainage | Gravel, pipe and a soakaway |
| Retaining walls | Nearly always the biggest cost |
| Steps | Stone or brick to match the walls |
| Base surface | Gravel is cheapest, paving costs more |
| Plants | Cheaper if you split plants you already have |
Reclaimed brick is usually cheaper than new natural stone, so it’s a good way to bring the wall cost down.
Hidden costs to budget for
Getting rid of soil catches people out. Even a small sunken garden makes a mountain of it, enough to fill several skips. If you can use it elsewhere, for raised beds or reshaping the garden, you’ll save a good chunk.
How to plan the size and position
Pick a sunny spot. A south or west-facing position makes the most of the shelter. A shady, north-facing hollow feels gloomy.
About 4m x 4m at the base is the smallest that feels comfortable. Any smaller gets cramped once you allow for the walls and a path. A 5m x 6m base fits a seating area, borders on all sides and room to move.
Before you dig, check these:
- Pipes and cables: Find out where gas, water, electric and phone lines run before you dig. They can be quite shallow in gardens.
- Trees: Digging near big trees can damage their roots, and some trees are protected. Keep well clear of the trunk, at least as far out as the branches spread.
- Neighbours: Digging close to a neighbour’s building, below its foundations, can bring Party Wall Act duties. Talk to them early.
- Water level: On low ground, water may sit close to the surface. Dig a test hole about 1.2m deep in winter and leave it for two days. If water collects, you’ll need better drainage, or a different spot.
Step-by-step: how to excavate a sunken garden
Step 1: Mark out and set levels
Mark the outline with string and pegs. Knock in a peg at the finished base level. Then remember to dig deeper than that, to leave room for 150mm of drainage stone and about 50mm of gravel or paving on top.
So for a garden that looks 750mm deep, you actually dig about 950mm.
Step 2: Excavate the soil
For anything bigger than about 3m x 3m, hire a mini digger. It saves days. Smaller areas can be dug by hand, but it’s slow, heavy work, so rope in a friend.
Keep the soils separate as you dig. Put topsoil in one pile to reuse in borders. Put the paler subsoil underneath in another pile to go in the skip. Mixing them spoils both.
On heavy clay soil, digging is harder, but clay is stable ground for walls. You just need good drainage at the bottom.
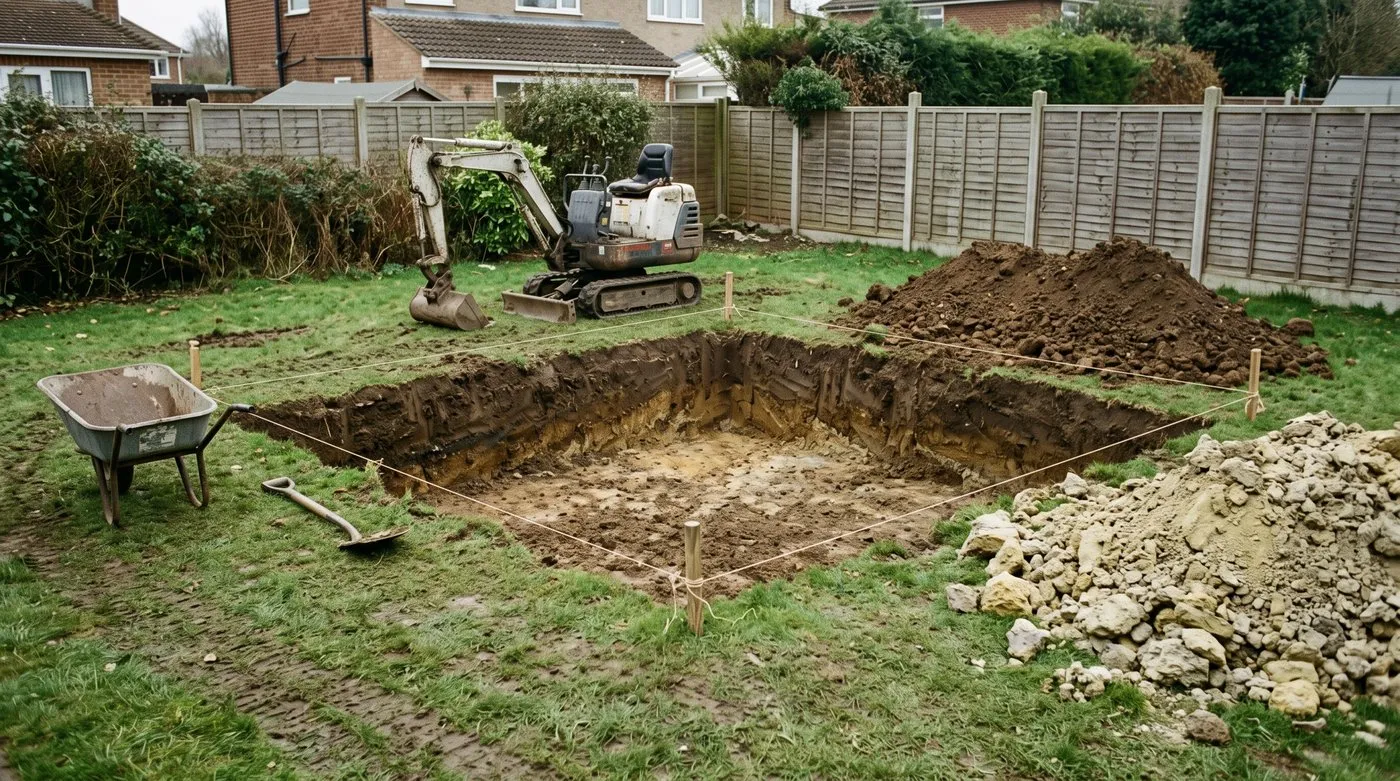
Keep the dark topsoil and pale subsoil in separate heaps as you dig. The topsoil is worth saving for your borders.
Step 3: Install the drainage system
This is the most important step. Without drainage, a sunken garden turns into a pond after heavy rain.
Base layer: Spread 150mm of crushed stone across the whole base. Give it a gentle slope towards the lowest corner.
Land drain: Lay a perforated land drain pipe, wrapped in fabric, along the lowest edge. Run it to a soakaway outside the sunken area, at least 5m from any building.
Behind the walls: Pack about 150mm of gravel between each wall and the soil behind it. This stops water building up and pushing the wall over, which is the most common reason retaining walls fail.
 Gravel behind the wall lets water drain away instead of building up and pushing the wall inwards.
Step 4: Build the retaining walls
The wall has to hold back the soil behind it, so build it solidly. For gardens under 1m deep, a solid stone wall around 300mm thick or a brick wall 215mm thick on a proper footing is the usual approach. For anything deeper, or if you’re unsure, ask a structural engineer.
Natural stone walls: Build in layers, leaning each stone slightly back into the bank so gravity helps hold it. Fill behind with gravel as you go. Finish with flat coping stones that overhang a little to throw off rain.
Brick walls: Use frost-proof engineering bricks below ground and facing bricks above, on a concrete footing. Leave small gaps in the mortar at the bottom every metre or so, so trapped water can escape.
Dry-stone walls: The traditional choice, and lovely with cottage garden planting. Pack each layer tightly and fill behind with gravel. They flex a little instead of cracking, which suits clay that swells and shrinks.
Step 5: Build the steps
Comfortable steps make the whole space feel right.
Size: A rise of about 150mm and a tread at least 300mm deep feels natural to walk. For a 750mm drop, that’s five steps.
Width: Make them at least 900mm wide. If you have room, 1.2m lets two people pass and feels more welcoming.
Materials: Match the walls. Stone treads with stone walls, brick with brick. Timber risers with gravel treads suit a relaxed look.
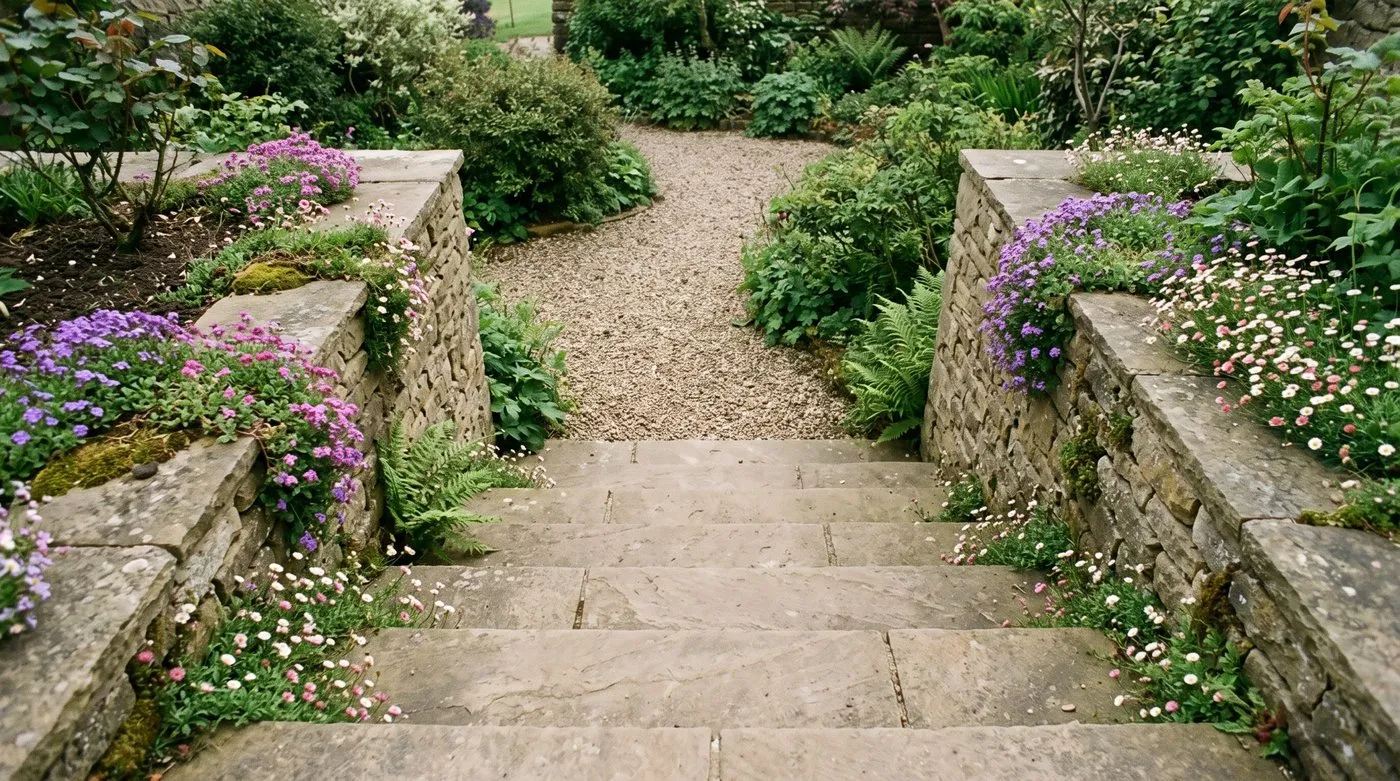
Shallow risers and deep treads feel natural to walk. Wide steps also make it much easier to get a wheelbarrow in and out.
Step 6: Finish the base
The base must let water through. Gravel over the drainage stone is the simplest choice. It drains straight away and suits any style.
For a smarter look, use permeable paving or stone slabs laid on sand. Avoid solid paving set in mortar, as it traps water and undoes all your drainage work.
What plants thrive in a sunken garden?
Think of three planting spots: the wall tops, the wall faces and the base. The shelter means you can grow plants that would sulk in a windy spot.
Wall-top planting
Plants along the top tumble over the edge and soften the hard line. Choose tough plants that like thin, well-drained soil.
- Aubrieta, with purple flowers tumbling over the edge from March to May
- Mexican fleabane (Erigeron karvinskianus), little white-to-pink daisies from May to October, seeds itself into cracks
- Campanula portenschlagiana, blue bell flowers that spread happily along walls
- Creeping thyme, scented leaves and pink flowers, happy in poor soil
Wall-face planting
Tuck plants into gaps between stones in a dry-stone wall, or leave pockets for them as you build.
- Ivy-leaved toadflax, tiny lilac flowers that love old walls
- Wall pennywort, fleshy round leaves, a native of western Britain
- Small ferns such as maidenhair spleenwort and common polypody, for shady wall faces
 Aubrieta and Mexican fleabane tumbling over the walls soften the stone and add colour from spring to autumn.
Base-level planting
The sheltered base is perfect for scented plants, mixed with sturdy perennials for colour through the year.
Scented climbers for sheltered walls:
- Star jasmine, evergreen with scented white flowers, likes shelter
- Honeysuckle, a native climber with lovely evening scent
- Chocolate vine (Akebia quinata), unusual purple-brown flowers with a sweet scent
Perennials for the borders:
- Hostas, which love the damper, sheltered conditions
- Astilbe, feathery plumes in pink, red and white, likes moisture
- Japanese anemones, flowering from August to October
- Geranium ‘Rozanne’, flowering from June until the frosts
The RHS guide to planting retaining walls has more plants for walls. For the base borders, follow the same idea as planning a mixed border: tall plants at the back against the wall, medium in the middle, and low or trailing ones at the front.
How to design the layout
Decide first whether you want it formal or relaxed.
Formal: A rectangle with matching borders, a centrepiece such as a water bowl, urn or special plant, and matching steps on one or two sides. Think of the classic sunken gardens at grand country houses.
Relaxed: A curved shape with flowing borders and one set of steps. A gravel floor, loose planting and a bench tucked into a corner. This suits courtyard gardens and smaller spaces.
Either way, give the eye something to land on. A water feature, a tree in a big pot or a piece of sculpture draws you down into the space.
Adding a seating area
A sunken garden is made for sitting in. Cap the walls with wide coping stones and they double as seats. Or build a stone bench into one wall as you go.
Face the seating south or west to catch the afternoon and evening sun. Out of the wind, it’s a lovely spot on spring and autumn days when an open patio feels too chilly.
 A bench built into the wall makes a snug spot to sit well into autumn.
Drainage solutions for clay soil
Clay is the biggest drainage challenge. It holds water, swells when wet and shrinks when dry. Without good drainage, a sunken garden on clay will be waterlogged by the first winter.
Three layers work well on heavy clay:
- Base layer: 150mm of crushed stone, firmed down, sloping to the lowest point
- Land drain: a perforated pipe at the lowest point, running to a soakaway
- Gravel behind the walls: about 150mm of gravel between the clay and the wall, with fabric to keep soil out of it
Soakaway size: Wetter parts of the country need a bigger soakaway than the drier east. If in doubt, go bigger.
Test it before you finish the base. After heavy rain, check the next day. If water is still sitting there, the slope isn’t enough or the soakaway needs to be bigger.
If water runs in from the ground around it, a rain garden higher up can catch it first.
Can you build a sunken garden yourself?
Yes, if you keep it under 1m deep and hire a mini digger. You’ll need basic bricklaying or dry-stone walling skills, some drainage know-how, and patience.
What you need:
- Mini digger (hired)
- Spirit level, string line, pegs and tape measure
- Cement mixer for mortared walls
- Plate compactor (hired)
- Wheelbarrow, spade, shovel, gloves and safety boots
Rough timeline for a 4m x 4m DIY build:
| Stage | Time |
|---|---|
| Planning and marking out | 1 day |
| Digging out | 1-2 days with a digger |
| Drainage | 1 day |
| Retaining walls | 3-5 days |
| Steps | 1-2 days |
| Base surface | 1 day |
| Planting | 1 day |
| Total | 9-13 days |
Done at weekends, that’s roughly six to eight weeks. Get the drainage right before the walls go up, and the rest follows.
If you’re designing a garden from scratch, plan the sunken garden early. Linking it to paths and other levels from the start looks more natural than squeezing one in later.
Sunken garden lighting ideas
A little lighting goes a long way in a sunken garden. The walls are perfect for low fittings, and the enclosed space makes even soft light look magical.
Wall lights: Small LED lights set into the walls cast a warm glow across the base. Warm white feels the most welcoming.
Step lights: Lights in each step make the way down safer and look great. Solar step lights work if the steps face south.
Uplighting: Aim a spotlight up at a special plant or centrepiece from the foot of the wall.
Lay the cables while you build, before the base goes down. Adding them later means digging up finished work. Use outdoor garden lighting rated IP67 for anything at or below ground level, and get an electrician to wire in anything mains powered.
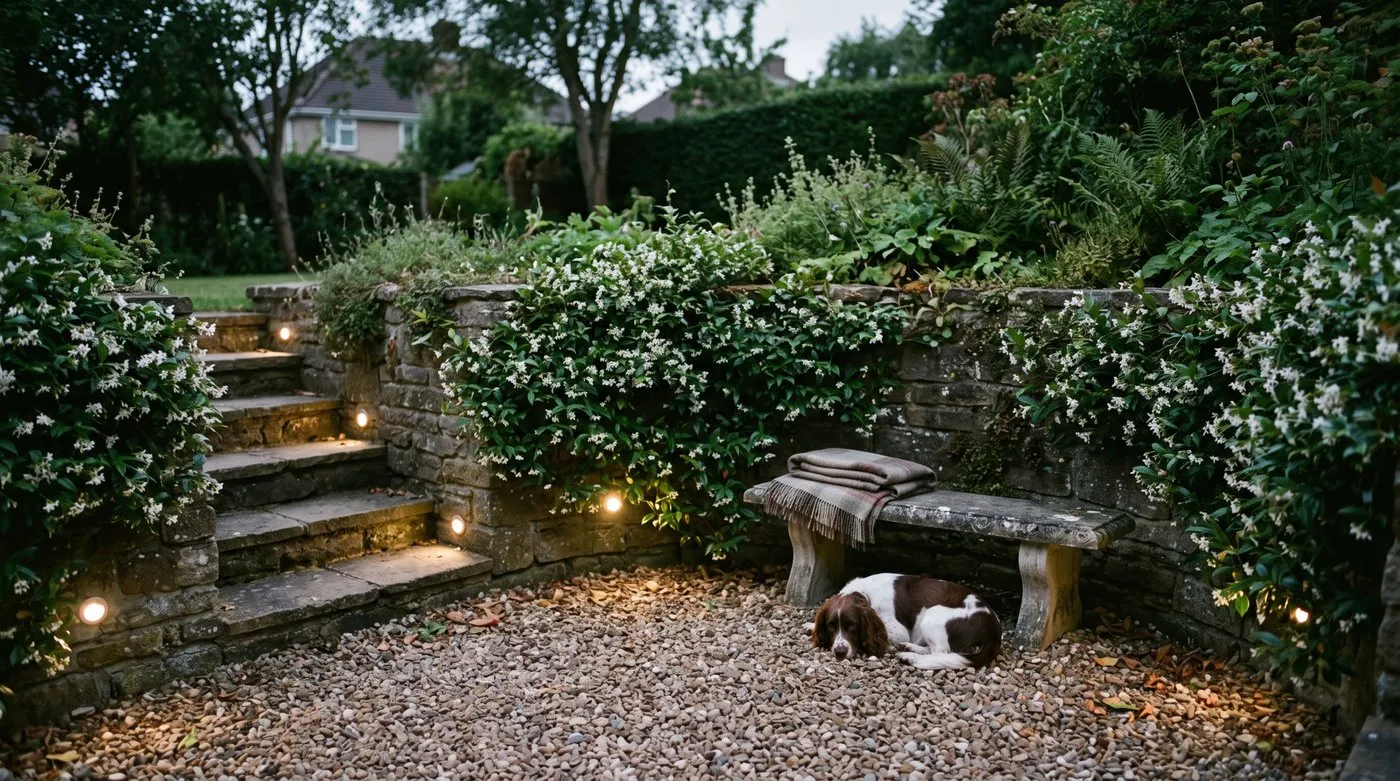
Low, warm-white lights in the steps make the way down safer after dark. Lay the cables while you build, long before the gravel goes down.
Common mistakes to avoid
Skipping drainage. The biggest mistake of all. Every sunken garden needs drainage, even on sandy soil, or it collects every drop of rain around it.
Walls too thin. The soil behind a wall pushes hard, especially wet clay. A thin wall can bulge and fail within a few years.
Forgetting access. You’ll need to get a wheelbarrow in and out. Steps that are narrow or steep make that a struggle.
Digging too deep. Going beyond about 1.2m without an engineer’s advice risks the walls failing and makes drainage much harder.
Ignoring the water level. On low ground, water may sit not far below the surface. Dig below it and you’ve made a permanent pool. Test in winter first.
Maintenance through the seasons
Upkeep is regular but simple.
Spring: Clear any drainage channels. Check the weep holes in brick walls aren’t blocked. Trim trailing plants that have grown too long. Top up thin patches of gravel.
Summer: Water the base borders in dry spells, as the walls can stop rain reaching the soil at their foot. Deadhead for more flowers.
Autumn: Clear fallen leaves from the base before they block the drains. Cut back tired perennials so dead stuff doesn’t pile up in corners. Check the soakaway is draining before winter.
Winter: Look over the walls for frost damage, and repoint mortar if needed. Brush algae off the steps so they aren’t slippery. Don’t use salt on natural stone, as it damages the surface.
Built on good drainage, a sunken garden lasts for decades and just gets better as the walls weather and the plants grow in.
Frequently asked questions
How deep should a sunken garden be?
Most are between 600mm and 1.2m deep. Any shallower and it doesn’t feel enclosed. Any deeper and drainage gets harder and the walls need an engineer. Around 750-900mm suits most DIY builds.
Do you need planning permission for a sunken garden?
Usually not, but there are exceptions. Listed buildings, conservation areas and trees with a Tree Preservation Order can all need permission. So can tall retaining walls or big changes in ground level. Digging near a neighbour’s foundations may bring Party Wall Act duties. Check with your local council first.
How much does it cost to build a sunken garden?
It depends on size, depth and materials. A small DIY build with block or sleeper walls costs far less than a professional stone one. The walls are usually the biggest cost, and getting rid of soil adds a lot. Get a few quotes and budget for drainage.
What is the best material for sunken garden walls?
Natural stone looks best and lasts longest. Reclaimed brick gives a warm cottage feel. Concrete block is cheapest but usually needs rendering or facing. Sleepers suit an informal look but rot in time. Whatever you use, the wall must be built to hold back the soil behind it.
How do you stop a sunken garden flooding?
Put the drainage in before you build. Lay crushed stone under the base, sloping to a soakaway or drain. On heavy clay, add a perforated land drain to a soakaway at the lowest point. Channels at the foot of the walls catch water running in. Never build where water already sits.
What plants grow well in a sunken garden?
Trailing plants are perfect for the walls. Aubrieta, Mexican fleabane and ivy soften the stone. The sheltered base suits scented climbers like jasmine and honeysuckle, and damper corners suit hostas and astilbes. Check the drainage before choosing plants for the base.
Can you build a sunken garden on a slope?
Yes, a slope can work well. You cut into the slope on one side and build up on the other, so there’s less soil to move. The uphill wall holds back a lot of soil, so it must be strong. Plan drainage carefully, as water from higher up will run in.
Our team produces practical UK gardening guidance from source research, contributor records and established horticultural practice. Editorial standards are overseen by Matt W.


