Key takeaways
- Red Robin is hardy in most of the UK, but dislikes very exposed, cold sites
- Plant bare-root hedging 60-75cm apart from November to March
- Trim in late May and August for fresh flushes of red leaves
- Good drainage matters most, as soggy clay kills it faster than frost
- Leaf spot is the main problem, so clear fallen leaves and water the soil, not the leaves
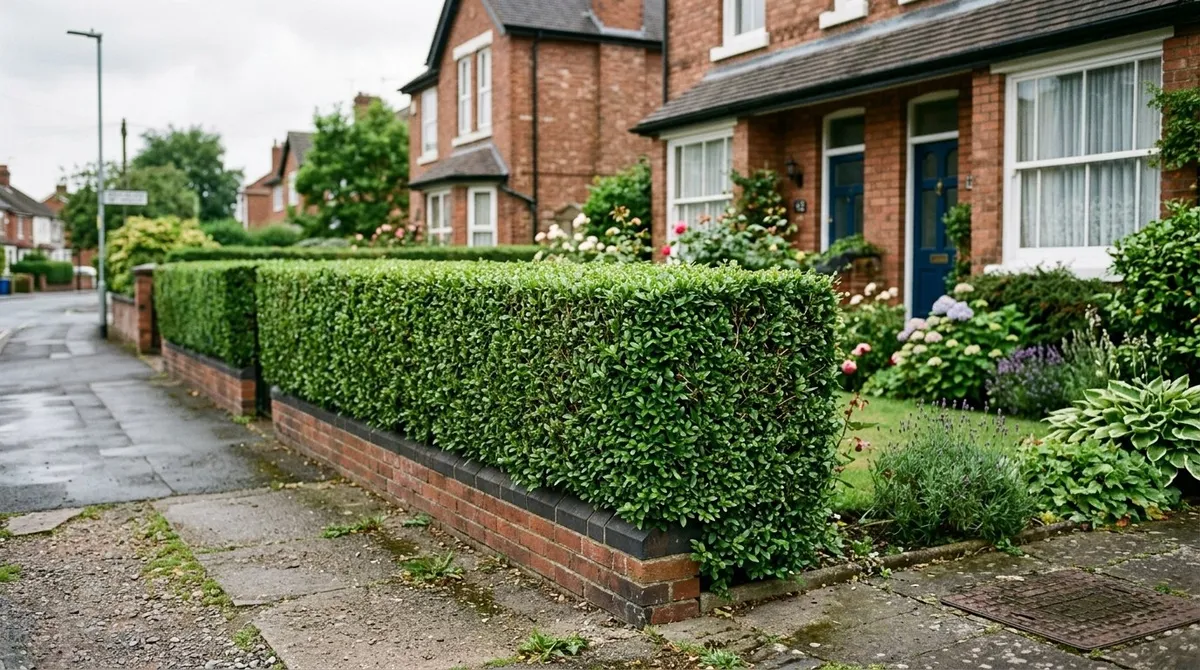
Photinia ‘Red Robin’ is an evergreen shrub loved for its bright scarlet young leaves. They fade through bronze to glossy dark green. It makes a great informal screen or clipped hedge in a sheltered spot with soil that drains well.
The secret to lots of red is simple: trim it after each flush of new growth. Here’s how to choose, plant, prune and look after it.
Which photinia variety should I grow?
‘Red Robin’ is the go-to choice for UK hedges. It’s the one you’ll find in almost every garden centre, and it holds the RHS Award of Garden Merit, so you know it does well here. A few others suit different jobs.
| Variety | Size | New leaves | Best for |
|---|---|---|---|
| ’Red Robin’ | 3-4m | Bright scarlet | Hedges and screens |
| ’Little Red Robin’ | 1.5-2m | Cherry red | Low hedges and pots |
| ’Pink Marble’ | 2.5-3m | Pink and cream | A single eye-catching shrub |
| ’Camilvy’ | 3-4m | Vivid red | Quick screening |
| Photinia serratifolia | 6-10m | Copper-bronze | Big gardens, small tree |
For a hedge of around 2-3 metres, ‘Red Robin’ is the easy pick. ‘Little Red Robin’ is better for low hedges and containers. Variegated ‘Pink Marble’ looks best as a single shrub rather than a neat hedge.
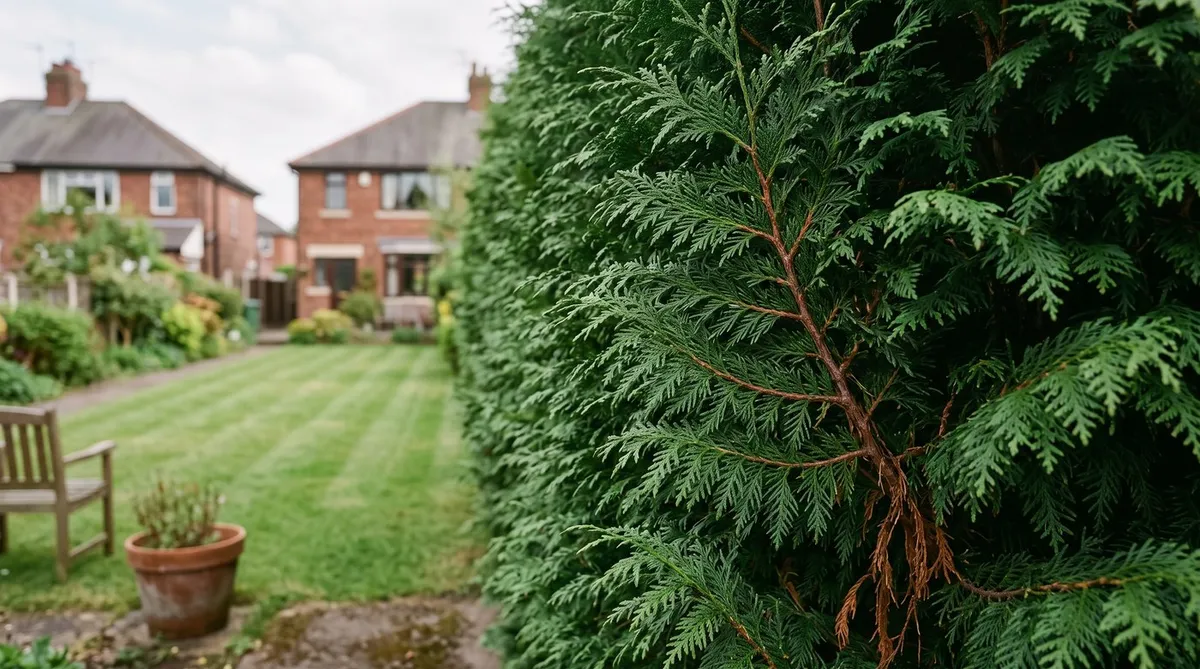
 Trimming twice a year brings fresh flushes of bright red leaves.
How to plant a photinia hedge
Plant bare-root photinia between November and March. It’s cheaper than pot-grown and settles in well.
Good drainage is the thing to get right. Photinia hates sitting in wet soil. On heavy clay, waterlogging kills more photinia than frost does.
Step by step:
-
Mark the line with string and canes. Allow 60-75cm between plants for a single row. For a double row, stagger plants 45cm apart with 40cm between rows.
-
Dig the holes about 50cm wide and 40cm deep, or dig a trench.
-
Sort out drainage on clay. Dig grit and composted bark into a wide strip along the hedge line, not just the hole. Plant slightly raised if the ground stays wet. Don’t fill the bottom of the hole with gravel, as it can collect water like a sump. On chalk or sand, mix in garden compost to help hold moisture.
-
Soak bare-root plants in a bucket of water for a couple of hours. Water potted plants well beforehand.
-
Plant at the same depth as before, using the soil mark on the stem. Spread the roots out, fill in and firm gently with your boot. Don’t bury the stem.
-
Water well, about a full watering can per plant. Mulch with 7-8cm of composted bark, keeping it clear of the stems.
-
Stake plants over 1 metre with a short stake at an angle on the windy side. Take it away after a year.
For more on hedge planting and working out spacing, see our hedge guide.
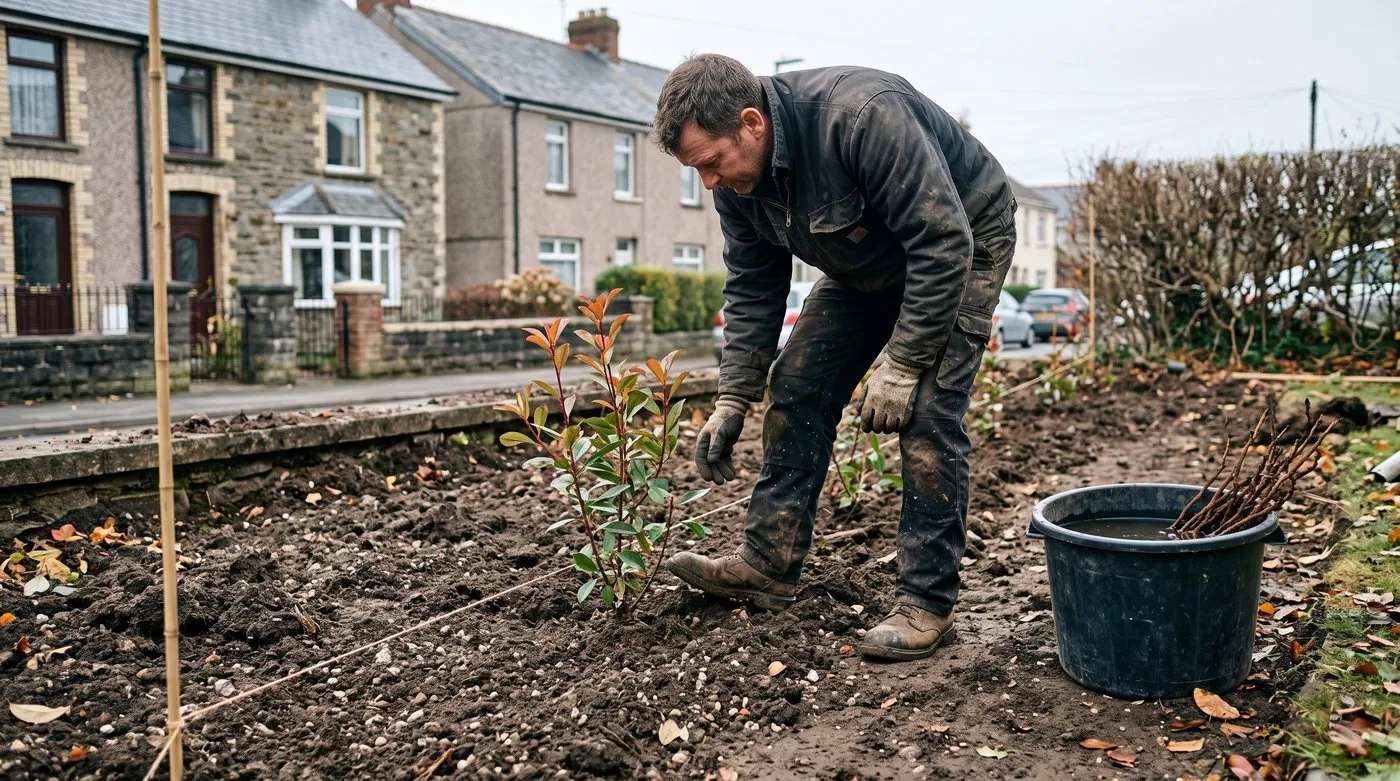
A string line keeps the row straight and spacing even. On heavy clay, improve a wide strip along the line rather than just each planting hole.
When and how to prune Photinia Red Robin
Trim in late May and again in mid-August. This is the most important job of the year. Each cut brings a fresh flush of red leaves a few weeks later.
May trim (the main one): Wait until the spring red leaves have turned bronze-green, usually by late May. Cut this year’s growth back by a third with shears or a hedge trimmer. Shape the hedge so it’s slightly narrower at the top than the bottom. That lets light reach the lower branches, so the base doesn’t go bare.
August trim (a lighter one): By mid-August there’s a second flush of growth. Trim it back by half. The new leaves this brings toughen up before winter and give you red into autumn. Don’t trim much later, or soft shoots get caught by frost.
Overgrown hedges: Photinia takes hard pruning well. In March, before growth starts, cut back to about 30cm from the main stems. It looks drastic, but new shoots break from the old wood within a couple of months. Feed with Growmore (70g per square metre) and keep it mulched. Expect 2-3 seasons for it to fill out fully.
Our year-round pruning calendar shows when to prune photinia alongside other common hedges.
For a loose, informal screen, one trim a year is enough.
 New leaves start scarlet, then turn bronze and finally glossy green.
Month-by-month photinia care calendar
| Month | Task |
|---|---|
| January | Check hedges after storms and fix any loose stakes. Order bare-root plants. |
| February | Plant bare-root photinia if the ground isn’t frozen. Mulch established plants. |
| March | Feed with Growmore (70g per square metre). Check for leaf spot. |
| April | Enjoy the red leaves. Water new hedges weekly in dry spells. Watch for greenfly on soft shoots. |
| May | Main trim in late May, once the red leaves turn bronze. Cut back by a third. |
| June | Second red flush appears. Keep watering first-year plants. |
| July | Watch for leaf spot in warm, damp weather. Pick off spotted leaves. Water the soil, not the leaves. |
| August | Second trim in mid-August, cutting new growth back by half. |
| September | Enjoy the autumn red. Take semi-ripe cuttings. |
| October | Clear fallen leaves from the base. Mulch before winter. |
| November | Start planting bare-root hedging. Put up windbreak netting on exposed new hedges. |
| December | Leave it be. Plan any hard pruning for March. |
How to deal with photinia leaf spot
Leaf spot is the most common photinia problem in UK gardens. You’ll see dark brown spots with purple edges, starting on older, lower leaves and spreading upwards in wet weather.
Why it happens: The fungus lives through winter on fallen leaves at the base of the plant. Rain splashes it back up onto new growth. Mild, damp weather and crowded, airless hedges make it worse.
Prevention works better than cure. Every autumn, rake up fallen photinia leaves and bin them rather than composting. Thin out the middle of the hedge in late winter so air can get through. Water the roots, never the leaves. On a sheltered, still site, space new plants at 75cm rather than 60cm.
If it’s already there: Pick off spotted leaves, cut out badly hit shoots and keep clearing fallen leaves through spring. Copper fungicides such as Bordeaux mixture are no longer allowed for home gardeners in the UK. If you want to spray, use a product approved for amateur use and follow the label exactly.
If your Red Robin is going brown rather than spotty, our guide on why photinia goes brown goes through every cause.
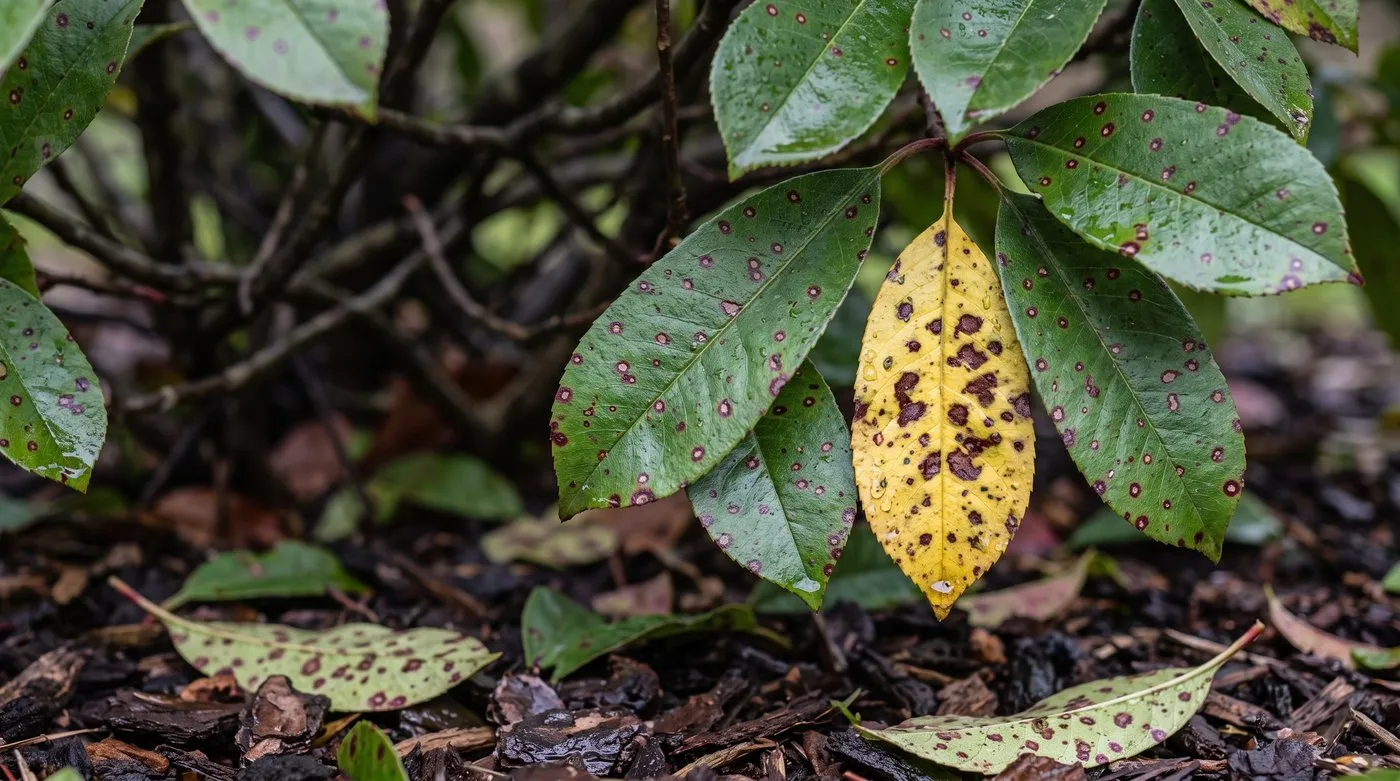
Leaf spot starts low down and spreads up in wet weather. Clear fallen leaves from the base each autumn, as that’s where the fungus spends winter.
Growing Photinia Red Robin in containers
‘Little Red Robin’ is the best choice for a pot. It stays at 1.5-2 metres, while full-sized ‘Red Robin’ outgrows most pots in a few years.
Choose a pot at least 45cm across and 40cm deep, with drainage holes. Terracotta or frost-proof ceramic is heavy enough to stay put in wind. Stand it on pot feet so water drains freely.
Compost: Mix about two-thirds John Innes No.3 with one-third grit or perlite for drainage. Multipurpose compost on its own can stay too wet. Our guide to peat-free compost covers good options for shrubs in pots.
Feeding: Add a slow-release fertiliser in March. From May to August, give a liquid high-potash feed such as tomato feed every fortnight.
Watering: Pots dry out faster than the ground. Check daily in summer. The compost should be moist but never soggy at the bottom. In winter, water only when the top few centimetres feel dry.
Repotting: Move up a pot size every 2-3 years in March. Once it’s in its final pot, replace the top layer of compost each spring instead.
 On heavy clay, improve a wide strip of soil with grit and bark so water can drain away.
Where to position photinia in your garden
Plant in full sun or part shade, on soil that drains well. It copes with town pollution, so it’s a great choice for privacy screening in towns and cities.
Aspect: South and west-facing spots give the brightest red. East-facing is fine, but cold morning wind after a late frost can scorch spring shoots. North-facing spots give pale new growth and slower plants.
Shelter: Photinia handles some wind but struggles on bleak hilltops. In exposed, windy gardens, put up a temporary hessian or mesh windbreak for the first two winters.
Soil: It grows on clay, loam, sand and chalk as long as water drains away. On clay soil, add grit and bark as described above. On sandy soil, add compost so it holds more water. On very chalky soil, leaves can turn yellow with green veins.
Planting partners: Photinia makes a good backdrop to a border. Its dark green leaves look great behind silver lavender, blue ceanothus and white viburnum. As an evergreen shrub, it gives the border shape all winter.
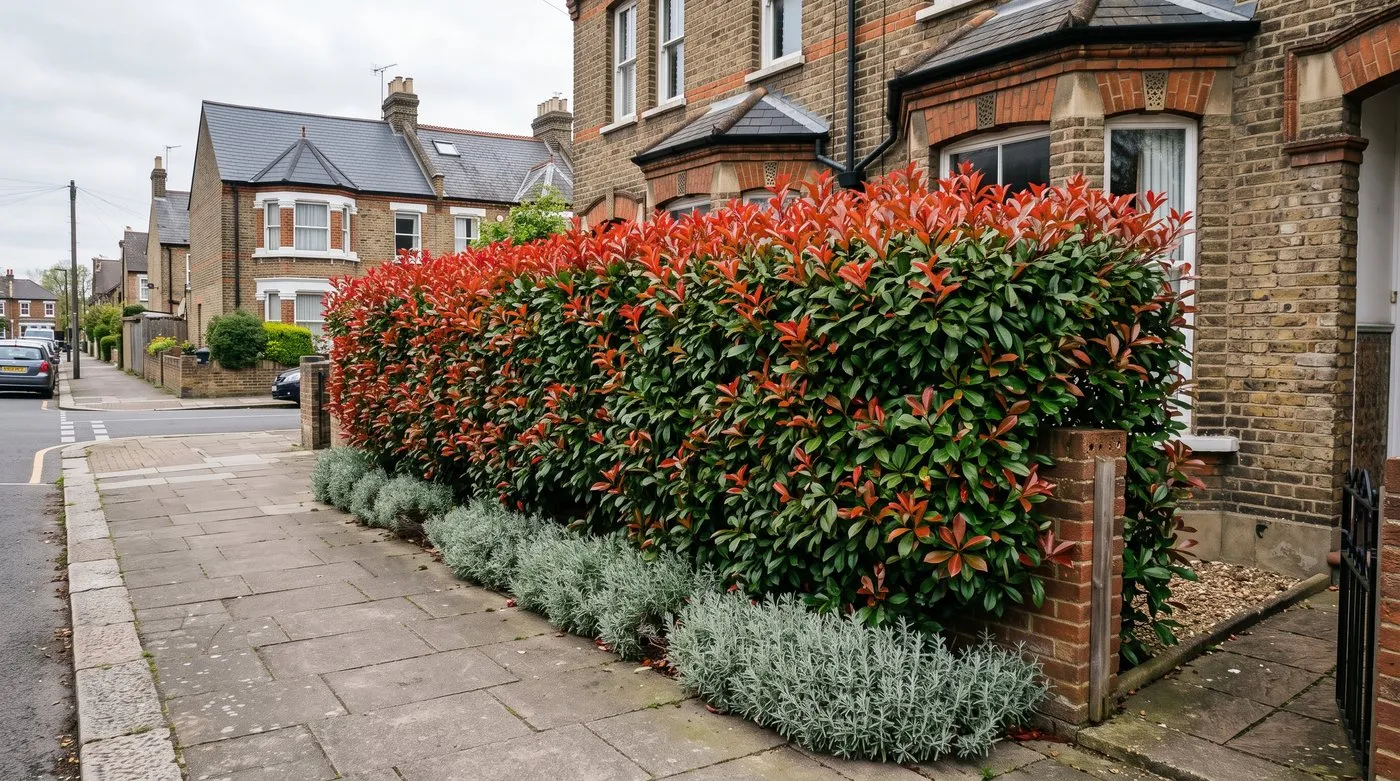
Photinia shrugs off town pollution, so it makes a handy street-side screen. A sunny south or west-facing spot gives the brightest red.
How to propagate photinia from cuttings
Take semi-ripe cuttings in September. Choose healthy shoots from this year that are firm at the base but still soft at the tip, without flowers.
How to do it:
- Cut 10-15cm lengths just below a leaf joint.
- Strip the lower two-thirds of leaves. Cut the remaining leaves in half so they lose less water.
- Dip the base in hormone rooting powder.
- Push them a third of their length into pots of half perlite, half multipurpose compost.
- Water gently and put them in a cold frame or unheated greenhouse, covered with a clear plastic bag.
- Roots take 8-12 weeks. A gentle tug that meets resistance means roots have formed.
- Pot them up separately in spring in John Innes No.2. Grow on for a season before planting out.
Seed isn’t worth it. Seedlings don’t come true and are slow. Cuttings give you identical plants ready for the hedge in about 18-24 months.
Common problems and how to fix them
Yellow leaves with green veins: Usually a lack of iron on chalky, alkaline soil. Water on chelated iron (sold as sequestered iron) in April. Our soil testing guide helps you check your soil.
Bare, leggy base: Not enough light is reaching the bottom branches, often because the hedge has straight sides. Always keep the base wider than the top. For a bare-based hedge, cut the lower branches back hard in March to get new shoots.
Frost-blackened new growth: Late frosts in April and May can blacken soft red shoots. It looks bad but rarely kills the plant. Wait a few weeks for new buds to show, then cut back to healthy growth. In frosty gardens, move the May trim to early June.
Scale insects: Brown, limpet-like bumps on stems and under leaves. Scrub them off with a soft brush or cut out badly hit shoots. For a heavy attack, use an approved plant oil insecticide in early summer, exactly as the label says. The RHS scale insect page has photos to help you identify them.
Pets: The leaves are mildly toxic if eaten in quantity, but the bitter taste puts most pets off. If your dog or cat seems unwell after chewing it, call your vet.
Now you know how to grow photinia Red Robin, read our guide on how to prune shrubs for techniques that work on all your hedges and border shrubs.
Frequently asked questions
When is the best time to plant a photinia hedge in the UK?
Plant bare-root photinia from November to March. Pot-grown plants can go in any time, but autumn is best as the roots settle before spring. Avoid frozen or waterlogged ground, and in a cold, wet area waiting until March is fine. Water new hedges weekly through their first summer.
How fast does Photinia Red Robin grow in the UK?
It grows about 30-40cm a year. Expect the faster end on good, well-drained soil in full sun, and slower growth on heavy clay or in part shade. Left untrimmed, it can reach 3-4 metres.
Why are the leaves on my Photinia Red Robin turning brown?
Brown spots with purple edges usually mean leaf spot. This fungus spreads in wet, humid weather and from splashing water. Pick off spotted leaves, clear fallen ones from the base and thin out crowded growth so air can move. Water the soil, not the leaves.
Can Photinia Red Robin grow in shade?
It copes with part shade, but the red is less bright. In deep shade new leaves come through pale pink or bronze, and the plant grows slowly and gets leggy. For the best colour, give it at least 4-5 hours of sun a day.
How far apart should I plant a Photinia Red Robin hedge?
Space plants 60-75cm apart for a dense hedge. Use 60cm for a screen under 2 metres and 75cm for a taller one. For a thicker double row, set plants 45cm apart with 40cm between the rows.
Is Photinia Red Robin poisonous to dogs and cats?
It’s mildly toxic if a pet eats a lot of leaves. The leaves taste bitter, so most pets leave them alone. Signs include drooling, sickness and tiredness. If you think your pet has eaten some, call your vet.
How do I make my Photinia Red Robin bushier?
Cut the shoots back by a third in late May. Do this once the first red leaves have turned bronze. This makes it branch out and gives a second red flush. Trim the new growth by half again in August. After two seasons of this, a leggy plant turns dense and bushy.
Our team produces practical UK gardening guidance from source research, contributor records and established horticultural practice. Editorial standards are overseen by Matt W.